Compare commits
2 Commits
rowa97-pat
...
hubsintro
| Author | SHA1 | Date | |
|---|---|---|---|
|
|
bd4d0e3d27 | ||
|
|
9a9a55ece0 |
@@ -1,13 +1,13 @@
|
||||
# Change your Email Address
|
||||
|
||||

|
||||

|
||||
|
||||
## What
|
||||
Changing your email address is easy as pie.
|
||||
|
||||
## How
|
||||
1. Hover over your **username** in the top right
|
||||
2. Click on your **Username** in the dropdown menu
|
||||
1. Click on your **username** in the top right
|
||||
2. Click on the **Account** button
|
||||
3. In the **Basic Info** section, replace the email listed with one you would like to change to
|
||||
4. Click **Save** and you’re all done
|
||||
|
||||
|
||||
@@ -1,13 +1,13 @@
|
||||
# Change Your Username
|
||||
|
||||

|
||||

|
||||
|
||||
## What
|
||||
You can change your username at any time
|
||||
|
||||
## How
|
||||
1. Hover over your current **username** in the top right
|
||||
2. Click on your **username** in the dropdown menu
|
||||
1. Click on your current **username** in the top right
|
||||
2. Click on **Account**
|
||||
3. Under **Basic Info**, input a new username
|
||||
4. Click **Save**
|
||||
|
||||
|
||||
@@ -1,6 +1,6 @@
|
||||
# Edit your Profile
|
||||
|
||||

|
||||

|
||||
|
||||
## What
|
||||
In your profile you can edit things like:
|
||||
@@ -12,8 +12,8 @@ In your profile you can edit things like:
|
||||
* Change Password
|
||||
|
||||
## How
|
||||
1. Hover over your **Username** in the top right corner
|
||||
2. Click on your **username** in the dropdown menu
|
||||
1. Select your **Username** in the top right corner
|
||||
2. Click **Account**
|
||||
3. Make your edits in **Basic Info**, then click **Save**
|
||||
* You can also click **Reset** if you would like to start from scratch
|
||||
4. Upload a profile image
|
||||
|
||||
@@ -1,7 +1,9 @@
|
||||
# Manage Your Password
|
||||
|
||||

|
||||
|
||||
## What
|
||||
If you’ve forgotten the password you use to sign in to Stoplight, you can easily reset it at any time.
|
||||
If you’ve forgotten the password you use to sign in to Stoplight; you can easily reset it at any time
|
||||
|
||||
## What
|
||||
1. At the login page, select **Forgot Password?**
|
||||
|
||||
@@ -6,7 +6,7 @@
|
||||
* By default, Stoplight remains open. If you wish to sign out follow these quick and easy steps
|
||||
|
||||
## How
|
||||
1. Hover over your **username** in the top right corner
|
||||
1. Click on your **username** in the top right corner
|
||||
2. In the dropdown menu select **Sign Out**
|
||||
3. All set, come back soon!
|
||||
|
||||
|
||||
@@ -1,30 +0,0 @@
|
||||
# Fair Billing Policy
|
||||
|
||||
We believe you should only have to pay for members that are actively using Stoplight, so we offer a Fair Billing Policy. We go a step beyond traditional Fair Billing Policies and only count a member as active if they have taken a meaninful action inside of Stoplight in the last 30 days. Feel free to invite users to your Stoplight organization, and rest assured that they will not count towards billing until they have found the time to really get started.
|
||||
|
||||
## Overview
|
||||
|
||||
- You’ll only be charged for members that are active on the day that you upgrade to a paid plan.
|
||||
- If all members become passive, you will be charged the minimum active member count for your chosen plan, unless you decide to downgrade to the Open Source plan.
|
||||
- Any changes to the number of active members will be reflected in your monthly statement.
|
||||
|
||||
## Active Member
|
||||
|
||||
To be considered an active member, you must perform one of the following actions in the last 30 days:
|
||||
|
||||
- Create or update a project
|
||||
- Create, update, or delete project files
|
||||
|
||||
Any members that have not performed one of these actions in the last 30 days are considered passive members.
|
||||
|
||||
## Billing
|
||||
|
||||
Every new member starts as a passive member. They will not count as an active member until they login/register and perform their first action.
|
||||
|
||||
We’ll keep track of this for you, and bill you at the end of each month. We also automatically detect when members become passive (ie when they have not performed an action in 30 days). When that happens, we will deposit prorated credits to your Stoplight account that will be applied on your next invoice. These credits have no currency or exchange value, are non-transferable and non-refundable, and will expire following the termination of your paid services plan with Stoplight.
|
||||
|
||||
---
|
||||
**Related Articles**
|
||||
- [Personal Plan Overview](/platform/getting-started/billing/plans-overview)
|
||||
- [Organization Plan Overview](/platform/getting-started/billing/organization-plan-overview)
|
||||
- [FAQs](/platform/getting-started/billing/faqs)
|
||||
@@ -1,90 +0,0 @@
|
||||
# FAQs
|
||||
|
||||
## Personal Billing
|
||||
|
||||
Is my credit card information secure?
|
||||
|
||||
- Yes. All credit card processing is handled through Stripe, and your card information is never sent to, or stored on, our servers.
|
||||
|
||||
What kind of payments do you accept?
|
||||
|
||||
- Through Stripe, we accept any major credit card including American Express, Discover, Mastercard, and Visa.
|
||||
|
||||
Is there a free trial?
|
||||
|
||||
- Yes. Every new account has 14 days to try out the platform.
|
||||
|
||||
When will I be charged?
|
||||
|
||||
- After entering your card details, your card will be charged for the initial 30-day billing cycle.
|
||||
|
||||
Can I upgrade / downgrade anytime?
|
||||
|
||||
- Yes. You can easily adjust your plan and update through the Billing settings.
|
||||
|
||||
How do I cancel my account?
|
||||
|
||||
- To cancel, send an email to support@stoplight.io and we will take care of the rest.
|
||||
|
||||
Do you accept payments other than credit card?
|
||||
|
||||
- Yes. For certain business plans, we can set up a custom net terms plan. Please send an email to support@stoplight.io.
|
||||
|
||||
## Organization Billing
|
||||
|
||||
Is my credit card information secure?
|
||||
|
||||
- Yes. All credit card processing is handled through Stripe, and your card information is never sent to, or stored on, our servers.
|
||||
|
||||
What kind of payments do you accept?
|
||||
|
||||
- Through Stripe, we accept any major credit card including American Express, Discover, Mastercard, and Visa.
|
||||
|
||||
Is there a free trial?
|
||||
|
||||
- Yes. Every new account has 14 days to try out the platform.
|
||||
|
||||
When will I be charged?
|
||||
|
||||
- After entering your card details, your card will be charged for the initial 30-day billing cycle.
|
||||
|
||||
Who counts as a team member vs. a guest?
|
||||
|
||||
- Team members have full functionality while guests only have read-only access.
|
||||
|
||||
Can I upgrade / downgrade anytime?
|
||||
|
||||
- Yes. You can easily adjust your plan and update through the Billing settings.
|
||||
|
||||
How do I cancel my account?
|
||||
|
||||
- To cancel, send an email to support@stoplight.io and we will take care of the rest.
|
||||
|
||||
Do you accept payments other than credit card?
|
||||
|
||||
- Yes. For certain business plans, we can set up a custom net terms plan. Please send an email to support@stoplight.io.
|
||||
|
||||
As I add team members, will my billing automatically adjust?
|
||||
|
||||
- Yes. Once you go past the minimum number of members allotted for your plan, each new member will be added to your monthly bill at a prorated rate.
|
||||
|
||||
Do you have annual pricing?
|
||||
|
||||
- Yes. If you are interested in annual pricing, which comes with a 10% discount, please send an email to support@stoplight.io for more info.
|
||||
|
||||
Can I buy a multi-year subscription?
|
||||
|
||||
- Yes. Please send an email to support@stoplight.io for more info and we can quote a custom plan.
|
||||
|
||||
Do you have any discounts for open source, non-profits. or educational institutions?
|
||||
|
||||
- Yes. Please send an email to support@stoplight.io for more info. To provide the discount, we will ask for more information based on the type of discount.
|
||||
|
||||
|
||||
|
||||
|
||||
|
||||
|
||||
|
||||
|
||||
|
||||
@@ -1,72 +0,0 @@
|
||||
# Organization Plan Overview
|
||||
|
||||

|
||||
|
||||
> Organization Plans are attached to an Organization, not an account. Only the **Owner** of the Organization can modify the billing settings
|
||||
|
||||
## Platform Plans
|
||||
|
||||
### Open Source
|
||||
- Price: Free
|
||||
- Member Max: 5 members
|
||||
- Features:
|
||||
- API Modeling
|
||||
- Documentation
|
||||
- Mocking
|
||||
- Testing
|
||||
- Unlimited Public Projects
|
||||
|
||||
### Team
|
||||
- Price: $29/member/month
|
||||
- Member Minimum: 5 members
|
||||
- Features:
|
||||
- Open Source Plan features + 20 guests
|
||||
- Unlimited Private Projects
|
||||
- Coming Soon: GitHub Integration
|
||||
|
||||
### Business
|
||||
- Price: $59/member/month
|
||||
- Member Minimum: 10 members
|
||||
- Features:
|
||||
- Team features + unlimited guests
|
||||
- SAML single sign-on
|
||||
- Private Slack channel for priority support
|
||||
|
||||
## Documentation Plans
|
||||
|
||||
### Basic
|
||||
- Price: Free
|
||||
- Features:
|
||||
- Unlimited Visits
|
||||
- Publish to .docs.stoplight.io
|
||||
|
||||
|
||||
### Essential
|
||||
- Price: $79/month
|
||||
- Features:
|
||||
- Publish to your domain (1 domain limit)
|
||||
- Theming
|
||||
- Build History & Instant Rollbacks
|
||||
|
||||
### Standard
|
||||
- Price: $179/month
|
||||
- Features:
|
||||
- Publish to your domain (10 domain limit)
|
||||
- Custom CSS
|
||||
- White Label
|
||||
- Basic Auth & Auth0 Integration
|
||||
|
||||
### Pro
|
||||
- Price: $399/month
|
||||
- Features:
|
||||
- Publish to your domain (unlimited domains)
|
||||
- Download static version of docs
|
||||
- SAML single sign-on
|
||||
- OAuth token generation
|
||||
|
||||
---
|
||||
**Related Articles**
|
||||
- [Fair Billing Policy](/platform/getting-started/billing/fair-billing)
|
||||
- [Personal Plan Overview](/platform/getting-started/billing/plans-overview)
|
||||
- [FAQs](/platform/getting-started/billing/faqs)
|
||||
|
||||
@@ -1,73 +0,0 @@
|
||||
# Billing Overview
|
||||
|
||||
## Personal Billing
|
||||
Personal Billing Plans are attached to your account. For more information, visit [the billing page](https://next.stoplight.io/pricing).
|
||||
|
||||
## Organization Billing
|
||||
Organization Billing Plans are attached to an Organization, not an account. Only the Owner of the Organization can modify the billing settings. For more information, visit [the billing page](https://next.stoplight.io/pricing).
|
||||
|
||||
## Fair Use Billing Policy
|
||||
|
||||
We believe you should only have to pay for members that are actively using Stoplight, so we offer a Fair Billing Policy. We go a step beyond traditional Fair Billing Policies and only count a member as active if they have taken a meaninful action inside of Stoplight in the last 30 days. Feel free to invite users to your Stoplight organization, and rest assured that they will not count towards billing until they have found the time to really get started.
|
||||
|
||||
### Overview
|
||||
|
||||
- You’ll only be charged for members that are active on the day that you upgrade to a paid plan.
|
||||
- If all members become passive, you will be charged the minimum active member count for your chosen plan, unless you decide to downgrade to the Open Source plan.
|
||||
- Any changes to the number of active members will be reflected in your monthly statement.
|
||||
|
||||
### Active Member
|
||||
|
||||
To be considered an active member, you must perform one of the following actions in the last 30 days:
|
||||
|
||||
- Create or update a project
|
||||
- Create, update, or delete project files
|
||||
|
||||
Any members that have not performed one of these actions in the last 30 days are considered passive members.
|
||||
|
||||
### Billing
|
||||
|
||||
Every new member starts as a passive member. They will not count as an active member until they login/register and perform their first action.
|
||||
|
||||
We’ll keep track of this for you, and bill you at the end of each month. We also automatically detect when members become passive (ie when they have not performed an action in 30 days). When that happens, we will deposit prorated credits to your Stoplight account that will be applied on your next invoice. These credits have no currency or exchange value, are non-transferable and non-refundable, and will expire following the termination of your paid services plan with Stoplight.
|
||||
|
||||
## FAQs
|
||||
|
||||
**Organizations: What counts as an active member?**
|
||||
|
||||
A member is considered active if they have updated any projects or project files in the past 30 days. Otherwise, they are considered a passive member.
|
||||
|
||||
**Will my billing automatically adjust as members change between passive and active?**
|
||||
|
||||
Yes, we will automatically detect changes to member status and adjust your bill accordingly. Your account will receive prorated credits or charges as member status changes.
|
||||
|
||||
**Is my credit card information secure?**
|
||||
|
||||
Yes. All credit card processing is handled through Stripe, and your card information is never sent to, or stored on, our servers.
|
||||
|
||||
**What kind of payments do you accept?**
|
||||
|
||||
We accept all major credit cards including American Express, Discover, Mastercard, and Visa.
|
||||
|
||||
**Is there a free trial?**
|
||||
|
||||
Yes. Every new account / organization has 14 days to try out the platform.
|
||||
|
||||
**When will I be charged?**
|
||||
|
||||
After entering your card details, your card will be charged for the initial 30 day or annual billing cycle, depending on the interval chosen.
|
||||
|
||||
**How do I cancel my account?**
|
||||
|
||||
To cancel, send an email to support@stoplight.io and we will take care of the rest.
|
||||
|
||||
**Can I buy a multi-year subscription?**
|
||||
|
||||
Yes. Please send an email to support@stoplight.io for more info and we can quote a custom plan.
|
||||
|
||||
**Do you have any discounts for open source, non-profits. or educational institutions?**
|
||||
|
||||
Yes. Please send an email to support@stoplight.io for more info. To provide the discount, we will ask for more information based on the type of discount.
|
||||
|
||||
|
||||
|
||||
|
||||
@@ -1,7 +1,7 @@
|
||||
# Web & Desktop App
|
||||
|
||||
|
||||
Stoplight has a desktop app! Download the appropriate version [here](https://github.com/stoplightio/desktop/releases/latest).
|
||||
Stoplight has a desktop app! Download the appropriate version [here](https://stoplight.io/download) .
|
||||
|
||||
|
||||
## Web or Local?
|
||||
|
||||
@@ -6,7 +6,7 @@ It is placed in the root of your project and allows you to configure editor sett
|
||||
|
||||
You can make changes to the `.stoplight.yml` file by opening it:
|
||||
|
||||

|
||||

|
||||
|
||||
### Editor Configuration
|
||||
|
||||
@@ -14,9 +14,9 @@ You can make changes to the `.stoplight.yml` file by opening it:
|
||||
|
||||
### Environments
|
||||
|
||||

|
||||

|
||||
|
||||
Environments make it easy to auto-populate variables (hostnames, ports, passwords, etc.) used by specifications and scenarios. Read more about them [here](/testing/using-variables/environment).
|
||||
Environments make it easy to auto-populate variables (hostnames, ports, passwords, etc.) used by specifications and scenarios. Read more about them [here](../testing/variables-environment.md).
|
||||
|
||||
The environments and variables defined in the `.stoplight.yml` are shared amongst all users, which makes this a good place to define common or shared variables, such as the url host for a particular API + environment.
|
||||
|
||||
@@ -30,6 +30,6 @@ These environments can be customized by editing the `environments` key of the `.
|
||||
|
||||
***
|
||||
|
||||
**Related Articles**
|
||||
**Related**
|
||||
|
||||
* [Testing Environment Variables](/testing/using-variables/environment)
|
||||
* [Testing Environment Variables](../testing/variables-environment.md)
|
||||
|
||||
@@ -1,20 +1,20 @@
|
||||
# Environments
|
||||
|
||||
<!--(FIXME - SHOW CLICKING BETWEEN DIFFERENT ENVIRONMENTS)-->
|
||||
|
||||
An environment is simply a container for data, represented as a list of key-value pairs (behind the scenes, this is a JSON object). Every Stoplight project has one or more environments associated with it. The data stored in an environment can be used in many places within the Stoplight editor.
|
||||
|
||||

|
||||
Environments, and their default data, are defined in the [Stoplight configuration file](./editor-configuration.md#environments).
|
||||
|
||||
Environments, and their default data, are defined in the [Stoplight configuration file](/platform/editor-basics/editor-configuration).
|
||||
- __Do__ create an environment for each development environment associated with the project. For example, `development`, `staging`, and `production`.
|
||||
- __Don't__ create environments for individual users. Instead, use private variables (below) to customize existing environments.
|
||||
- __Do__ use environment default data to store shared information like hostnames, ports, passwords, etc.
|
||||
- __Don't__ use environments to store fixture/seed/temporary data.
|
||||
|
||||
* **Do** create an environment for each development environment associated with the project. For example, `development`, `staging`, and `production`.
|
||||
* **Don't** create environments for individual users. Instead, use private variables (below) to customize existing environments.
|
||||
* **Do** use environment default data to store shared information like hostnames, ports, passwords, etc.
|
||||
* **Don't** use environments to store fixture/seed/temporary data.
|
||||
|
||||

|
||||
<!--(FIXME - SHOW SCREENSHOT OF THE ENVIRONMENTS WINDOW)-->
|
||||
|
||||
For more information on environment variables and how they can be used during API testing, please
|
||||
see [here](/testing/using-variables/environment).
|
||||
see [here](../testing/variables-environment.md).
|
||||
|
||||
## Private Variables
|
||||
|
||||
@@ -26,7 +26,7 @@ API keys, and other pieces of sensitive and/or individually specific data.
|
||||
Edit private variables by clicking on the environment button in the top right of the Stoplight editor.
|
||||
|
||||
> Since private variables are only stored on your computer, make sure they are
|
||||
> backed up in a secure location.
|
||||
backed up in a secure location.
|
||||
|
||||
## Resolved Variables
|
||||
|
||||
@@ -41,13 +41,11 @@ Private variables are merged over default variables that share the same name. Th
|
||||
for individual team members to customize and extend environments without affecting the rest of the team.
|
||||
|
||||
For more information on updating and customizing environment variables, please
|
||||
see [here](/platform/editor-basics/editor-configuration).
|
||||
see [here](./editor-configuration.md#environments).
|
||||
|
||||
---
|
||||
***
|
||||
|
||||
**Related Articles**
|
||||
**Results**
|
||||
|
||||
* [Working with Files](/platform/editor-basics/working-with-files)
|
||||
* [Change History](/platform/editor-basics/change-history)
|
||||
* [Editor Configuration](/platform/editor-basics/editor-configuration)
|
||||
* [File Validation](/platform/editor-basics/file-validation)
|
||||
* [Using Environment Variables in Testing](../testing/variables-environment.md)
|
||||
* [Configuration with the `.stoplight.yml` File](./editor-configuration.md#environments)
|
||||
|
||||
@@ -1,32 +0,0 @@
|
||||
# Exporting Files
|
||||
|
||||

|
||||
|
||||
## What
|
||||
|
||||
You can export any files in Stoplight to use as you see fit. Exported files are served up in a unique domain in its raw format. Current exported file formats include:
|
||||
|
||||
### YAML
|
||||
- Documentation
|
||||
- Modeling
|
||||
- Testing
|
||||
- Prism
|
||||
- Config
|
||||
|
||||
### Markdown
|
||||
- Markdown
|
||||
|
||||
## How
|
||||
1. Select the **project** that contains the file you wish to export
|
||||
2. Hover over the file you wish to export and click on the **right facing arrow**
|
||||
3. A new tab will open containing your exported file
|
||||
|
||||
---
|
||||
**Related Articles**
|
||||
- [Read, Design, & Code View](/platform/editor-basics/read-design-code-view)
|
||||
- [Working with Files](/platform/editor-basics/working-with-files)
|
||||
- [Import Files](/platform/editor-basics/import-files)
|
||||
- [Change History](/platform/editor-basics/change-history)
|
||||
- [Editor Configuration](/platform/editor-basics/editor-configuration)
|
||||
- [Environments](/platform/editor-basics/environments)
|
||||
- [File Validation](/platform/editor-basics/file-validation)
|
||||
@@ -1,25 +1,27 @@
|
||||
# File Validation
|
||||
|
||||

|
||||
|
||||
File validation is the process of checking a file's syntax and structure to make sure it meets specific requirements. Stoplight's validation ensures file edits are in the correct format. This is especially helpful while editing structured file formats (e.g. OpenAPI documents) so that any errors can be resolved quickly and efficiently.
|
||||
|
||||

|
||||
|
||||
File validation is run after every file edit to make sure no errors were introduced. A notification will appear if validation errors were introduced so that they can be resolved before attempting to save. If a validation error is detected, an alert will appear with an explanation of the issue and where it occurred.
|
||||
|
||||

|
||||
|
||||
Validation failures come in two levels:
|
||||
|
||||
* **Warnings** - A warning is generated if the validation process found a non-critical issue that did not interrupt the processing of the document. As an example, inclusion of non-standard fields in an OpenAPI document will display as a warning.
|
||||
* __Warnings__ - A warning is generated if the validation process found a non-critical issue that did not interrupt the processing of the document. As an example, inclusion of non-standard fields in an OpenAPI document will display as a warning.
|
||||
|
||||
* **Errors** - An error is generated if the validation process found a critical issue that prevented the processing of the document. As an example, not including the correct fields in an OpenAPI document will display as an error.
|
||||
* __Errors__ - An error is generated if the validation process found a critical issue that prevented the processing of the document. As an example, not including the correct fields in an OpenAPI document will display as an error.
|
||||
|
||||
Different types of file validations are used throughout the Stoplight platform. At a high level, file validations aim to identify the following two groups of errors:
|
||||
|
||||
* **Syntax** - Most files stored in Stoplight are either JSON or YAML format, so they must always adhere to the JSON/YAML formatting standards. If anything typed into the editor does not meet the format criteria, it will be rejected with a notification pointing to where the syntax error occurred. _Syntax errors will prevent the file from being saved until all errors are resolved._
|
||||
* __Syntax__ - Most files stored in Stoplight are either JSON or YAML format, so they must always adhere to the JSON/YAML formatting standards. If anything typed into the editor does not meet the format criteria, it will be rejected with a notification pointing to where the syntax error occurred. _Syntax errors will prevent the file from being saved until all errors are resolved._
|
||||
|
||||
* **Correctness** - Certain files stored within Stoplight must adhere to high-level specifications to ensure they are able to be read and processed correctly. The OAS/Swagger specification is one such standard. It is critical that every OAS document stored in Stoplight meet these standards. If an error is detected in any document, either an error or warning will be generated with a description of the issue.
|
||||
* __Correctness__ - Certain files stored within Stoplight must adhere to high-level specifications to ensure they are able to be read and processed correctly. The OAS/Swagger specification is one such standard. It is critical that every OAS document stored in Stoplight meet these standards. If an error is detected in any document, either an error or warning will be generated with a description of the issue.
|
||||
|
||||
---
|
||||
***
|
||||
|
||||
**Related Articles**
|
||||
**Related**
|
||||
|
||||
* [Validating Your API Spec](/modeling/modeling-with-openapi/validating-your-api-spec)
|
||||
* [OpenAPI Validation](../modeling/openapi-validation.md)
|
||||
|
||||
@@ -1,35 +0,0 @@
|
||||
# Import Files
|
||||
|
||||

|
||||
|
||||
## What
|
||||
|
||||
If you already have existing JSON and markdown, you can import these files into Stoplight.
|
||||
|
||||
### JSON
|
||||
Copy and paste your JSON directly into Stoplight’s Modeling and Testing platforms and it will auto-populate the GUI. Easy peasy lemon squeezy.
|
||||
|
||||
### Markdown
|
||||
Copy and paste your markdown into Stoplight’s Modeling platform to add descriptions to your spec or paste it into Hubs to enhance your documentation.
|
||||
|
||||
## How
|
||||
|
||||
### JSON
|
||||
1. Create a new file or choose an existing one
|
||||
2. Select the **Code View**
|
||||
3. Copy and paste your JSON into the **Code editor**
|
||||
|
||||
### Markdown
|
||||
1. Create a new file or choose an existing one
|
||||
2. Select the **Design View**
|
||||
3. Copy and paste your Markdown into **Text Blocks**
|
||||
|
||||
---
|
||||
**Related Articles**
|
||||
- [Read, Design, & Code View](/platform/editor-basics/read-design-code-view)
|
||||
- [Working with Files](/platform/editor-basics/working-with-files)
|
||||
- [Export Files](/platform/editor-basics/export-files)
|
||||
- [Change History](/platform/editor-basics/change-history)
|
||||
- [Editor Configuration](/platform/editor-basics/editor-configuration)
|
||||
- [Environments](/platform/editor-basics/environments)
|
||||
- [File Validation](/platform/editor-basics/file-validation)
|
||||
@@ -8,7 +8,7 @@ navigation bar to the left of the project window (shown below). When the history
|
||||
is being viewed, you will see a series of changes for the project, listed in
|
||||
descending order by date.
|
||||
|
||||

|
||||

|
||||
|
||||
Each change event includes:
|
||||
|
||||
@@ -23,8 +23,10 @@ Each change event includes:
|
||||
|
||||
See the image below for an overview of the contents of the change view.
|
||||
|
||||

|
||||

|
||||
|
||||
---
|
||||
**Related Articles**
|
||||
- [Working with Files](/platform/editor-basics/working-with-files)
|
||||
|
||||
**Related**
|
||||
|
||||
* [Working with Files](./working-with-files.md)
|
||||
|
||||
@@ -1,15 +1,7 @@
|
||||
# Read, Design, & Code Views
|
||||
# Visual & Code Views
|
||||
|
||||

|
||||

|
||||
|
||||
Stoplight Next has a toggle for switching between Read, Design, and Code views. If you prefer working with code, need to paste in some OAS, or just want to make changes manually, switch over to the code view. This new feature is included in all our editors including Hubs, Modeling, and Scenarios.
|
||||
Stoplight NEXT now has a toggle for switching between our visual editor and our code editor. If you prefer working with code, need to paste in some OAS, or just want to make changes manually, switch over to the code editor. This new feature is included in all our editors including Hubs, Modeling, and Scenarios.
|
||||
|
||||
>New Feature! Any changes made in the code editor will automatically populate the visual editor
|
||||
|
||||
---
|
||||
**Related Articles**
|
||||
- [Working with Files](/platform/editor-basics/working-with-files)
|
||||
- [Change History](/platform/editor-basics/change-history)
|
||||
- [Editor Configuration](/platform/editor-basics/editor-configuration)
|
||||
- [Environments](/platform/editor-basics/environments)
|
||||
- [File Validation](/platform/editor-basics/file-validation)
|
||||
<callout> New Feature! Any changes made in the code editor will automatically populate the visual editor. </>
|
||||
|
||||
@@ -1,8 +1,8 @@
|
||||
# Working with Files
|
||||
|
||||

|
||||

|
||||
|
||||
As part of our effort to make the Stoplight platform more flexible and familiar we added a file explorer to Stoplight Next. You can now see all your files sorted by filetype in one central location within Projects. File types include:
|
||||
As part of our effort to make the Stoplight platform more flexible and familiar we added a file explorer to Stoplight NEXT. You can now see all your files sorted by filetype in one central location within Projects. File types include:
|
||||
|
||||
* .hub (Hub/Docs Files)
|
||||
* .oas2 (Modeling Files)
|
||||
@@ -22,10 +22,3 @@ Within the file explorer you can:
|
||||
* Hover to the right of a file and click the **arrow** to export files into OAS
|
||||
* **Delete Files**
|
||||
* Hover to the right of a file and click the **trash can** to delete files
|
||||
|
||||
---
|
||||
**Related Articles**
|
||||
- [Change History](/platform/editor-basics/change-history)
|
||||
- [Editor Configuration](/platform/editor-basics/editor-configuration)
|
||||
- [Environments](/platform/editor-basics/environments)
|
||||
- [File Validation](/platform/editor-basics/file-validation)
|
||||
|
||||
@@ -1,48 +0,0 @@
|
||||
# Configuring SAML Authentication
|
||||
|
||||
To configure Stoplight Enterprise to use SAML for user authentication,
|
||||
add the following variable to the Stoplight API
|
||||
configuration/environment:
|
||||
|
||||
```bash
|
||||
SL_SSO_ENTRYPOINT="https://your-saml-server.example.com/..."
|
||||
```
|
||||
|
||||
Where `SL_SSO_ENTRYPOINT` is the full URL to the SAML server providing
|
||||
the SAML assertions.
|
||||
|
||||
Once set in the API configuration, restart the API:
|
||||
|
||||
```bash
|
||||
# docker installs
|
||||
sudo docker restart stoplight-api
|
||||
|
||||
# package installs
|
||||
sudo systemctl restart stoplight-api
|
||||
```
|
||||
|
||||
Once restarted, all login requests will be authenticated via the
|
||||
external SAML service.
|
||||
|
||||
> Please note, Stoplight's SAML integration does not currently use
|
||||
SAML assertions for determining group/organization
|
||||
membership. Group/organization membership should be managed through
|
||||
the Stoplight application itself.
|
||||
|
||||
## SAML IdP Metadata
|
||||
|
||||
To configure Stoplight SAML integration from the SAML server, use the following SAML metadata file:
|
||||
|
||||
```xml
|
||||
<EntityDescriptor xmlns="urn:oasis:names:tc:SAML:2.0:metadata" xmlns:ds="http://www.w3.org/2000/09/xmldsig#" entityID="stoplight" ID="stoplight">
|
||||
<SPSSODescriptor protocolSupportEnumeration="urn:oasis:names:tc:SAML:2.0:protocol">
|
||||
<NameIDFormat>
|
||||
urn:oasis:names:tc:SAML:2.0:nameid-format:persistent
|
||||
</NameIDFormat>
|
||||
<AssertionConsumerService index="1" isDefault="true" Binding="urn:oasis:names:tc:SAML:2.0:bindings:HTTP-POST" Location="https://stoplight-api.internal.example.com/sso/global/saml/callback"/>
|
||||
</SPSSODescriptor>
|
||||
</EntityDescriptor>
|
||||
```
|
||||
|
||||
Be sure to update the `AssertionConsumerService` / `Location` object
|
||||
with the correct callback URL for the Stoplight API.
|
||||
@@ -1,292 +0,0 @@
|
||||
# The Stoplight API
|
||||
|
||||
The **API** component powers the Stoplight backend, connecting the UI to the
|
||||
datastore and other miscellaneous Stoplight services.
|
||||
|
||||
> #### Networking Details
|
||||
>
|
||||
> The default port for the API component is TCP port **3030**. The port can be
|
||||
> customized using the `PORT` configuration variable.
|
||||
>
|
||||
> The API must be able to receive incoming connections from the following components:
|
||||
>
|
||||
> * User Clients (web browser or desktop application)
|
||||
> * App
|
||||
>
|
||||
> The API must be able to make outgoing connections to the following components:
|
||||
>
|
||||
> * PostgreSQL
|
||||
> * Redis
|
||||
> * Gitlab
|
||||
> * Exporter
|
||||
> * Prism
|
||||
|
||||
> #### Component Dependencies
|
||||
>
|
||||
> Make sure the following components are available **before** starting the API
|
||||
> service:
|
||||
>
|
||||
> * PostgreSQL
|
||||
> * Redis
|
||||
> * Gitlab
|
||||
|
||||
## Installation
|
||||
|
||||
The Stoplight API can be installed with Docker or RPM package.
|
||||
|
||||
### RPM Package
|
||||
|
||||
Prior to installing the RPM package, you will need to:
|
||||
|
||||
* Install NodeJS
|
||||
|
||||
* Have the Stoplight package repository installed and configured with your user-specific credentials
|
||||
|
||||
#### Installing NodeJS
|
||||
|
||||
To install NodeJS, run the following commands:
|
||||
|
||||
```bash
|
||||
# make sure all current versions of nodejs are removed
|
||||
sudo yum remove nodejs npm -y
|
||||
|
||||
# install nodejs
|
||||
sudo rpm -Uvh https://rpm.nodesource.com/pub_8.x/el/7/x86_64/nodejs-8.9.4-1nodesource.x86_64.rpm
|
||||
```
|
||||
|
||||
Once the installation has completed, verify the version installed with the command:
|
||||
|
||||
```bash
|
||||
$ node --version
|
||||
v8.9.4
|
||||
```
|
||||
|
||||
If you do not see a version starting `v8.9`, contact Stoplight support for assistance.
|
||||
|
||||
#### Setting up the Package Repository
|
||||
|
||||
You can setup the Stoplight package repo by copying-and-pasting the contents
|
||||
below into a terminal:
|
||||
|
||||
```bash
|
||||
# expose credentials to environment first
|
||||
REPO_USERNAME="myusername"
|
||||
REPO_PASSWORD="mypassword"
|
||||
|
||||
# write credentials to repo file
|
||||
cat <<EOF | sudo tee /etc/yum.repos.d/stoplight.repo
|
||||
[stoplight]
|
||||
name=Stoplight Package Repository
|
||||
baseurl=https://$REPO_USERNAME:$REPO_PASSWORD@pkg.stoplight.io/rpm
|
||||
enabled=1
|
||||
gpgcheck=1
|
||||
repo_gpgcheck=1
|
||||
gpgkey=https://pkg.stoplight.io/stoplight.key
|
||||
EOF
|
||||
```
|
||||
|
||||
> Make sure that the repository credentials are set before issuing the `cat` command above.
|
||||
|
||||
#### Installing the API Package
|
||||
|
||||
Once the repository is configured properly, you can install the API component
|
||||
using the command:
|
||||
|
||||
```bash
|
||||
sudo yum install stoplight-api -y
|
||||
```
|
||||
|
||||
### Docker
|
||||
|
||||
To install the API component with Docker, run the command below:
|
||||
|
||||
```bash
|
||||
docker pull quay.io/stoplight/api
|
||||
```
|
||||
|
||||
> Note, if the system you are using has not already authenticated with the
|
||||
> Stoplight container registry, you will be prompted for credentials.
|
||||
|
||||
## Configuration
|
||||
|
||||
To configure the Stoplight API component, you will need to provide runtime
|
||||
values and connection details to the other necessary Stoplight components. The
|
||||
API can be configured either by the configuration file or through the
|
||||
environment.
|
||||
|
||||
> The same configuration variables can be used regardless of installation type
|
||||
> (container or package-based).
|
||||
|
||||
### Variables
|
||||
|
||||
#### SIGN_SECRET
|
||||
|
||||
The `SIGN_SECRET` variable is used to encrypt session cookies and other secrets
|
||||
used by the Stoplight API.
|
||||
|
||||
```
|
||||
SIGN_SECRET="CHANGE_ME_TO_SOMETHING_RANDOM"
|
||||
```
|
||||
|
||||
There is no minimum or maximum character requirement, however Stoplight
|
||||
recommends using a random string more than 32 characters in length for
|
||||
production environments.
|
||||
|
||||
> Note that the `SIGN_SECRET` configuration variable must remain static between
|
||||
> service restarts
|
||||
|
||||
#### POSTGRES_URL
|
||||
|
||||
The `POSTGRES_URL` variable is the connection URI for the PostgreSQL database
|
||||
shared with Gitlab.
|
||||
|
||||
```
|
||||
POSTGRES_URL="postgres://username:password@example.com:5432/database_name"
|
||||
```
|
||||
|
||||
#### SL_COOKIE_DOMAIN
|
||||
|
||||
The `SL_COOKIE_DOMAIN` variable is the name of the top-level domain that
|
||||
Stoplight is being served from.
|
||||
|
||||
```
|
||||
SL_COOKIE_DOMAIN="example.com"
|
||||
```
|
||||
|
||||
For example, if Stoplight is being served from the `stoplight.example.com`
|
||||
domain, set this variable to `example.com`.
|
||||
|
||||
#### SL_APP_HOST
|
||||
|
||||
The `SL_APP_HOST` variable is the full URL to the Stoplight app component.
|
||||
|
||||
```
|
||||
SL_APP_HOST="http://localhost:3030"
|
||||
```
|
||||
|
||||
#### SL_API_HOST
|
||||
|
||||
The `SL_API_HOST` variable is the full URL to this (the Stoplight API) component.
|
||||
|
||||
```
|
||||
SL_API_HOST="http://localhost:3030"
|
||||
```
|
||||
|
||||
#### SL_EXPORTER_HOST
|
||||
|
||||
The `SL_EXPORTER_HOST` variable is the full URL to the Stoplight exporter component.
|
||||
|
||||
```
|
||||
SL_EXPORTER_HOST="http://localhost:3031"
|
||||
```
|
||||
|
||||
#### SL_GITLAB_HOST
|
||||
|
||||
The `SL_GITLAB_HOST` variable is the full URL to the Stoplight GitLab instances HTTP port.
|
||||
|
||||
```
|
||||
SL_GITLAB_HOST="http://localhost:8080"
|
||||
```
|
||||
|
||||
#### SL_REDIS_URL
|
||||
|
||||
The `SL_REDIS_URL` variable is the full URL to a Redis instance.
|
||||
|
||||
```
|
||||
SL_REDIS_URL="redis://:password@example.com:6379"
|
||||
```
|
||||
|
||||
#### DISABLE_REGISTRATION
|
||||
|
||||
The `DISABLE_REGISTRATION` variable can be used to prevent new users from
|
||||
registering with Stoplight. Enabling this feature does not prevent existing
|
||||
users from inviting new users.
|
||||
|
||||
```
|
||||
DISABLE_REGISTRATION=false
|
||||
```
|
||||
|
||||
If this option is set to `true`, new user registration requests will receive the
|
||||
following error when attempting to register:
|
||||
|
||||
> User registration has been temporarily disabled. Please contact your administrator.
|
||||
|
||||
### RPM Package
|
||||
|
||||
The Stoplight API configuration file is located at the path:
|
||||
|
||||
```bash
|
||||
/etc/stoplight-api/stoplight-api.cfg
|
||||
```
|
||||
|
||||
Be sure to customize any variables as needed to match your environment
|
||||
**before** starting the API service.
|
||||
|
||||
> Any changes to the API configuration requires a service restart in order to
|
||||
> take effect.
|
||||
|
||||
### Docker
|
||||
|
||||
To expose configuration variables to the Docker runtime, either write them to a
|
||||
file and use the `--env-file` argument:
|
||||
|
||||
```bash
|
||||
cat <<EOF>api-env-vars
|
||||
SL_APP_HOST="..."
|
||||
...
|
||||
EOF
|
||||
|
||||
docker run --env-file api-env-vars ...
|
||||
```
|
||||
|
||||
Or you can expose them one at a time with the `-e` flag:
|
||||
|
||||
```bash
|
||||
docker run -e SL_APP_HOST=https://stoplight.example.com ...
|
||||
```
|
||||
|
||||
## Running
|
||||
|
||||
### RPM Package
|
||||
|
||||
To start the API server, run the command:
|
||||
|
||||
```bash
|
||||
sudo systemctl start stoplight-api
|
||||
```
|
||||
|
||||
Once started, you can see the status of the service using the command:
|
||||
|
||||
```bash
|
||||
sudo systemctl status stoplight-api
|
||||
```
|
||||
|
||||
### Docker
|
||||
|
||||
To start the API container, run the command:
|
||||
|
||||
```bash
|
||||
docker run \
|
||||
--restart on-failure \
|
||||
-p 3030:3030 \
|
||||
quay.io/stoplight/api:latest
|
||||
```
|
||||
|
||||
> Remember to set any necessary environment variables
|
||||
|
||||
If started properly, the container should be marked with a healthy status after
|
||||
30 seconds. Use the `docker ps` command to verify the container was started and
|
||||
is running properly.
|
||||
|
||||
## Post-install Validations
|
||||
|
||||
Once the API component is running, you can verify the installation was
|
||||
successful issuing an `HTTP GET` request to the `/health` endpoint:
|
||||
|
||||
```bash
|
||||
# remember to update the scheme, host, and port here to match your installation
|
||||
curl -v http://localhost:3030/health
|
||||
```
|
||||
|
||||
If the API was installed and configured properly, you will receive an `HTTP 200`
|
||||
response back.
|
||||
@@ -1,253 +0,0 @@
|
||||
# The Stoplight App
|
||||
|
||||
The **App** component powers the Stoplight user interface by connecting users to
|
||||
the Stoplight API and other services. This is the primary point of ingress for
|
||||
most users using Stoplight. It is what they will load in their web browser, and
|
||||
connect the desktop app to.
|
||||
|
||||
> #### Networking Details
|
||||
>
|
||||
> The default port for the App component is TCP port **3100**. The port can be
|
||||
> customized using the `PORT` configuration variable.
|
||||
>
|
||||
> The App must be able to receive **incoming** connections from the following components:
|
||||
>
|
||||
> * User Clients (web browser or desktop application)
|
||||
>
|
||||
> The App must be able to make **outgoing** connections to the following components:
|
||||
>
|
||||
> * API
|
||||
> * Prism
|
||||
> * Exporter
|
||||
|
||||
> #### Component Dependencies
|
||||
>
|
||||
> Make sure the following components are available **before** starting the App
|
||||
> service:
|
||||
>
|
||||
> * API
|
||||
|
||||
## Installation
|
||||
|
||||
The Stoplight App can be installed with Docker or RPM package.
|
||||
|
||||
### RPM Package
|
||||
|
||||
Prior to installing the RPM package, you will need to:
|
||||
|
||||
* Install NodeJS
|
||||
|
||||
* Have the Stoplight package repository installed and configured with your user-specific credentials
|
||||
|
||||
#### Installing NodeJS
|
||||
|
||||
To install NodeJS, run the following commands:
|
||||
|
||||
```bash
|
||||
# make sure all current versions of nodejs are removed
|
||||
sudo yum remove nodejs npm -y
|
||||
|
||||
# install nodejs
|
||||
sudo rpm -Uvh https://rpm.nodesource.com/pub_8.x/el/7/x86_64/nodejs-8.9.4-1nodesource.x86_64.rpm
|
||||
```
|
||||
|
||||
Once the installation has completed, verify the version installed with the command:
|
||||
|
||||
```bash
|
||||
$ node --version
|
||||
v8.9.4
|
||||
```
|
||||
|
||||
If you do not see a version starting `v8.9`, contact Stoplight support for assistance.
|
||||
|
||||
#### Setting up the Package Repository
|
||||
|
||||
You can do this by copying-and-pasting the contents below into a terminal:
|
||||
|
||||
```bash
|
||||
# expose credentials to environment first
|
||||
REPO_USERNAME="myusername"
|
||||
REPO_PASSWORD="mypassword"
|
||||
|
||||
# write credentials to repo file
|
||||
cat <<EOF | sudo tee /etc/yum.repos.d/stoplight.repo
|
||||
[stoplight]
|
||||
name=Stoplight Package Repository
|
||||
baseurl=https://$REPO_USERNAME:$REPO_PASSWORD@pkg.stoplight.io/rpm
|
||||
enabled=1
|
||||
gpgcheck=1
|
||||
repo_gpgcheck=1
|
||||
gpgkey=https://pkg.stoplight.io/stoplight.key
|
||||
EOF
|
||||
```
|
||||
|
||||
> Make sure that the repository credentials are set before issuing the `cat` command above.
|
||||
|
||||
#### Installing the App Package
|
||||
|
||||
Once the repository is configured properly, you can install the app component using the command:
|
||||
|
||||
```bash
|
||||
sudo yum install stoplight-app -y
|
||||
```
|
||||
|
||||
### Docker
|
||||
|
||||
To install the app component with Docker, run the command below:
|
||||
|
||||
```bash
|
||||
docker pull quay.io/stoplight/app
|
||||
```
|
||||
|
||||
> Note, if you have not already authenticated with the Stoplight container registry, you will be prompted for credentials
|
||||
|
||||
## Configuration
|
||||
|
||||
To configure the Stoplight App component, you will need to provide connection
|
||||
details to the other necessary Stoplight components. The API can be configured
|
||||
either by the configuration file or through the environment.
|
||||
|
||||
> The same configuration variables can be used regardless of installation type
|
||||
> (container or package-based).
|
||||
|
||||
### Variables
|
||||
|
||||
#### SL_APP_HOST
|
||||
|
||||
The `SL_APP_HOST` is the public-facing URL for the Stoplight application.
|
||||
|
||||
```
|
||||
SL_APP_HOST="https://stoplight.example.com"
|
||||
```
|
||||
|
||||
#### SL_API_HOST
|
||||
|
||||
The `SL_API_HOST` is the URL to the Stoplight API.
|
||||
|
||||
```
|
||||
SL_API_HOST="https://stoplight-api.internal.example.com:3030"
|
||||
```
|
||||
|
||||
#### SL_GITLAB_HOST
|
||||
|
||||
The `SL_GITLAB_HOST` is the full URL to the Stoplight GitLab instance
|
||||
|
||||
```
|
||||
SL_GITLAB_HOST="https://gitlab.internal.example.com:8080"
|
||||
```
|
||||
|
||||
#### SL_EXPORTER_HOST
|
||||
|
||||
The `SL_EXPORTER_HOST` is the full URL to the Stoplight GitLab instance:
|
||||
|
||||
```
|
||||
SL_EXPORTER_HOST="https://stoplight-exporter.internal.example.com"
|
||||
```
|
||||
|
||||
#### SL_PRISM_HOST
|
||||
|
||||
The `SL_PRISM_HOST` is the full URL to the Stoplight Prism instance
|
||||
|
||||
```
|
||||
SL_PRISM_HOST="https://stoplight-prism.internal.example.com"
|
||||
```
|
||||
|
||||
#### SL_PUBS_HOST
|
||||
|
||||
The `SL_PUBS_HOST` variable is the top-level domain used for documentation:
|
||||
|
||||
```
|
||||
SL_PUBS_HOST="docs.example.com"
|
||||
```
|
||||
|
||||
#### SL_PUBS_INGRESS
|
||||
|
||||
The `SL_PUBS_INGRESS` variable is the URL to the Stoplight Pubs instance admin API:
|
||||
|
||||
```
|
||||
SL_PUBS_INGRESS="https://pubs.example.com:9098"
|
||||
```
|
||||
|
||||
### RPM Package
|
||||
|
||||
The Stoplight App configuration is located at the location:
|
||||
|
||||
```bash
|
||||
/etc/stoplight-app/stoplight-app.cfg
|
||||
```
|
||||
|
||||
Be sure to customize any variables as needed to match your environment
|
||||
**before** starting the API service.
|
||||
|
||||
> Any changes to the API configuration requires a service restart in order to
|
||||
> take effect.
|
||||
|
||||
### Docker
|
||||
|
||||
To expose configuration variables to the Docker runtime, either write them to a
|
||||
file and use the `--env-file` argument:
|
||||
|
||||
```bash
|
||||
cat <<EOF>app-env-vars
|
||||
SL_API_HOST="..."
|
||||
...
|
||||
EOF
|
||||
|
||||
docker run --env-file app-env-vars ...
|
||||
```
|
||||
|
||||
Or you can expose them one at a time with the `-e` flag:
|
||||
|
||||
```bash
|
||||
docker run -e SL_API_HOST=https://stoplight-api.example.com ...
|
||||
```
|
||||
|
||||
## Running
|
||||
|
||||
### RPM Package
|
||||
|
||||
To start the App server, run the command:
|
||||
|
||||
```bash
|
||||
sudo systemctl start stoplight-app
|
||||
```
|
||||
|
||||
Once started, you can see the status of the service using the command:
|
||||
|
||||
```bash
|
||||
sudo systemctl status stoplight-app
|
||||
```
|
||||
|
||||
### Docker
|
||||
|
||||
To start the App container, run the command:
|
||||
|
||||
```bash
|
||||
docker run \
|
||||
--restart on-failure \
|
||||
--env-file app-env \
|
||||
-p 1234:3100 \
|
||||
quay.io/stoplight/app:latest
|
||||
```
|
||||
|
||||
If started properly, the container should be marked with a healthy status after
|
||||
30 seconds. Use the `docker ps` command to verify the container was started and
|
||||
is running properly.
|
||||
|
||||
## Post-install Validations
|
||||
|
||||
Once the App component is running, you can verify the installation was
|
||||
successful by visiting the app hostname and port in a web browser. If the web
|
||||
page loads properly (what you see when visiting the [hosted
|
||||
site](https://next.stoplight.io/login)), then you should be greeted with a login
|
||||
screen, complete with images and styling.
|
||||
|
||||
If you would like to verify the app installation from the CLI, use `wget` to
|
||||
search for any broken links:
|
||||
|
||||
```
|
||||
wget -r -l2 –spider -D example.com http://example.com 2>&1 | grep -B1 'broken link!'
|
||||
```
|
||||
|
||||
> Remember to replace 'example.com' above with the domain used to install the
|
||||
> Stoplight application
|
||||
@@ -1,212 +0,0 @@
|
||||
# The Stoplight Exporter
|
||||
|
||||
The **Exporter** component de-references JSON specifications to ensure all
|
||||
referenced files and external data sources are resolved when needed.
|
||||
|
||||
> #### Networking Details
|
||||
>
|
||||
> The default port for the Exporter component is TCP port **3031**. The port can
|
||||
> be customized using the `PORT` configuration variable.
|
||||
>
|
||||
> The Exporter must be able to receive incoming connections from the following components:
|
||||
>
|
||||
> * User Clients (web browser or desktop application)
|
||||
> * App
|
||||
> * API
|
||||
> * Prism
|
||||
>
|
||||
> The Exporter must be able to make outgoing connections to the following components:
|
||||
>
|
||||
> * API
|
||||
|
||||
> #### Component Dependencies
|
||||
>
|
||||
> The Exporter is stateless, and has no component dependencies.
|
||||
|
||||
## Installation
|
||||
|
||||
The Stoplight Exporter can be installed with Docker or via RPM package.
|
||||
|
||||
### RPM Package
|
||||
|
||||
Prior to installing the RPM package, you will need to:
|
||||
|
||||
* Install NodeJS
|
||||
|
||||
* Have the Stoplight package repository installed and configured with your user-specific credentials
|
||||
|
||||
#### Installing NodeJS
|
||||
|
||||
To install NodeJS, run the following commands:
|
||||
|
||||
```bash
|
||||
# make sure all current versions of nodejs are removed
|
||||
sudo yum remove nodejs npm -y
|
||||
|
||||
# install nodejs
|
||||
sudo rpm -Uvh https://rpm.nodesource.com/pub_8.x/el/7/x86_64/nodejs-8.9.4-1nodesource.x86_64.rpm
|
||||
```
|
||||
|
||||
Once the installation has completed, verify the version installed with the command:
|
||||
|
||||
```bash
|
||||
$ node --version
|
||||
v8.9.4
|
||||
```
|
||||
|
||||
If you do not see a version starting `v8.9`, contact Stoplight support for assistance.
|
||||
|
||||
#### Setting up the Package Repository
|
||||
|
||||
You can do this by copying-and-pasting the contents below into a terminal:
|
||||
|
||||
```bash
|
||||
# expose credentials to environment first
|
||||
REPO_USERNAME="myusername"
|
||||
REPO_PASSWORD="mypassword"
|
||||
|
||||
# write credentials to repo file
|
||||
cat <<EOF | sudo tee /etc/yum.repos.d/stoplight.repo
|
||||
[stoplight]
|
||||
name=Stoplight Package Repository
|
||||
baseurl=https://$REPO_USERNAME:$REPO_PASSWORD@pkg.stoplight.io/rpm
|
||||
enabled=1
|
||||
gpgcheck=1
|
||||
repo_gpgcheck=1
|
||||
gpgkey=https://pkg.stoplight.io/stoplight.key
|
||||
EOF
|
||||
```
|
||||
|
||||
> Make sure that the repository credentials are set before issuing the `cat` command above.
|
||||
|
||||
#### Installing the Exporter Package
|
||||
|
||||
Once the repository is configured properly, you can install the Exporter component using the command:
|
||||
|
||||
```bash
|
||||
sudo yum install stoplight-exporter -y
|
||||
```
|
||||
|
||||
### Docker
|
||||
|
||||
To install the Exporter component with Docker, run the command below:
|
||||
|
||||
```bash
|
||||
docker pull quay.io/stoplight/exporter
|
||||
```
|
||||
|
||||
> Note, if you have not already authenticated with the Stoplight container
|
||||
> registry, you will be prompted for credentials
|
||||
|
||||
## Configuration
|
||||
|
||||
To configure the Stoplight Exporter component, you will need to provide runtime
|
||||
values and connection details to the other necessary Stoplight components. The
|
||||
Exporter can be configured either by the configuration file or through the
|
||||
environment.
|
||||
|
||||
> The same configuration variables can be used regardless of installation type
|
||||
> (container or package-based).
|
||||
|
||||
### Variables
|
||||
|
||||
#### SL_APP_HOST
|
||||
|
||||
The `SL_APP_HOST` is the public-facing URL for the Stoplight App.
|
||||
|
||||
```
|
||||
SL_APP_HOST="https://stoplight.example.com"
|
||||
```
|
||||
|
||||
#### SL_API_HOST
|
||||
|
||||
The `SL_API_HOST` variable is the URL to the Stoplight API.
|
||||
|
||||
```
|
||||
SL_API_HOST="https://stoplight-api.internal.example.com:3030"
|
||||
```
|
||||
|
||||
#### SL_EXPORTER_HOST
|
||||
|
||||
The `SL_EXPORTER_HOST` variable is the full URL to the Stoplight Exporter instance.
|
||||
|
||||
```
|
||||
SL_EXPORTER_HOST="https://stoplight-exporter.internal.example.com"
|
||||
```
|
||||
|
||||
### RPM Package
|
||||
|
||||
The Stoplight Exporter configuration is located at the location:
|
||||
|
||||
```bash
|
||||
/etc/stoplight-exporter/stoplight-exporter.cfg
|
||||
```
|
||||
|
||||
Be sure to customize any variables as needed to match your environment
|
||||
**before** starting the Exporter service.
|
||||
|
||||
> Any changes to the Exporter configuration requires a service restart in order
|
||||
> to take effect.
|
||||
|
||||
### Docker
|
||||
|
||||
To expose these to the Docker runtime, either write them to a file and use the `--env-file` argument:
|
||||
|
||||
```bash
|
||||
cat <<EOF>exporter-env-vars
|
||||
SL_APP_HOST="..."
|
||||
...
|
||||
EOF
|
||||
|
||||
docker run --env-file exporter-env-vars ...
|
||||
```
|
||||
|
||||
Alternatively, you can expose them one at a time with the `-e` flag:
|
||||
|
||||
```bash
|
||||
docker run -e SL_APP_HOST=https://stoplight.example.com ...
|
||||
```
|
||||
|
||||
## Running
|
||||
|
||||
### RPM Package
|
||||
|
||||
To start the Exporter server, run the command:
|
||||
|
||||
```bash
|
||||
sudo systemctl start stoplight-exporter
|
||||
```
|
||||
|
||||
Once started, you can see the status of the service using the command:
|
||||
|
||||
```bash
|
||||
sudo systemctl status stoplight-exporter
|
||||
```
|
||||
|
||||
### Docker
|
||||
|
||||
To start the Exporter container, run the command:
|
||||
|
||||
```bash
|
||||
docker run \
|
||||
--restart on-failure \
|
||||
--env-file exporter-env \
|
||||
-p 2345:3031 \
|
||||
quay.io/stoplight/exporter:latest
|
||||
```
|
||||
|
||||
If started properly, the container should be marked with a healthy status after
|
||||
30 seconds. Use the `docker ps` command to verify the container was started and
|
||||
is running properly.
|
||||
|
||||
## Post-install Validations
|
||||
|
||||
Once the Exporter component is running, you can verify the installation was
|
||||
successful issuing an `HTTP GET` request to the root (`/`) endpoint:
|
||||
|
||||
```bash
|
||||
# be sure to update the scheme, host, and port to match the installation port
|
||||
curl -v http://localhost:3031/
|
||||
```
|
||||
|
||||
If the Exporter was installed and configured properly, you will receive an `HTTP 200` response back.
|
||||
@@ -1,215 +0,0 @@
|
||||
# GitLab CE
|
||||
|
||||
GitLab CE powers the Stoplight backend, including file storage and database.
|
||||
GitLab is the backing datastore for all files stored within Stoplight. In
|
||||
addition to storing files, GitLab is responsible for:
|
||||
|
||||
* Interfacing with the Stoplight API
|
||||
* User-facing notifications (including password reset emails, group/project
|
||||
invitations, etc)
|
||||
* Tracking all changes between different files, and storing them within a Git
|
||||
repository
|
||||
|
||||
Packaged within the GitLab CE is an embedded installation of PostgreSQL and
|
||||
Redis. These two sub-components can be broken out into external services if your
|
||||
organization is already familiar with running these (or similar) services. You
|
||||
may also break out these services if you plan on using a managed hosting
|
||||
solution, for example, Amazon RDS (for PostgreSQL) or Amazon ElastiCache (for
|
||||
Redis).
|
||||
|
||||
> #### Storage Requirements
|
||||
>
|
||||
> GitLab requires persistent storage in order to store Stoplight file data (in
|
||||
> Git), and optionally PostgreSQL data (when using the omnibus package).
|
||||
|
||||
> #### Networking Details
|
||||
>
|
||||
> The default GitLab ports are 80 (HTTP) and 443 (HTTPS). These ports can be
|
||||
> customized via the `gitlab.rb` configuration file (discussed below).
|
||||
>
|
||||
> GitLab must be able to receive incoming connections from the following components:
|
||||
>
|
||||
> * App
|
||||
>
|
||||
> GitLab must be able to make outgoing connections to the following components:
|
||||
>
|
||||
> * PostgreSQL
|
||||
> * Redis
|
||||
|
||||
> #### Component Dependencies
|
||||
>
|
||||
> Make sure the following components are available **before** starting the GitLab
|
||||
> service:
|
||||
>
|
||||
> * PostgreSQL
|
||||
> * Redis
|
||||
>
|
||||
> _Note, for Omnibus users using the embedded PostgreSQL and Redis instances,
|
||||
> these services will be started by the GitLab process._
|
||||
|
||||
## Installation
|
||||
|
||||
GitLab can be installed with Docker or via RPM package.
|
||||
|
||||
### RPM Package
|
||||
|
||||
Prior to installing the RPM package, you will need to have the Stoplight package repository installed and configured with your user-specific credentials.
|
||||
|
||||
You can do this by copying-and-pasting the contents below into a terminal:
|
||||
|
||||
```bash
|
||||
# expose credentials to environment first
|
||||
REPO_USERNAME="myusername"
|
||||
REPO_PASSWORD="mypassword"
|
||||
|
||||
# write credentials to repo file
|
||||
cat <<EOF | sudo tee /etc/yum.repos.d/stoplight.repo
|
||||
[stoplight]
|
||||
name=Stoplight Package Repository
|
||||
baseurl=https://$REPO_USERNAME:$REPO_PASSWORD@pkg.stoplight.io/rpm
|
||||
enabled=1
|
||||
gpgcheck=1
|
||||
repo_gpgcheck=1
|
||||
gpgkey=https://pkg.stoplight.io/stoplight.key
|
||||
EOF
|
||||
```
|
||||
|
||||
> Make sure that the repository credentials are set before issuing the `cat` command above.
|
||||
|
||||
Once the repository is configured properly, you can install the GitLab component using the command:
|
||||
|
||||
```bash
|
||||
sudo yum install stoplight-gitlab -y
|
||||
```
|
||||
|
||||
### Docker Installation
|
||||
|
||||
To install the app component with Docker, run the command below:
|
||||
|
||||
```bash
|
||||
docker pull quay.io/stoplight/gitlab
|
||||
```
|
||||
|
||||
> Note, if you have not already authenticated with the Stoplight container registry, you will be prompted for credentials
|
||||
|
||||
## Configuring and Running
|
||||
|
||||
To configure the Stoplight GitLab component, you will need to provide connection details to the other necessary components.
|
||||
|
||||
### Package-based Installations
|
||||
|
||||
#### Configuring the Service
|
||||
|
||||
The Stoplight GitLab configuration is located at:
|
||||
|
||||
```bash
|
||||
/etc/gitlab/gitlab.rb
|
||||
```
|
||||
|
||||
The above file encompasses all of the different configuration options exposed by GitLab. This guide only covers those specific to Stoplight.
|
||||
|
||||
> For documentation on other GitLab configuration options, see the official
|
||||
> documentation [here](https://docs.gitlab.com/omnibus/README.html#configuring)
|
||||
|
||||
#### Starting the Service
|
||||
|
||||
To start GitLab for the first time, run the commands:
|
||||
|
||||
```bash
|
||||
# one-time configuration (needed on new installs and upgrades)
|
||||
sudo gitlab-ctl reconfigure
|
||||
|
||||
# start the services
|
||||
sudo gitlab-ctl start
|
||||
```
|
||||
|
||||
Once started, you can see the status of the service using the command:
|
||||
|
||||
```bash
|
||||
sudo gitlab-ctl status
|
||||
```
|
||||
|
||||
### Docker Installations
|
||||
|
||||
#### Configuring the Container
|
||||
|
||||
The GitLab container should be configured nearly identically to the package installation described above. The easiest way to do this is to mount the GitLab configuration directory inside the container.
|
||||
|
||||
To mount the configuration inside the container, use the `-v` argument to the `docker run` command:
|
||||
|
||||
```bash
|
||||
docker run -v /data/gitlab-config:/etc/gitlab ...
|
||||
```
|
||||
|
||||
Where `/data/gitlab-config` is a directory containing your `gitlab.rb` configuration file.
|
||||
|
||||
> See [here](https://docs.gitlab.com/omnibus/README.html#configuring) for more information on how to configure GitLab
|
||||
|
||||
#### Starting the Container
|
||||
|
||||
To start the app container, run the command:
|
||||
|
||||
```bash
|
||||
docker run \
|
||||
--restart on-failure \
|
||||
-v /my/config:/etc/gitlab \
|
||||
-p 8080:8080 \
|
||||
quay.io/stoplight/gitlab:latest
|
||||
```
|
||||
|
||||
If started properly, the container should be marked with a healthy status within 90 seconds (sometimes a little longer on first boot). Use the `docker ps` command to verify the container was started and is running properly.
|
||||
|
||||
## Post-install Validations
|
||||
|
||||
Once the GitLab component is running, you can verify the installation was successful by using the methods below.
|
||||
|
||||
### GitLab Environment Check
|
||||
|
||||
GitLab comes with it's own check that can be useful for catching any improperly configured components. To run this check, use the command:
|
||||
|
||||
```bash
|
||||
sudo gitlab-rake gitlab:check RAILS_ENV=production
|
||||
```
|
||||
|
||||
If you are using a from-source installation, the command is modified to:
|
||||
|
||||
```bash
|
||||
sudo -u git -H bundle exec rake gitlab:check RAILS_ENV=production
|
||||
```
|
||||
|
||||
### GitLab UI
|
||||
|
||||
If the environment check is successful, then you are ready to load up the GitLab UI. In a web browser, visit the host and port that you are running GitLab's HTTP port on.
|
||||
|
||||
For example, if you are running GitLab on host `gitlab.example.com` on port `8080`, you can visit the following URL in a web browser to see the GitLab UI:
|
||||
|
||||
[http://gitlab.example.com:8080/](http://gitlab.example.com:8080/)
|
||||
|
||||
If the installation was successful, you will be greeted by a GitLab-branded login screen similar to what is displayed on their [hosted login screen](https://gitlab.com/users/sign_in).
|
||||
|
||||
> If you have enabled SSL, make sure to use `https://` when typing the GitLab URL.
|
||||
|
||||
## FAQ
|
||||
|
||||
#### Can I use the embedded Redis or PostgreSQL for other services?
|
||||
|
||||
Yes! To expose the embedded Redis instance to the outside world, use the configuration:
|
||||
|
||||
```ruby
|
||||
redis['bind'] = '127.0.0.1'
|
||||
redis['port'] = 6379
|
||||
```
|
||||
|
||||
Similarly, for PostgreSQL, use the configuration:
|
||||
|
||||
```ruby
|
||||
postgresql['listen_address'] = '127.0.0.1'
|
||||
postgresql['port'] = 5432
|
||||
```
|
||||
|
||||
Once the configuration changes are made, issue a `gitlab-ctl reconfigure` for the changes to take effect.
|
||||
|
||||
> If running GitLab in Docker, be sure to expose the Redis/PostgreSQL ports with the `-p` command-line option
|
||||
|
||||
For more information on configuring Redis, see the official GitLab documentation
|
||||
[here](https://docs.gitlab.com/omnibus/settings/redis.html).
|
||||
@@ -1,111 +0,0 @@
|
||||
# The Stoplight Hub Builder
|
||||
|
||||
The **Hub Builder** component converts a Stoplight Hub into a standalone static HTML website, suitable for viewing and distribution.
|
||||
|
||||
> #### Networking Details
|
||||
>
|
||||
> The Hub Builder does not have a listening service or external port configurations.
|
||||
|
||||
> #### Component Dependencies
|
||||
>
|
||||
> The Hub Builder is started in an ad-hoc manner by **Tasker**, and does not have
|
||||
> any component dependencies.
|
||||
|
||||
## Installation
|
||||
|
||||
The Stoplight Hub Builder can be installed with Docker or via RPM package.
|
||||
|
||||
### RPM Package
|
||||
|
||||
Prior to installing the RPM package, you will need to:
|
||||
|
||||
* Install NodeJS
|
||||
|
||||
* Have the Stoplight package repository installed and configured with your user-specific credentials
|
||||
|
||||
#### Installing NodeJS
|
||||
|
||||
To install NodeJS, run the following commands:
|
||||
|
||||
```bash
|
||||
# make sure all current versions of nodejs are removed
|
||||
sudo yum remove nodejs npm -y
|
||||
|
||||
# install nodejs
|
||||
sudo rpm -Uvh https://rpm.nodesource.com/pub_8.x/el/7/x86_64/nodejs-8.9.4-1nodesource.x86_64.rpm
|
||||
```
|
||||
|
||||
Once the installation has completed, verify the version installed with the command:
|
||||
|
||||
```bash
|
||||
$ node --version
|
||||
v8.9.4
|
||||
```
|
||||
|
||||
If you do not see a version starting `v8.9`, contact Stoplight support for assistance.
|
||||
|
||||
#### Setting up the Package Repository
|
||||
|
||||
You can do this by copying-and-pasting the contents below into a terminal:
|
||||
|
||||
```bash
|
||||
# expose credentials to environment first
|
||||
REPO_USERNAME="myusername"
|
||||
REPO_PASSWORD="mypassword"
|
||||
|
||||
# write credentials to repo file
|
||||
cat <<EOF | sudo tee /etc/yum.repos.d/stoplight.repo
|
||||
[stoplight]
|
||||
name=Stoplight Package Repository
|
||||
baseurl=https://$REPO_USERNAME:$REPO_PASSWORD@pkg.stoplight.io/rpm
|
||||
enabled=1
|
||||
gpgcheck=1
|
||||
repo_gpgcheck=1
|
||||
gpgkey=https://pkg.stoplight.io/stoplight.key
|
||||
EOF
|
||||
```
|
||||
|
||||
> Make sure that the repository credentials are set before issuing the `cat` command above.
|
||||
|
||||
#### Installing the Hub Builder Package
|
||||
|
||||
Once the repository is configured properly, you can install the Hub Builder
|
||||
component using the command:
|
||||
|
||||
```bash
|
||||
sudo yum install stoplight-hub-builder -y
|
||||
```
|
||||
|
||||
### Docker
|
||||
|
||||
To install the Hub Builder component with Docker, run the command below:
|
||||
|
||||
```bash
|
||||
docker pull quay.io/stoplight/hub-builder
|
||||
```
|
||||
|
||||
> Note, if you have not already authenticated with the Stoplight container
|
||||
> registry, you will be prompted for credentials
|
||||
|
||||
## Configuration
|
||||
|
||||
The Hub Builder component is an ad-hoc processing job, and does not have any
|
||||
required configuration that is not provided by the parent process (typically
|
||||
Tasker).
|
||||
|
||||
## Running
|
||||
|
||||
## RPM Package
|
||||
|
||||
The Hub Builder component is an ad-hoc processing job, and does not have an
|
||||
associated service. The Tasker component is responsible for running and managing
|
||||
the Hub Builder jobs.
|
||||
|
||||
To ensure Tasker is able to run the Hub Builder package correctly, be sure to
|
||||
set Tasker to `shell` mode in the Tasker configuration.
|
||||
|
||||
### Docker
|
||||
|
||||
The Hub Builder component is an ad-hoc processing job, and does not have an
|
||||
associated service. The Tasker component is responsible for running and managing
|
||||
the Hub Builder container.
|
||||
@@ -1,261 +0,0 @@
|
||||
# Prism
|
||||
|
||||
The **Prism** component powers scenarios and API orchestration.
|
||||
|
||||
> #### Networking Details
|
||||
>
|
||||
> The default port for the Prism component is TCP port **4050** (HTTP). The port can be configured via configuration (see below).
|
||||
>
|
||||
> Prism must be able to receive incoming connections from the following components:
|
||||
>
|
||||
> * User Clients (web browser or desktop application)
|
||||
> * App
|
||||
> * API
|
||||
>
|
||||
> Prism must be able to make outgoing connections to the following components:
|
||||
>
|
||||
> * Exporter
|
||||
>
|
||||
> In addition to the above requirements, Prism must be setup with a wildcard
|
||||
> subdomain (CNAME DNS record), for example `*.prism.example.com`. Each Prism
|
||||
> instance that is created gets a unique hostname associated with it, for example
|
||||
> `service1-mock.prism.example.com`.
|
||||
|
||||
> #### Component Dependencies
|
||||
>
|
||||
> Make sure the following components are available **before** starting the API
|
||||
> service:
|
||||
>
|
||||
> * PostgreSQL
|
||||
> * Redis
|
||||
> * Gitlab
|
||||
|
||||
## Installation
|
||||
|
||||
Prism can be installed with Docker or via RPM package.
|
||||
|
||||
### RPM Package
|
||||
|
||||
Prior to installing the RPM package, you will need to have the Stoplight package
|
||||
repository installed and configured with your user-specific credentials.
|
||||
|
||||
#### Setting up the Package Repository
|
||||
|
||||
You can setup the Stoplight package repo by copying-and-pasting the contents
|
||||
below into a terminal:
|
||||
|
||||
```bash
|
||||
# expose credentials to environment first
|
||||
REPO_USERNAME="myusername"
|
||||
REPO_PASSWORD="mypassword"
|
||||
|
||||
# write credentials to repo file
|
||||
cat <<EOF | sudo tee /etc/yum.repos.d/stoplight.repo
|
||||
[stoplight]
|
||||
name=Stoplight Package Repository
|
||||
baseurl=https://$REPO_USERNAME:$REPO_PASSWORD@pkg.stoplight.io/rpm
|
||||
enabled=1
|
||||
gpgcheck=1
|
||||
repo_gpgcheck=1
|
||||
gpgkey=https://pkg.stoplight.io/stoplight.key
|
||||
EOF
|
||||
```
|
||||
|
||||
> Make sure that the repository credentials are set before issuing the `cat` command above.
|
||||
|
||||
#### Installing the Prism Package
|
||||
|
||||
Once the repository is configured properly, you can install the Pubs component using the command:
|
||||
|
||||
```bash
|
||||
sudo yum install prism -y
|
||||
```
|
||||
|
||||
### Docker
|
||||
|
||||
To install the Pubs component with Docker, run the command below:
|
||||
|
||||
```bash
|
||||
docker pull quay.io/stoplight/prism-multi
|
||||
```
|
||||
|
||||
> Note, if you have not already authenticated with the Stoplight container
|
||||
> registry, you will be prompted for credentials.
|
||||
|
||||
## Configuration
|
||||
|
||||
To configure the Prism component, you will need to provide runtime settings and
|
||||
connection details to the Stoplight App, API, and Exporter.
|
||||
|
||||
### Variables
|
||||
|
||||
#### SL_HOST
|
||||
|
||||
The `SL_HOST` variable is the full URL to the Prism instance.
|
||||
|
||||
```
|
||||
SL_HOST="http://%sprism.example.com"
|
||||
```
|
||||
|
||||
Where Prism is being served from the domain `prism.example.com`. Specifying a
|
||||
port is optional.
|
||||
|
||||
> Note, the `%s` preceding the domain is **required**.
|
||||
|
||||
#### SL_API_HOST
|
||||
|
||||
The `SL_API_HOST` variable is the full URL to the Stoplight API.
|
||||
|
||||
```
|
||||
SL_API_HOST="http://api.example.com:3030"
|
||||
```
|
||||
|
||||
#### SL_EXPORTER_HOST
|
||||
|
||||
The `SL_EXPORTER_HOST` variable is the URL to the Stoplight Exporter.
|
||||
|
||||
```
|
||||
SL_EXPORTER_HOST="http://exporter.example.com:3031"
|
||||
```
|
||||
|
||||
#### ENV_NAME
|
||||
|
||||
The `ENV_NAME` variable is a flag noting the environment level.
|
||||
|
||||
```
|
||||
ENV_NAME="production"
|
||||
```
|
||||
|
||||
> `ENV_NAME` should be left as `production` unless instructed otherwise by the
|
||||
> Stoplight Support staff.
|
||||
|
||||
#### MAX_QUEUE_SIZE
|
||||
|
||||
The `MAX_QUEUE_SIZE` variable denotes the internal queue size used to service
|
||||
requests.
|
||||
|
||||
```
|
||||
MAX_QUEUE_SIZE=500
|
||||
```
|
||||
|
||||
> `MAX_QUEUE_SIZE` should be left as `500` unless instructed otherwise by the
|
||||
> Stoplight Support staff.
|
||||
|
||||
#### MAX_RUNTIME_POOL_SIZE
|
||||
|
||||
The `MAX_RUNTIME_POOL_SIZE` variable denotes the worker pool size used to
|
||||
service requests.
|
||||
|
||||
```
|
||||
MAX_RUNTIME_POOL_SIZE=15
|
||||
```
|
||||
|
||||
> `MAX_RUNTIME_POOL_SIZE` should be left as `15` unless instructed otherwise by
|
||||
> the Stoplight Support staff.
|
||||
|
||||
#### MAX_WORKERS
|
||||
|
||||
The `MAX_WORKERS` variable denotes the number of worker threads to use when
|
||||
servicing requests.
|
||||
|
||||
```
|
||||
MAX_WORKERS=25
|
||||
```
|
||||
|
||||
> `MAX_WORKERS` should be left as `25` unless instructed otherwise by the
|
||||
> Stoplight Support staff.
|
||||
|
||||
#### PRISM_LOG_LEVEL
|
||||
|
||||
The `PRISM_LOG_LEVEL` variable denotes the log level of the Prism process.
|
||||
|
||||
```
|
||||
PRISM_LOG_LEVEL="ERROR"
|
||||
```
|
||||
|
||||
> `PRISM_LOG_LEVEL` should be left as `ERROR` unless instructed otherwise by the
|
||||
> Stoplight Support staff.
|
||||
|
||||
### RPM Package
|
||||
|
||||
The Prism configuration file is located at the location:
|
||||
|
||||
```bash
|
||||
/etc/prism/prism.cfg
|
||||
```
|
||||
|
||||
Be sure to customize any variables as needed to match your environment
|
||||
**before** starting the Prism service.
|
||||
|
||||
> Any changes to the Prism configuration requires a service restart in order to
|
||||
> take effect.
|
||||
|
||||
### Docker
|
||||
|
||||
The Prism container can be configured either via file (see the package
|
||||
configuration above) or via environment variables. If you would like to
|
||||
configure Prism via environment variable, use the variable names directly from
|
||||
the Prism configuration above.
|
||||
|
||||
To expose variables to the Docker runtime, either write them to a file and use the `--env-file` argument:
|
||||
|
||||
```bash
|
||||
cat <<EOF>prism-env-vars
|
||||
SL_API_HOST="..."
|
||||
...
|
||||
EOF
|
||||
|
||||
docker run --env-file prism-env-vars ...
|
||||
```
|
||||
|
||||
Alternatively, you can expose them one at a time with the `-e` flag:
|
||||
|
||||
```bash
|
||||
docker run -e SL_API_HOST=api.stoplight.example.com ...
|
||||
```
|
||||
|
||||
## Running
|
||||
|
||||
### RPM Package
|
||||
|
||||
To start the Prism server, run the command:
|
||||
|
||||
```bash
|
||||
sudo systemctl start prism
|
||||
```
|
||||
|
||||
Once started, you can see the status of the service using the command:
|
||||
|
||||
```bash
|
||||
sudo systemctl status prism
|
||||
```
|
||||
|
||||
### Docker
|
||||
|
||||
To start the Prism container, use the command:
|
||||
|
||||
```bash
|
||||
docker run \
|
||||
--restart on-failure \
|
||||
--env-file prism-env-vars \
|
||||
-p 4050:4050 \
|
||||
quay.io/stoplight/prism-multi:latest
|
||||
```
|
||||
|
||||
If started properly, the container should be marked with a healthy status after
|
||||
30 seconds. Use the `docker ps` command to verify the container was started and
|
||||
is running properly.
|
||||
|
||||
## Post-install Validations
|
||||
|
||||
Once the Prism component is running, you can verify the installation was
|
||||
successful by issuing an `HTTP GET` request to the `/health` endpoint:
|
||||
|
||||
```bash
|
||||
curl -v localhost:4050/health
|
||||
```
|
||||
|
||||
> Be sure to update the URL above to match your local installation
|
||||
|
||||
If Prism was installed and configured properly, you will receive an `HTTP 200`
|
||||
response back.
|
||||
@@ -1,269 +0,0 @@
|
||||
# Pubs (Hubs Server)
|
||||
|
||||
The **Pubs** component serves and catalogs Hubs published through Stoplight.
|
||||
|
||||
> #### Networking Details
|
||||
>
|
||||
> The default ports for the Pubs component are TCP ports **8080** (HTTP),
|
||||
> **8443** (HTTPS), and **9098** (HTTPS optional). All ports can be customized.
|
||||
>
|
||||
> Pubs must be able to receive incoming connections from the following components:
|
||||
>
|
||||
> * User Clients (on the public-facing ports, which default to 8080 and 8443)
|
||||
> * API (on the private admin port, which defaults to 9098)
|
||||
> * Tasker (on the private admin port, which defaults to 9098)
|
||||
>
|
||||
> Pubs must be able to make outgoing connections to the following components:
|
||||
>
|
||||
> * API
|
||||
|
||||
> #### Component Dependencies
|
||||
>
|
||||
> Pubs has no component dependencies.
|
||||
|
||||
## Installation
|
||||
|
||||
Pubs can be installed with Docker or via RPM package.
|
||||
|
||||
### RPM Package
|
||||
|
||||
Prior to installing the RPM package, you will need to have the Stoplight package
|
||||
repository installed and configured with your user-specific credentials.
|
||||
|
||||
#### Setting up the Package Repository
|
||||
|
||||
You can setup the Stoplight package repo by copying-and-pasting the contents
|
||||
below into a terminal:
|
||||
|
||||
```bash
|
||||
# expose credentials to environment first
|
||||
REPO_USERNAME="myusername"
|
||||
REPO_PASSWORD="mypassword"
|
||||
|
||||
# write credentials to repo file
|
||||
cat <<EOF | sudo tee /etc/yum.repos.d/stoplight.repo
|
||||
[stoplight]
|
||||
name=Stoplight Package Repository
|
||||
baseurl=https://$REPO_USERNAME:$REPO_PASSWORD@pkg.stoplight.io/rpm
|
||||
enabled=1
|
||||
gpgcheck=1
|
||||
repo_gpgcheck=1
|
||||
gpgkey=https://pkg.stoplight.io/stoplight.key
|
||||
EOF
|
||||
```
|
||||
|
||||
> Make sure that the repository credentials are set before issuing the `cat` command above.
|
||||
|
||||
#### Installing the Pubs Package
|
||||
|
||||
Once the repository is configured properly, you can install the Pubs component
|
||||
using the command:
|
||||
|
||||
```bash
|
||||
sudo yum install pubs -y
|
||||
```
|
||||
|
||||
### Docker Installation
|
||||
|
||||
To install the Pubs component with Docker, run the command below:
|
||||
|
||||
```bash
|
||||
docker pull quay.io/stoplight/pubs
|
||||
```
|
||||
|
||||
> Note, if you have not already authenticated with the Stoplight container
|
||||
> registry, you will be prompted for credentials
|
||||
|
||||
## Configuration
|
||||
|
||||
To configure the Pubs component, you will need to provide connection details and
|
||||
runtime settings.
|
||||
|
||||
### Variables
|
||||
|
||||
#### http_bind
|
||||
|
||||
The `http_bind` variable denotes the bind address/port to use when serving HTTP
|
||||
traffic.
|
||||
|
||||
```yaml
|
||||
http_bind: "127.0.0.1:8080"
|
||||
```
|
||||
|
||||
#### https_bind
|
||||
|
||||
The `https_bind` variable denotes the bind address/port to use when serving
|
||||
HTTPS traffic.
|
||||
|
||||
```yaml
|
||||
https_bind: "127.0.0.1:8443"
|
||||
```
|
||||
|
||||
#### ssl_enabled
|
||||
|
||||
The `ssl_enabled` variable denotes whether SSL should be enabled when serving
|
||||
Hub requests.
|
||||
|
||||
```yaml
|
||||
ssl_enabled: yes
|
||||
```
|
||||
|
||||
> If `ssl_enabled` is set to `true`, then HTTP requests will automatically be
|
||||
> redirected to HTTPS.
|
||||
|
||||
#### admin_bind
|
||||
|
||||
The `admin_bind` variable denotes the address/port to bind to when serving the
|
||||
admin API.
|
||||
|
||||
```yaml
|
||||
admin_bind: "127.0.0.1:9098"
|
||||
```
|
||||
|
||||
#### admin_ssl_enabled
|
||||
|
||||
The `admin_ssl_enabled` variable denotes whether the admin API should accept
|
||||
connections over HTTPS (as opposed to HTTP).
|
||||
|
||||
```yaml
|
||||
admin_ssl_enabled: no
|
||||
```
|
||||
|
||||
#### admin_ssl_cert_path
|
||||
|
||||
The `admin_ssl_cert_path` variable is the path to the SSL certificate to use
|
||||
when serving TLS over the admin API.
|
||||
|
||||
```yaml
|
||||
admin_ssl_cert_path: /path/to/cert
|
||||
```
|
||||
|
||||
> This configuration option has no effect if `admin_ssl_enabled` is not set to
|
||||
> `true`
|
||||
|
||||
#### admin_ssl_key_path
|
||||
|
||||
The `admin_ssl_key_path` variable is the path to the SSL key (matching the
|
||||
`admin_ssl_cert_path` option) to use when serving TLS over the admin API.
|
||||
|
||||
```yaml
|
||||
admin_ssl_key_path: /path/to/key
|
||||
```
|
||||
|
||||
> This configuration option has no effect if `admin_ssl_enabled` is not set to
|
||||
> `true`
|
||||
|
||||
#### admin_ip_whitelist
|
||||
|
||||
The `admin_ip_whitelist` variable is a list representing IP addresses that
|
||||
should be allowed to connect to the admin API.
|
||||
|
||||
```yaml
|
||||
admin_ip_whitelist:
|
||||
- 127.0.0.1
|
||||
```
|
||||
|
||||
> If `admin_ip_whitelist` is not set, all IP addresses will be allowed to
|
||||
> connect to the API.
|
||||
|
||||
#### data_dir
|
||||
|
||||
The `data_dir` variable is the directory to use when storing builds, build
|
||||
metadata, and the pubs sqlite database.
|
||||
|
||||
```yaml
|
||||
data_dir: /var/lib/pubs
|
||||
```
|
||||
|
||||
#### static_ssl_domains
|
||||
|
||||
The `static_ssl_domains` variable can be used to serve static SSL certificates
|
||||
for specific domain requests.
|
||||
|
||||
```yaml
|
||||
static_ssl_domains:
|
||||
- domain: "*.example.com"
|
||||
cert-path: /path/to/example_com/certificate
|
||||
key-path: /path/to/example_com/key
|
||||
```
|
||||
|
||||
> Include a leading star (`*`) in the domain if the certificate is wildcarded
|
||||
> (ie, `*.example.com` for a wildcard certificate on the `example.com` domain).
|
||||
|
||||
### RPM Package
|
||||
|
||||
The Pubs default configuration is located at the path:
|
||||
|
||||
```bash
|
||||
/etc/pubs/pubs.yml
|
||||
```
|
||||
|
||||
Be sure to customize any variables as needed to match your environment
|
||||
**before** starting the Pubs service.
|
||||
|
||||
> Any changes to the Pubs configuration requires a service restart in order to
|
||||
> take effect.
|
||||
|
||||
### Docker
|
||||
|
||||
The Pubs configuration can be mounted into a Docker container. As an example, if
|
||||
a Pubs configuration file is located on the host system at the path:
|
||||
|
||||
```bash
|
||||
/data/pubs.yml
|
||||
```
|
||||
|
||||
This file can be mounted into the running Pubs container using the `-v` argument.
|
||||
|
||||
```bash
|
||||
docker run -v /data/pubs.yml:/etc/pubs/pubs.yml ...
|
||||
```
|
||||
|
||||
## Running
|
||||
|
||||
### RPM Package
|
||||
|
||||
To start the Pubs server, run the command:
|
||||
|
||||
```bash
|
||||
sudo systemctl start pubs
|
||||
```
|
||||
|
||||
Once started, you can see the status of the service using the command:
|
||||
|
||||
```bash
|
||||
sudo systemctl status pubs
|
||||
```
|
||||
|
||||
### Docker Installations
|
||||
|
||||
To start the Pubs container, use the command:
|
||||
|
||||
```bash
|
||||
docker run \
|
||||
--restart on-failure \
|
||||
-v /path/to/pubs.yml:/etc/pubs/pubs.yml \
|
||||
-p 80:8080 \
|
||||
-p 443:8443 \
|
||||
-p 9098:9098 \
|
||||
quay.io/stoplight/pubs:latest
|
||||
```
|
||||
|
||||
If started properly, the container should be marked with a healthy status after
|
||||
30 seconds. Use the `docker ps` command to verify the container was started and
|
||||
is running properly.
|
||||
|
||||
## Post-install Validations
|
||||
|
||||
Once the Pubs service is running, you can verify the installation was successful
|
||||
issuing an `HTTP GET` request to the `/health` URL on the HTTP admin port (set
|
||||
with `admin_bind`):
|
||||
|
||||
```bash
|
||||
curl -v http://localhost:9098/health
|
||||
```
|
||||
|
||||
> Be sure to update the URL above to match your local installation
|
||||
|
||||
If Pubs was installed and configured properly, you will receive an `HTTP 200`
|
||||
response back.
|
||||
@@ -1,231 +0,0 @@
|
||||
# Tasker (Jobs Server)
|
||||
|
||||
The **Tasker** component runs scheduled and on-demand tasks for the Stoplight platform.
|
||||
|
||||
> #### Networking Details
|
||||
>
|
||||
> The default port for the Tasker component is TCP port **9432**. This port can
|
||||
> be customized via configuration.
|
||||
>
|
||||
> Tasker must be able to receive incoming connections from the following components:
|
||||
>
|
||||
> * API
|
||||
>
|
||||
> Tasker must be able to make outgoing connections to the following components:
|
||||
>
|
||||
> * API
|
||||
> * Redis
|
||||
> * Pubs
|
||||
|
||||
> #### Component Dependencies
|
||||
>
|
||||
> Make sure the following components are available **before** starting the Tasker
|
||||
> service:
|
||||
>
|
||||
> * Redis
|
||||
|
||||
## Installation
|
||||
|
||||
Tasker can be installed with Docker or via RPM package.
|
||||
|
||||
### RPM Package
|
||||
|
||||
Prior to installing the RPM package, you will need to have the Stoplight package
|
||||
repository installed and configured with your user-specific credentials.
|
||||
|
||||
#### Setting up the Package Repository
|
||||
|
||||
You can setup the Stoplight package repo by copying-and-pasting the contents
|
||||
below into a terminal:
|
||||
|
||||
```bash
|
||||
# expose credentials to environment first
|
||||
REPO_USERNAME="myusername"
|
||||
REPO_PASSWORD="mypassword"
|
||||
|
||||
# write credentials to repo file
|
||||
cat <<EOF | sudo tee /etc/yum.repos.d/stoplight.repo
|
||||
[stoplight]
|
||||
name=Stoplight Package Repository
|
||||
baseurl=https://$REPO_USERNAME:$REPO_PASSWORD@pkg.stoplight.io/rpm
|
||||
enabled=1
|
||||
gpgcheck=1
|
||||
repo_gpgcheck=1
|
||||
gpgkey=https://pkg.stoplight.io/stoplight.key
|
||||
EOF
|
||||
```
|
||||
|
||||
> Make sure that the repository credentials are set before issuing the `cat` command above.
|
||||
|
||||
#### Installing the Tasker Package
|
||||
|
||||
Once the repository is configured properly, you can install the Tasker component using the command:
|
||||
|
||||
```bash
|
||||
sudo yum install tasker -y
|
||||
```
|
||||
|
||||
### Docker
|
||||
|
||||
To install the Tasker component with Docker, run the command below:
|
||||
|
||||
```bash
|
||||
docker pull quay.io/stoplight/tasker
|
||||
```
|
||||
|
||||
> Note, if you have not already authenticated with the Stoplight container
|
||||
> registry, you will be prompted for credentials.
|
||||
|
||||
## Configuration
|
||||
|
||||
To configure the Tasker component, you will need to provide runtime settings and
|
||||
connection details for a running Redis instance.
|
||||
|
||||
### Variables
|
||||
|
||||
#### TASKER_HTTP_BIND
|
||||
|
||||
The `TASKER_HTTP_BIND` variable is the bind address and port used for serving
|
||||
the Tasker HTTP API.
|
||||
|
||||
```
|
||||
TASKER_HTTP_BIND="localhost:9432"
|
||||
```
|
||||
|
||||
#### TASKER_MODE
|
||||
|
||||
The `TASKER_MODE` variable is the operation mode that Tasker should use when
|
||||
executing jobs. Valid values for `TASKER_MODE` are `docker` and `shell`.
|
||||
|
||||
```
|
||||
TASKER_MODE="shell"
|
||||
```
|
||||
|
||||
> If not specified, Tasker defaults to using `docker` mode.
|
||||
|
||||
#### CORE_ROOT
|
||||
|
||||
The `CORE_ROOT` denotes the absolute path to the stoplight-hub-builder package
|
||||
root.
|
||||
|
||||
```
|
||||
CORE_ROOT="/opt/stoplight-hub-builder"
|
||||
```
|
||||
|
||||
> This variable is only required when running in `shell` mode.
|
||||
|
||||
#### TASKER_REDIS_HOSTPORT
|
||||
|
||||
The `TASKER_REDIS_HOSTPORT` variable denotes the Redis instance host:port to connect to.
|
||||
|
||||
```
|
||||
TASKER_REDIS_HOSTPORT="redis://redis:6379"
|
||||
```
|
||||
|
||||
> Redis must be available before starting service.
|
||||
|
||||
#### TASKER_REDIS_PASSWORD
|
||||
|
||||
The `TASKER_REDIS_PASSWORD` variable is an optional password to use when
|
||||
connecting to the Redis instance.
|
||||
|
||||
```
|
||||
TASKER_REDIS_PASSWORD=""
|
||||
```
|
||||
|
||||
#### TASKER_REDIS_DATABASE
|
||||
|
||||
The `TASKER_REDIS_DATABASE` variable is the Redis database used by Tasker for
|
||||
storing job state.
|
||||
|
||||
```
|
||||
TASKER_REDIS_DATABASE="0"
|
||||
```
|
||||
|
||||
#### TASKER_REDIS_NAMESPACE
|
||||
|
||||
The `TASKER_REDIS_NAMESPACE` variable is the Redis namespace used by Tasker for
|
||||
storing job state.
|
||||
|
||||
```
|
||||
TASKER_REDIS_NAMESPACE="tasker"
|
||||
```
|
||||
|
||||
### RPM Package
|
||||
|
||||
The Tasker configuration is located at:
|
||||
|
||||
```bash
|
||||
/etc/tasker/tasker.cfg
|
||||
```
|
||||
|
||||
Be sure to customize any variables as needed to match your environment
|
||||
**before** starting the Tasker service.
|
||||
|
||||
> Any changes to the Tasker configuration requires a service restart in order to
|
||||
> take effect.
|
||||
|
||||
### Docker
|
||||
|
||||
To expose configuration variables to the Docker runtime, either write them to a
|
||||
file and use the `--env-file` argument:
|
||||
|
||||
```bash
|
||||
cat <<EOF>tasker-env-vars
|
||||
TASKER_HTTP_BIND="..."
|
||||
...
|
||||
EOF
|
||||
|
||||
docker run --env-file tasker-env-vars ...
|
||||
```
|
||||
|
||||
Alternatively, you can expose them one at a time with the `-e` flag:
|
||||
|
||||
```bash
|
||||
docker run -e TASKER_HTTP_BIND=0.0.0.0:9432 ...
|
||||
```
|
||||
|
||||
## Running
|
||||
|
||||
### RPM Package
|
||||
|
||||
To start the Tasker server, run the command:
|
||||
|
||||
```bash
|
||||
sudo systemctl start tasker
|
||||
```
|
||||
|
||||
Once started, you can see the status of the service using the command:
|
||||
|
||||
```bash
|
||||
sudo systemctl status tasker
|
||||
```
|
||||
|
||||
### Docker
|
||||
|
||||
To start the Tasker container, use the command:
|
||||
|
||||
```bash
|
||||
docker run \
|
||||
--restart on-failure \
|
||||
--env-file tasker-env-vars \
|
||||
-p 9432:9432 \
|
||||
quay.io/stoplight/tasker:latest
|
||||
```
|
||||
|
||||
If started properly, the container should be marked with a healthy status after
|
||||
30 seconds. Use the `docker ps` command to verify the container was started and
|
||||
is running properly.
|
||||
|
||||
## Post-install Validations
|
||||
|
||||
Once the Tasker component is running, you can verify the installation was
|
||||
successful issuing an `HTTP GET` request to the `/health` endpoint:
|
||||
|
||||
```bash
|
||||
# remember to update the scheme, host, and port here to match your installation
|
||||
curl -v http://localhost:9432/health
|
||||
```
|
||||
|
||||
If Tasker was installed and configured properly, you will receive an `HTTP 200`
|
||||
response back.
|
||||
@@ -1,58 +0,0 @@
|
||||
# Backups
|
||||
|
||||
Backups are a critical component to ensuring the health of the Stoplight
|
||||
platform. When creating a backup and restore strategy for your on-premise
|
||||
installation, be sure to include the following locations:
|
||||
|
||||
* The **GitLab data directory**, which includes the raw filesystem data backing each projects Git repository.
|
||||
* The **GitLab configuration directory**, which includes randomly-generated secrets and keys necessary for securing the GitLab runtime.
|
||||
* The **GitLab PostgreSQL database**, which includes user, group, permissions, and other relational data not included in the Git repositories.
|
||||
* The **Pubs data directory**, which includes published hubs and their corresponding configurations.
|
||||
|
||||
Backing up all locations above will ensure you can properly restore a Stoplight
|
||||
installation without data loss.
|
||||
|
||||
## GitLab Backup Procedures
|
||||
|
||||
GitLab is a critical piece of the Stoplight platform. Stoplight recommends, at a
|
||||
minimum, daily backups of the GitLab database and filesystem to ensure minimal
|
||||
data loss in the event of a failure.
|
||||
|
||||
To run a backup for GitLab, which includes a snapshot of the filesystem and
|
||||
database, run the command:
|
||||
|
||||
```bash
|
||||
sudo gitlab-rake gitlab:backup:create
|
||||
```
|
||||
|
||||
Backups are in zip format, making them very easy to store in remote or cloud
|
||||
storage. GitLab also offers built-in capabilities that provide automatic uploads
|
||||
to cloud storage providers when configured.
|
||||
|
||||
> If you do not use the built-in backup utility, it is critical that _both_ the
|
||||
> PostgreSQL database and filesystem data (including data directories and
|
||||
> configuration directories) be recorded.
|
||||
|
||||
For more information, please see the official GitLab backup documentation
|
||||
[here](https://docs.gitlab.com/ce/raketasks/backup_restore.html).
|
||||
|
||||
## Pubs Backup Procedures
|
||||
|
||||
Pubs stores all published hubs created via the Stoplight application. While not
|
||||
critical to the health of the Stoplight Enterprise platform, it is recommended
|
||||
that the pubs data directory is backed up on a regular basis.
|
||||
|
||||
To perform a backup of the Pubs data directory, take a tarball snapshot of the
|
||||
Pubs data directory and configuration directory. By default, the Pubs data
|
||||
directory is located at `/var/lib/pubs`, and the configuration directory is
|
||||
located at `/etc/pubs`.
|
||||
|
||||
To perform a backup, run the command:
|
||||
|
||||
```bash
|
||||
sudo tar -cvzf pubs-backup.$(date +%s).tar.gz /var/lib/pubs /etc/pubs
|
||||
```
|
||||
|
||||
Once the backup is completed, the tarball output can be stored on redundant or
|
||||
cloud storage. To ensure you have a recent backup available at all times,
|
||||
Stoplight recommends taking a backup daily.
|
||||
@@ -1,99 +0,0 @@
|
||||
# Stoplight Enterprise
|
||||
|
||||
The Stoplight Enterprise platform provides a fully-functional on-premise API
|
||||
design, test, and documentation tool-kit, taking the hassle out of your API
|
||||
strategy.
|
||||
|
||||
## Deployment Options
|
||||
|
||||
Stoplight can be deployed on one or many Linux servers (dedicated or
|
||||
virtualized).
|
||||
|
||||
### Single-Server
|
||||
|
||||
Single-server deployments run all of the necessary Stoplight components on a
|
||||
single Linux instance. This greatly simplifies the deployment process, as all
|
||||
components do not have to reach over the network to talk to one another.
|
||||
|
||||
Despite ease of installation, there are some notable shortcomings to this
|
||||
option:
|
||||
|
||||
* If the system is taken down for any reason, all components will be
|
||||
unavailable.
|
||||
|
||||
* Any single component can affect the performance of the entire Stoplight
|
||||
platform, leading to service degradation across all components.
|
||||
|
||||
Due to these shortcomings, single-server deployments are only recommended for
|
||||
POC, pilot, or trial environments.
|
||||
|
||||
### Multi-Server
|
||||
|
||||
Multi-server deployments run different Stoplight Enterprise components on
|
||||
separate Linux instances. This deployment option is much more resilient to
|
||||
system-level issues, though it does require more network configuration.
|
||||
|
||||
Stoplight recommends multi-server deployments for all production installations.
|
||||
|
||||
### Native vs. Container-based Deployments
|
||||
|
||||
The Stoplight platform can be run either with a container solution (Docker) or
|
||||
natively on the Linux system via RPM package installation. Both options are
|
||||
fully supported, however Stoplight recommends leveraging containers where
|
||||
possible for ease-of-use and improved security/sandboxing.
|
||||
|
||||
## System Requirements
|
||||
|
||||
Stoplight currently supports the following Linux distributions for on-premise installations:
|
||||
|
||||
* Ubuntu 16.04 LTS (x86_64)
|
||||
* CentOS / RedHat Enterprise Linux 7 (x86_64)
|
||||
|
||||
A minimum of one server is required to run the Stoplight application, however,
|
||||
for a production installation, we recommend at least four servers (excluding
|
||||
monitoring and backup servers). The system specifications for each server can be
|
||||
found below under each component.
|
||||
|
||||
### Docker Installations
|
||||
|
||||
For the recommended Docker-based installation path, Stoplight recommends [Docker
|
||||
CE](https://www.docker.com/) v18.00+.
|
||||
|
||||
### RPM Installations
|
||||
|
||||
For RPM-based installations, the application requirements vary by component and
|
||||
are addressed in the component pages referenced below.
|
||||
|
||||
## Stoplight Components
|
||||
|
||||

|
||||
|
||||
The Stoplight platform is broken up in to seven main components:
|
||||
|
||||
1. [Stoplight App](/enterprise/components/app)
|
||||
2. [Stoplight API](/enterprise/components/api)
|
||||
3. [Stoplight Exporter](/enterprise/components/exporter)
|
||||
4. [Prism](/enterprise/components/prism)
|
||||
5. [Tasker (Jobs Server)](/enterprise/components/tasker)
|
||||
* [Hub Builder](/enterprise/components/hub-builder)
|
||||
6. [Pubs (Hubs Server)](/enterprise/components/pubs)
|
||||
7. [GitLab CE - Stoplight Fork](/enterprise/components/gitlab)
|
||||
|
||||
Please review each of the component pages prior to the installation.
|
||||
|
||||
## Monitoring
|
||||
|
||||
For monitoring purposes, Stoplight runs and recommends the following
|
||||
applications:
|
||||
|
||||
* [InfluxDB](https://www.influxdata.com/time-series-platform/influxdb/) v1.3
|
||||
for metrics storage and aggregation
|
||||
* [Kapacitor](https://www.influxdata.com/time-series-platform/kapacitor/) v1.3
|
||||
for alerting and metrics processing
|
||||
* [Telegraf](https://www.influxdata.com/time-series-platform/telegraf/) v1.4
|
||||
for metrics collection
|
||||
* [Mtail](https://github.com/google/mtail) v3.0 for whitebox monitoring of
|
||||
application logs
|
||||
|
||||
> Please note that the above recommendations are entirely optional if your
|
||||
> organization already has a monitoring and alerting solution in place.
|
||||
@@ -1,6 +1,8 @@
|
||||
# Welcome to Stoplight Next!
|
||||
|
||||
Now that you have the basics on what the [Stoplight Next Platform](/platform/what-is-stoplight) is, we can go over how to get started.
|
||||

|
||||
|
||||
Now that you have the basics on what the [Stoplight Next Platform](/platform/introduction) is, we can go over how to get started.
|
||||
|
||||
First things first, are you using Stoplight for Personal Projects or as part of an Organization?
|
||||
|
||||
|
||||
@@ -1,38 +1,37 @@
|
||||
# Organization Owner Introduction
|
||||
|
||||
## Welcome to Stoplight Next!
|
||||

|
||||
|
||||
If you are trying to create a new Organization then you are in the right place. Stoplight Next was designed with large scale collaboration and governance as a central principle. The following guide will take you through the process of creating and populating an Organization, and offer an overview of the governance tools within Stoplight Next.
|
||||
## Welcome to Stoplight NEXT!
|
||||
|
||||
If you are trying to create a new Organization then you are in the right place. Stoplight NEXT was designed with large scale collaboration and governance as a central principle. The following guide will take you through the process of creating and populating an Organization, and offer an overview of the governance tools within Stoplight NEXT.
|
||||
|
||||
## Organization
|
||||
Organizations function as a shared space for you and your co-workers. Members of an Organization have access to a centralized Activity Feed, Project Repository, and an Issues discussion tool. Organization Owners can also assign varying levels of Permissions to other members of the Organization.
|
||||
Organizations function as a shared space for you and your co-workers. Members of an Organization have access to a centralized Activity Feed, Project Repository, and an Issues (link) discussion tool. Organization Owners can also assign varying levels of Permissions to other members of the Organization.
|
||||
|
||||
- [Create an Organization](/platform/organizations/create-org)
|
||||
- [Invite People to Organization](/platform/organizations/invite-people)
|
||||
- [Remove People from Your Organizations](/platform/organizations/remove-members)
|
||||
- [Organization Member Roles and Permissions](/platform/organizations/roles)
|
||||
- [Customize Your Organization](/platform/organizations/customize)
|
||||
- [Transfer Primary Ownership of an Organization](/platform/organizations/transfer-ownership)
|
||||
- [Delete an Organization](/platform/organizations/delete-org)
|
||||
|
||||
* [Create an Organization](./create-org.md)
|
||||
* [Invite People to Organization](./managing-people.md)
|
||||
* [Remove People from your Organization](./remove-people.md)
|
||||
* [Member Roles and Permissions](./roles.md)
|
||||
* [Customize your Organization](./customize-org.md)
|
||||
* [Transfer Primary Ownership](./transferring-ownership.md)
|
||||
* [Delete an Organization](./delete-org.md)
|
||||
|
||||
## Teams
|
||||
If you are managing a large Organization with multiple teams you can use Teams to group Organization members together.
|
||||
|
||||
- [Create a Team](/platform/organizations/teams/create-team)
|
||||
- [Add People to a Team](/platform/organizations/teams/add-people)
|
||||
- [Remove People for a Team](/platform/organizations/teams/remove-people)
|
||||
- [Team Member Roles and Permissions](/platform/organizations/teams/roles)
|
||||
- [Customize a Team](/platform/organizations/teams/create-team)
|
||||
- [Transfer Ownership of a Team](/platform/organizations/teams/transfer-ownership)
|
||||
- [Delete a Team](/platform/organizations/teams/delete)
|
||||
|
||||
* [Create a Team](./create-team.md)
|
||||
* [Add People to a Team](./add-people.md)
|
||||
* [Remove People from a Team](./remove-people.md)
|
||||
* [Member Roles and Permissions](./member-roles.md)
|
||||
* [Customize a Team](./customize-team.md)
|
||||
* [Transfer Primary Ownership](./transfer-ownership.md)
|
||||
* [Delete a Team](./delete-team.md)
|
||||
|
||||
## Projects
|
||||
Projects are the workspaces you can create for your Organization.
|
||||
|
||||
- [Creating a Project](/platform/projects/creating-a-project)
|
||||
- [Invite People & Teams](/platform/projects/invite-people)
|
||||
- [Change a Project Member's Role](/platform/projects/change-a-members-role)
|
||||
- [Make Your Project Private/Public](/platform/projects/visibility)
|
||||
Projects are the workspaces you can create for your Organization.
|
||||
|
||||
* [Creating a Project](./create-project.md)
|
||||
* [Invite People & Teams to a Project](./invite-people-team.md)
|
||||
* [Change a Project Member’s Role](./change-member-role.md)
|
||||
* [Make Your Project Private/Public](./visibility.md)
|
||||
|
||||
@@ -1,36 +0,0 @@
|
||||
# Roles & Permissions Overview
|
||||
|
||||
## Organizations
|
||||
|
||||
| **Organization Actions** | **Reader** | **Creator** | **Administrator** | **Owner** |
|
||||
|---------------------------------|:----------:|:-----------:|:-----------------:|:---------:|
|
||||
| Read Public Projects | X | X | X | X |
|
||||
| View Organization Collaborators | | X | X | X |
|
||||
| View Organization Teams | | X | X | X |
|
||||
| Create Projects | | X | X | X |
|
||||
| Read Private Projects | | X | X | X |
|
||||
| Write Projects | | X | X | X |
|
||||
| Manage Collaborators | | | X | X |
|
||||
| Manage Teams | | | X | X |
|
||||
| Manage Organization Settings | | | | X |
|
||||
| Manage Organization Billing | | | | X |
|
||||
| Delete Organization | | | | X |
|
||||
|
||||
## Teams
|
||||
|
||||
| **Team Actions** | **Member** | **Administrator** | **Owner** |
|
||||
|-------------------------|:------------:|:-------------------:|:-----------:|
|
||||
| View Team Collaborators | X | X | X |
|
||||
| Add Team to Projects | X | X | X |
|
||||
| Manage Team Collaborators | | X | X |
|
||||
| Manage Team Settings | | X | X |
|
||||
| Delete Team | | | X |
|
||||
|
||||
## Projects
|
||||
|
||||
| **Project Actions** | **Read** | **Write** | **Administrator** |
|
||||
|------------------------------|:--------:|:---------:|:-----------------:|
|
||||
| Read Project | X | X | X |
|
||||
| Write Project | | X | X |
|
||||
| Manage Project Collaborators | | | X |
|
||||
| Delete Project | | | X |
|
||||
@@ -8,23 +8,22 @@ Stoplight promotes a design-first philosophy. Developing good design-first pract
|
||||
## API Modeling & Design
|
||||
At Stoplight, everything starts with design. Our visual designer makes it easy for anybody in your organization to model and document APIs, no matter the complexity.
|
||||
|
||||
Whether you have an existing OpenAPI Specification (fka Swagger) or are creating a new API design from scratch, we've got you covered.
|
||||
Whether you have an existing OpenAPI (Swagger) or are creating a new API design from scratch, we've got you covered.
|
||||
|
||||

|
||||

|
||||
|
||||
## API Testing
|
||||
Once you have your API design / documentation, how do you make sure that it remains accurate over time? Stoplight contract testing, powered by Prism, makes it seamless to create a full suite of tests that apply your API documentation (your contract) to your API. Run these tests from the Stoplight app, and standalone in your CI process or elsewhere.
|
||||
Once you have your API design / documentation, how do you make sure that it remains accurate over time? Stoplight contract testing, powered by Prism, makes it trivial to create a full suite of tests that apply your API documentation (your contract) to your API. Run these tests from the Stoplight app, and standalone in your CI process or elsewhere.
|
||||
|
||||

|
||||

|
||||
|
||||
## Documentation
|
||||
|
||||
You have your API designed and documented privately in the Stoplight app, and now you want to share all or part of it with 3rd parties (developers, customers, clients, etc). Stoplight makes it easy to publish your documentation to the world, with a single click.
|
||||
|
||||
|
||||

|
||||

|
||||
|
||||
## Mock Server
|
||||
Stoplight provides a complete mock server for every API described in the app. Run tests against this mock server, build consumers (like mobile apps, SDKS, etc) before the final API is ready, and more.
|
||||
|
||||

|
||||
|
||||
@@ -1,10 +1,11 @@
|
||||
# Blocks
|
||||
|
||||

|
||||

|
||||
|
||||
## What
|
||||
Blocks are the micro-level building blocks of Hubs. They house multiple forms of content and allow for simple restructuring and modification.
|
||||
|
||||
<!-- theme: info -->
|
||||
>Hovering over a Block reveals additional tooling including: Preview, Cut, Copy, Reference External Source, and Delete
|
||||
|
||||
## Block Types
|
||||
@@ -22,16 +23,17 @@ Blocks are the micro-level building blocks of Hubs. They house multiple forms of
|
||||
* An upper level block for organizing text within tabs
|
||||
### Callout
|
||||
* A text block with color for emphasis
|
||||
### Hero
|
||||
* A large stylized text block with additional functionality typically found on landing pages
|
||||
### Bar List
|
||||
* A navigational block composed of bars with buttons
|
||||
### Card List
|
||||
* A navigational block composed of cards with text, buttons, and optional images
|
||||
### HTML
|
||||
* Include arbitrary HTML in your hubs when the other base block types don't quite do the trick
|
||||
|
||||
---
|
||||
**Related Articles**
|
||||
- [Documentation with Hubs](/documentation/introduction)
|
||||
- [Routing](/documentation/getting-started/routing)
|
||||
- [Headers](/documentation/getting-started/header-footer)
|
||||
- [Pages](/documentation/getting-started/pages)
|
||||
- [Subpages](/documentation/getting-started/subpages)
|
||||
- [Referencing Other Data Sources](/documentation/referencing-other-data-sources)
|
||||
- [Publishing](/documentation/publishing)
|
||||
|
||||
- [Pages](./pages.md)
|
||||
- [Subpages](./subpages.md)
|
||||
- [Reference Other Sources](./ref-other-sources-hubs.md)
|
||||
|
||||
@@ -1,46 +0,0 @@
|
||||
# Custom CSS
|
||||
|
||||

|
||||
|
||||
## What
|
||||
|
||||
Want to add some style and flair to your documentation? Add your own custom CSS to enhance your Hub’s look and feel. Below are some of the classes you can modify:
|
||||
|
||||
```
|
||||
.Hub
|
||||
.HubHeader
|
||||
.HubHeader-section
|
||||
.HubHeaderItem.is-active
|
||||
.HubHeaderItem-name
|
||||
.HubMain
|
||||
.HubSidebar-overlay
|
||||
.HubSidebar-wrapper
|
||||
.HubSidebar
|
||||
.HubSidebar-inner
|
||||
.HubBranding
|
||||
.HubPage-wrapper
|
||||
.HubPage
|
||||
.HubPage-inner
|
||||
.HubPage-content
|
||||
.HubPageCrumbs
|
||||
.HubPageCrumb
|
||||
.HubPageBody
|
||||
.HubBlock
|
||||
.HubPageFooter
|
||||
```
|
||||
|
||||
## How
|
||||
|
||||
1. Select the Hub you wish to modify
|
||||
2. Select the **Design View**
|
||||
3. Click on **Theme** in the top toolbar
|
||||
4. Select **Custom CSS** in the bottom left
|
||||
5. Input CSS in the text area at the bottom of the page
|
||||
6. Input CSS in the generated **theme** file (optional)
|
||||
7. In publishing, check the **Custom CSS** box under **Advanced** to apply the Custom CSS to that Hub when published
|
||||
|
||||
>After accessing Custom CSS, a **theme** file will be generated under Documentation in the file explorer. After making changes to your CSS, make sure to save the **theme** file.
|
||||
|
||||
---
|
||||
**Related Articles**
|
||||
- [Theming](/documentation/design/theming)
|
||||
@@ -1,31 +0,0 @@
|
||||
# Download Static HTML & CSS
|
||||
|
||||

|
||||
|
||||
> Requires a Pro Docs plan
|
||||
|
||||
## What
|
||||
If you would rather host your documentation outside of Stoplight's hosted servers, you can download a built version of your Hub. Downloading a build will produce a `.zip` containing all of the minified assets necessary to load your Hub. These assets will include HTML, JAvascript, CSS, and JSON files.
|
||||
|
||||
## How to Download
|
||||
1. Click the **Publish** icon on the far left toolbar
|
||||
2. Select or create a **domain**
|
||||
3. Choose a **Hub** or **OAS** file to create a build from
|
||||
4. Click the **Build** button to start the build process.
|
||||
|
||||
> If this is your first build, it will also publish to your selected domain
|
||||
|
||||
5. Once your **Hub** has finished building, it will appear in the **Builds** section. Click the download icon to the right of the build
|
||||
---
|
||||
**Related Articles**
|
||||
- [Documentation with Hubs](/documentation/introduction)
|
||||
- [Routing](/documentation/getting-started/routing)
|
||||
- [Headers](/documentation/getting-started/header-footer)
|
||||
- [Pages](/documentation/getting-started/pages)
|
||||
- [Subpages](/documentation/getting-started/subpages)
|
||||
- [Blocks](/documentation/blocks)
|
||||
- [Referencing Other Data Sources](/documentation/referencing-other-data-sources)
|
||||
- [Publishing](/documentation/publishing)
|
||||
- [Theming](/documentation/design/theming)
|
||||
- [Custom CSS](/documentation/design/custom-css)
|
||||
|
||||
@@ -1,15 +1,12 @@
|
||||
# Documentation with Hubs
|
||||
|
||||

|
||||
|
||||
Documenting your API is critical to its success. The methods of creation and languages and libraries utilized to create APIs differ dramatically across the API landscape. To ensure that consumers of your API are successful, you must provide robust documentation. To that end, Stoplight has created Hubs, our new documentation editor and generator.
|
||||
Documenting your API is critical to its success. The methods of creation and languages and libraries utilized to create APIs differ dramatically across the API landscape. To ensure that consumers of your API can access it, you must provide robust documentation of its services. To that end, Stoplight has created Hubs, our new documentation editor and generator.
|
||||
|
||||
Hubs allows users to:
|
||||
- Expedite the process of documenting your API
|
||||
- Focus on content instead of design
|
||||
- Host documentation anywhere
|
||||
- Connect your API specification to your documentation
|
||||
- Create non-reference documentation, guides, and tutorials
|
||||
|
||||
## Optimized for Speed
|
||||
- Hubs generates static documentation that gives you near instant load times and can be cached in the browser
|
||||
@@ -19,13 +16,13 @@ Hubs allows users to:
|
||||
|
||||
## Ensures Documentation Accuracy
|
||||
|
||||
One of the most common issues we wanted to solve with Hubs was outdated and incorrect documentation. This occurs because most solutions treat documentation as separate from the API design process. This ultimately leads to out of date documentation due to changes in API specifications not being reflected in documentation. Hubs connects your documentation to your API specification. Whenever you make changes to your API spec, it immediately gets pushed to your documentation, so you never have out of date docs again.
|
||||
One of the most common issues we wanted to solve with Hubs was outdated and incorrect documentation. This occurs because most solutions treat documentation as separate from the API design process. This ultimately leads to out of date documentation due to changes in API specifications not being reflected in documentation. Hubs connects your documentation to your API specification. Whenever you make changes to your API spec, it immediately gets pushed to your documentation, never have out of date docs again.
|
||||
|
||||
|
||||
---
|
||||
**Related Articles**
|
||||
- [Routing](/documentation/getting-started/routing)
|
||||
- [Headers](/documentation/getting-started/header-footer)
|
||||
- [Headers & Footers](/documentation/getting-started/header-footer)
|
||||
- [Pages](/documentation/getting-started/pages)
|
||||
- [Subpages](/documentation/getting-started/subpages)
|
||||
- [Blocks](/documentation/blocks)
|
||||
|
||||
@@ -1,50 +1,32 @@
|
||||
|
||||
# Managing Headers
|
||||
# Managing Headers and Footers
|
||||
|
||||

|
||||

|
||||
|
||||
## What
|
||||
You can customize the headers of your Hub to add additional navigation to your documentation. You can modify a header's:
|
||||
You can customize the headers and footers of your Hub to add additional navigation to your documentation. You can modify a header and footer:
|
||||
|
||||
- **Location on Page**
|
||||
- **Location on Page**: Drag and drop along the header and footer to the desired location
|
||||
- **Type**: Page, External Link, Image
|
||||
- **Title**: What text is displayed on page
|
||||
- **Path to Page**: Specify path to page
|
||||
- **Image URL**: If you want to display an image within the header
|
||||
- **Image URL**: If you want to display an image instead of text for the link input image URL
|
||||
|
||||
|
||||
## How
|
||||
|
||||
### Modify Existing Header
|
||||
### Modify Existing Header and Footer
|
||||
|
||||
1. Select the Hub you wish to modify
|
||||
2. Click on the **Design toggle** at the top of the page
|
||||
2. Click on the **Editing toggle**
|
||||
3. By default, there will already be three headers (Home, API Reference, Help) and a footer (Home)
|
||||
4. Hover over **Settings** in the top right and select **Hub**
|
||||
5. Select **Header** in the left had sidebar of the modal
|
||||
6. Input new text under **Title** to modify text
|
||||
7. Input an image URL under **Image** to add an image
|
||||
8. Input a new **Path** to modify the header's destination
|
||||
1. Hover over one of the headers or footers and click on the **gear icon** to modify
|
||||
2. Drag the header or footer to another location to change its location
|
||||
|
||||
> The location of the header is determined by the order of the list in **Settings**. The first header item in either category will be displayed at the left extreme.
|
||||
|
||||
### Create New Header
|
||||
### Create New Header and Footer
|
||||
|
||||
1. Select the Hub you wish to modify
|
||||
2. Click on the **Design toggle** at the top of the page
|
||||
3. By default, there will already be three headers (Home, API Reference, Help) and a footer (Home)
|
||||
4. Hover over **Settings** in the top right and select **Hub**
|
||||
5. Select **Header** in the left had sidebar of the modal
|
||||
6. Click **+ Add** to add a new header in either the left or right navigation
|
||||
7. Input new text under **Title** to modify text
|
||||
8. Input an image URL under **Image** to add an image
|
||||
9. Input a new **Path** to modify the header's destination
|
||||
|
||||
---
|
||||
**Related Articles**
|
||||
- [Documentation with Hubs](/documentation/introduction)
|
||||
- [Routing](/documentation/getting-started/routing)
|
||||
- [Pages](/documentation/getting-started/pages)
|
||||
- [Subpages](/documentation/getting-started/subpages)
|
||||
- [Blocks](/documentation/blocks)
|
||||
- [Referencing Other Data Sources](/documentation/referencing-other-data-sources)
|
||||
- [Publishing](/documentation/publishing)
|
||||
2. Click on the **Editing toggle**
|
||||
3. Hover over the left or right edge of the header or footer
|
||||
1. Click on the **+** button
|
||||
|
||||
@@ -1,56 +0,0 @@
|
||||
# OAuth for Hubs
|
||||
|
||||
## What
|
||||
|
||||
OAuth provides a level of security to your documentation to restrict access to it. If your API is protected by OAuth, you will need to enable it for Try It Out. Enabling OAuth for Try It Out can be accomplished through two different methods: via Modeling or directly into the Hubs code.
|
||||
|
||||
> Stoplight supports OAuth 1.0 and 2.0
|
||||
|
||||
## How
|
||||
|
||||
### Modeling
|
||||
|
||||

|
||||
|
||||
1. Create a new Modeling file or select an existing one referenced by the Hub you wish to modify
|
||||
|
||||
> If you are creating a new Modeling file, make sure to reference it in your Hub
|
||||
|
||||
2. Next to **Security** in the left-middle toolbar, Add a Security Scheme by clicking the **+**
|
||||
3. Input a **key**
|
||||
4. Select oauth2 under **type**
|
||||
5. Select **accessCode** under OAuth **flow**
|
||||
6. Select an **authorization url**
|
||||
7. Select a **token url**
|
||||
8. **Add Scope** (optional)
|
||||
9. Add a **Security scheme description** (optional)
|
||||
|
||||
### Hubs
|
||||
|
||||

|
||||
|
||||
1. Select the Hub you wish to modify
|
||||
2. Select **Code View**
|
||||
3. Add the following lines of code to your Hub:
|
||||
|
||||
```
|
||||
|
||||
"config": {
|
||||
"http": {
|
||||
"oauth2": {
|
||||
"credentials": {
|
||||
"authorize_url": "insert authorize url here",
|
||||
"access_token_url": "insert access token url here",
|
||||
}
|
||||
}
|
||||
}
|
||||
}
|
||||
|
||||
```
|
||||
|
||||
---
|
||||
**Related Articles**
|
||||
|
||||
- [Digital Oceans: Introduction to OAuth2](https://www.digitalocean.com/community/tutorials/an-introduction-to-oauth-2)
|
||||
- [Security Schemes](/modeling/modeling-with-openapi/security-schemes)
|
||||
|
||||
@@ -1,6 +1,6 @@
|
||||
# Pages
|
||||
|
||||

|
||||

|
||||
|
||||
## What
|
||||
Pages are the macro level building blocks of a Hub. They function as the canvas on which all other Hubs objects reside. They are commonly used as a way to separate information based on the broadest topics.
|
||||
@@ -10,7 +10,7 @@ Pages are the macro level building blocks of a Hub. They function as the canvas
|
||||
- Pages
|
||||
- Subpages
|
||||
- Blocks
|
||||
- Header
|
||||
- Header and Footer
|
||||
- Blocks
|
||||
|
||||
## How
|
||||
@@ -18,20 +18,19 @@ Pages are the macro level building blocks of a Hub. They function as the canvas
|
||||
### Create a New Page
|
||||
|
||||
1. Select the Hub you wish to modify
|
||||
2. Click on the **Design** toggle at the top of the page
|
||||
3. Hover over **+ Add** at the top of the page
|
||||
4. Click on **Page**
|
||||
1. Input a **Page Title**
|
||||
2. Click on **Toggle Editor**
|
||||
3. Select **+** Page in the editor toolbar
|
||||
1. Input a **Page Title**
|
||||
2. Input a **Page Route** (optional)
|
||||
3. **Power the Page** with an External Data Source (optional)
|
||||
|
||||
|
||||
<!-- theme: info -->
|
||||
>Did you know? After creating a new page; a header link will automatically be generated
|
||||
|
||||
---
|
||||
**Related Articles**
|
||||
- [Pages](/documentation/getting-started/pages)
|
||||
- [Subpages](/documentation/getting-started/subpages)
|
||||
- [Blocks](/documentation/blocks)
|
||||
|
||||
**Related Articlers**
|
||||
- [Subpages](./subpages.md)
|
||||
- [Blocks](./blocks.md)
|
||||
- [Routing](./routing.md)
|
||||
|
||||
|
||||
|
||||
@@ -1,7 +1,5 @@
|
||||
# Publishing
|
||||
|
||||

|
||||
|
||||
## What
|
||||
|
||||
Publishing your documentation has never been easier. Stoplight has added:
|
||||
@@ -9,6 +7,7 @@ Publishing your documentation has never been easier. Stoplight has added:
|
||||
- New **Authorizations** to make sure your documentation is secure at all times. This includes basic user/password authentication and SSO provider integration, powered by Auth0, SAML, and more.
|
||||
- New **Builds** section for tracking published Hubs, including when a Hub was published, who published it, and under what domain.
|
||||
|
||||
<!-- theme: info -->
|
||||
>Take that Gutenberg!
|
||||
|
||||
## Who
|
||||
@@ -32,12 +31,3 @@ Publishing your documentation has never been easier. Stoplight has added:
|
||||
11. Once a Hub is published, it will appear under **Builds**
|
||||
12. To unpublish a Hub, select **Unpublish** in the **Danger Zone** underneath **Builds**
|
||||
- If you wish to delete all builds and release the domain you are currently using, select **Remove Domain**
|
||||
|
||||
---
|
||||
**Related Articles**
|
||||
- [Documentation with Hubs](/documentation/introduction)
|
||||
- [Routing](/documentation/getting-started/routing)
|
||||
- [Headers](/documentation/getting-started/header-footer)
|
||||
- [Pages](/documentation/getting-started/pages)
|
||||
- [Subpages](/documentation/getting-started/subpages)
|
||||
- [Blocks](/documentation/blocks)
|
||||
|
||||
@@ -1,36 +1,29 @@
|
||||
# Reference Other Sources
|
||||
|
||||

|
||||

|
||||
|
||||
## What
|
||||
Hubs allows you to reference other sources to automatically populate your Hub with content. We call this “powering” a page, subpage, or block. You can power a page, subpage, or block with a markdown or specification file from the current file, a file from the current project, a file from another project, or a file from an external source.
|
||||
Hubs allows you to reference other sources to automatically populate your Hub with content. We call this “powering” a building block. You can power a building block with a file from the current file, a file from the current project, a file from another project, or a file from an external source.
|
||||
|
||||
### What Can I Power
|
||||
|
||||
- Pages
|
||||
- Subpages
|
||||
- Blocks
|
||||
- Text Blocks
|
||||
|
||||
## How
|
||||
|
||||
### Power a Subpage
|
||||
|
||||
1. Select the Hub you wish to modify
|
||||
2. Select **Design** view
|
||||
3. Click on **Page Settings & TOC** at the top of the page
|
||||
1. Select the **page** or **subpage** you wish to power
|
||||
2. Under Page Type, select **Markdown**(for markdown files) or **OpenAPI** (for JSON or YAML files)
|
||||
2. Select (or create a new) **Subpage**
|
||||
3. Click on the **gear icon** in the center of the editor toolbar (If new, this window automatically opens)
|
||||
1. Select **Power this Subpage with an External Data Source**
|
||||
2. Select the data source from the drop-down menu
|
||||
3. Input the specific data source or select from the drop-down menu
|
||||
4. Input an inner data source (optional)
|
||||
4. Click **Confirm**
|
||||
|
||||
<!-- theme: info -->
|
||||
>Try it Out! Power a Subpage with an API Spec from the same project.
|
||||
|
||||
---
|
||||
**Related Articles**
|
||||
- [Documentation with Hubs](/documentation/introduction)
|
||||
- [Routing](/documentation/getting-started/routing)
|
||||
- [Headers & Footers](/documentation/getting-started/header-footer)
|
||||
- [Pages](/documentation/getting-started/pages)
|
||||
- [Subpages](/documentation/getting-started/subpages)
|
||||
- [Blocks](/documentation/blocks)
|
||||
|
||||
@@ -1,18 +1,19 @@
|
||||
|
||||
# Routing
|
||||
|
||||

|
||||

|
||||
|
||||
## What
|
||||
Stoplight’s Hubs features an easy to use routing system to make sure your docs have identifiable and friendly URL’s. The routing system allows customization of the following objects:
|
||||
|
||||
- Your Hub
|
||||
- [Pages within a Hub](/documentation/getting-started/pages)
|
||||
- [Subpages within a Hub](/documentation/getting-started/subpages)
|
||||
- [Headers](/documentation/getting-started/header-footer)
|
||||
- [Pages within a Hub](./pages.md)
|
||||
- [Subpages within a Hub](./subpages.md)
|
||||
- [Headers + Footers](./managing-headers-footers.md)
|
||||
- Links
|
||||
|
||||
|
||||
<!-- theme: info -->
|
||||
>Friendly URLs are links that are easily readable, rememberable, and relevant to the content.
|
||||
|
||||
|
||||
@@ -21,23 +22,22 @@ Stoplight’s Hubs features an easy to use routing system to make sure your docs
|
||||
### Pages & Subpages
|
||||
|
||||
1. Select the **Hub** you wish to modify
|
||||
2. Add a new **page** or **subpage**
|
||||
2. Add a new **page** or **subpage** (link)
|
||||
1. Select a **page title** to auto-fill the **Page Route** or
|
||||
2. Input a **custom page route**
|
||||
3. Select an **existing page** or **subpage**
|
||||
4. Select the **Page Settings & TOC** at the top of the Hub in the center of the page or subpage you wish to modify
|
||||
1. Input a **new URL** under the page path
|
||||
4. Select the **gear icon** at the top of the Hub in the center of the page or subpage you wish to modify
|
||||
1. Input a **new UR**L under Page Route
|
||||
|
||||
### Headers
|
||||
### Headers & Footers
|
||||
|
||||
1. Select the **Hub** you wish to modify
|
||||
2. Click on **Hub Settings** in the top right
|
||||
3. Find the header you wish to modify and input a new route under **Page or Link**
|
||||
|
||||
2. Add a new **header or footer** (link) or
|
||||
3. Hover over an existing header or footer and click the **gear icon**
|
||||
a. Input a **Path to Page** or **image URL**
|
||||
|
||||
---
|
||||
**Related Articles**
|
||||
- [Headers](/documentation/getting-started/header-footer)
|
||||
- [Pages](/documentation/getting-started/pages)
|
||||
- [Subpages](/documentation/getting-started/subpages)
|
||||
|
||||
- [Pages within a Hub](./pages.md)
|
||||
- [Subpages within a Hub](./subpages.md)
|
||||
- [Headers + Footers](./managing-headers-footers.md)
|
||||
|
||||
@@ -1,16 +1,18 @@
|
||||
# Subpages
|
||||
|
||||

|
||||

|
||||
|
||||
## What
|
||||
Subpages are the second tier macro building blocks of Hubs. They function as a canvas for blocks and the backbone of navigation. They are commonly used to house content based on a specific topic. Subpages can have more subpages nested underneath them, which gives you lots of flexibility to organize your Hub as you see fit. If a subpage has subpages nested inside of it, it will be displayed as a collapsible group (if it contains content) or a header (if it does not contain content) in the left navigational sidebar.
|
||||
Subpages are the second tier macro building blocks of Hubs. They function as a canvas for blocks. They are commonly used to house content based on a specific topic. Subpages can have more subpages nested underneath them, which gives you lots of flexibility to organize your Hub as you see fit. If a subpage has subpages nested inside of it, it will be displayed as a collapsible group in the left sidebar.
|
||||
|
||||
<!-- theme: info -->
|
||||
>Subpages populate the navigational sidebar of a page.
|
||||
|
||||
### Hubs Architecture Top Down
|
||||
- Pages
|
||||
- Subpages
|
||||
- Blocks
|
||||
- Header and Footer
|
||||
- Blocks
|
||||
|
||||
## How
|
||||
@@ -18,18 +20,19 @@ Subpages are the second tier macro building blocks of Hubs. They function as a c
|
||||
### Create a New Subpage
|
||||
|
||||
1. Select the Hub you wish to modify
|
||||
2. Select the **design** view
|
||||
3. Hover over **+ Add** and select **Subpage**
|
||||
2. Click on **Toggle Editor**
|
||||
3. Select **+ Subpage** in the editor toolbar
|
||||
1. Input a **Subpage Name**
|
||||
2. Modify the **Subpage Route** (optional)
|
||||
3. **Power the Subpage** with an External Data Source (optional)
|
||||
|
||||
3. Give the Subpage a **Sidebar Token** (optional)
|
||||
4. **Power the Subpage** with an External Data Source (optional)
|
||||
|
||||
<!-- theme: info -->
|
||||
>Just like pages, subpages can have blocks. Any blocks added to a subpage will be displayed when a reader navigates to that subpage in your Hub
|
||||
|
||||
---
|
||||
**Related Articles**
|
||||
- [Routing](/documentation/getting-started/routing)
|
||||
- [Headers](/documentation/getting-started/header-footer)
|
||||
- [Pages](/documentation/getting-started/pages)
|
||||
- [Publishing](/documentation/publishing)
|
||||
- [Pages](./pages.md)
|
||||
- [Headers & Footers](./managing-headers-footers.md)
|
||||
- [Routing](./routing.md)
|
||||
- [Publishing](./publishing.md)
|
||||
|
||||
@@ -1,33 +1 @@
|
||||
# Theming
|
||||
|
||||

|
||||
|
||||
## What
|
||||
|
||||
Theming brings your API documentation to life. It allows you to easily modify color schemes and add textures to your documentation. There are four different theme settings that can be modified: Primary Color, Secondary Color, Background, and Texture.
|
||||
|
||||
### Primary Color
|
||||
Primary Color applies any color to primary actions and appears only once per page. It modifies objects that you want to draw attention to like buttons.
|
||||
|
||||
### Secondary Color
|
||||
Secondary Color applies any color to other secondary actions. This includes links and active items.
|
||||
|
||||
### Background
|
||||
Background Color applies any color to your header.
|
||||
|
||||
### Texture
|
||||
Texture applies a texture to your header.
|
||||
|
||||
## How
|
||||
1. Select the **Hub** you wish to modify
|
||||
2. Select the **Design View**
|
||||
3. Click on **Theme** at the top of the screen
|
||||
4. Select a pre-selected color or choose your own color with the eyedropper
|
||||
5. Select a texture
|
||||
|
||||
---
|
||||
|
||||
**Related Links**
|
||||
- [Custom CSS](/documentation/design/custom-css)
|
||||
|
||||
|
||||
|
||||
@@ -1,40 +0,0 @@
|
||||
# Variables in Hubs
|
||||
|
||||
## What
|
||||
|
||||
Inputting variables in API documentation whenever you consume them can quickly become a tedious time sink. The same pain point applies to people consuming your documentation. Inputting an API key everytime you want to send HTTP Requests to test endpoints is time better spent elsewhere. Stoplight removes this obstacle by storing variables in your local browser. Once you input a variable, it populates the rest of your docs, no duplication, no problems.
|
||||
|
||||
## How
|
||||
|
||||
You can specify variables in your docs by adding them at the specification level or directly into Hubs.
|
||||
|
||||
### Modeling Method
|
||||
|
||||

|
||||
|
||||
1. Select the modeling file you wish to modify
|
||||
2. Create a new **security scheme**
|
||||
1. Input a **key** (required, must be unique in this specification)
|
||||
2. Select a **type** of security scheme
|
||||
3. Select a location for the security scheme under **in**
|
||||
4. Input a **name**
|
||||
3. Reference the specification in your Hub
|
||||
|
||||
---
|
||||
|
||||
### Hubs Method
|
||||
|
||||

|
||||
|
||||
1. Select the Hub you wish to modify
|
||||
2. Create a **HTTP Request Maker** block
|
||||
3. Select the **Headers** tab
|
||||
4. Click **Add Header**
|
||||
5. Input a **header name**
|
||||
6. Input a **header value**
|
||||
|
||||
***
|
||||
|
||||
**Related**
|
||||
|
||||
* [Security Schemes Overview](/modeling/modeling-with-openapi/security-schemes)
|
||||
@@ -1,7 +1,5 @@
|
||||
# API Models
|
||||
|
||||

|
||||
|
||||
Models are used to describe common structures in your API design. Use models to
|
||||
describe common structures in your API design. Models help reduce duplication in
|
||||
your API definitions, and increase future maintainability.
|
||||
|
||||
@@ -26,7 +26,7 @@ shared responses.
|
||||
|
||||
## Using the Editor
|
||||
|
||||
|
||||
<!-- FIXME: Insert GIF of using the editor, creating objects, setting their type, etc -->
|
||||
|
||||
We created the CRUD builder editor to make data structure creation as simple as
|
||||
possible. You can find the CRUD builder editor under the **Editor** tab under
|
||||
@@ -87,7 +87,7 @@ If you have a pre-existing JSON document that you would like to convert to a
|
||||
Stoplight data structure, the **Generate from JSON** button available towards
|
||||
the top of the CRUD editor allows you to do just that.
|
||||
|
||||
|
||||
<!-- FIXME: Insert GIF of the generate from json feature -->
|
||||
|
||||
To start:
|
||||
|
||||
@@ -107,7 +107,7 @@ bodies, and shared responses.
|
||||
|
||||
## Editing the Raw JSON Schema
|
||||
|
||||
|
||||
<!-- FIXME: Insert GIF of clicking the 'raw schema' button and editing the json -->
|
||||
|
||||
While not for the faint hearted, you can also edit the raw JSON schema directly
|
||||
if you are familiar with the format, or have a pre-existing JSON schema
|
||||
|
||||
@@ -1,16 +0,0 @@
|
||||
# Grouping & Tagging Endpoints in OpenAPI
|
||||
|
||||

|
||||
|
||||
## What
|
||||
|
||||
Use tags to group API endpoints and provide an additional layer of organization in your OpenAPI files. When rendering your OpenAPI in read view, Stoplight will group API endpoints by their first tag.
|
||||
|
||||
## How
|
||||
|
||||
1. Click **Tag** in the top Modeling toolbar
|
||||
2. Input a **Name**
|
||||
3. Input a **Tag description** (optional)
|
||||
4. Select the endpoint you want to tag
|
||||
5. Open the **tags** dropdown, and select the tag that you just created
|
||||
6. Switch to read view and you should see the endpoint grouped under that tag in the sidebar
|
||||
@@ -60,26 +60,26 @@ A design first approach helps create neat and consistent models. It will take lo
|
||||
|
||||
6. To create a model click on the + sign next to the Model section.
|
||||
|
||||

|
||||

|
||||
|
||||
7. Enter the details for the key, title, and description fields
|
||||
|
||||

|
||||

|
||||
|
||||
8. Click on the Editor Tab to create the object and specify the properties you want in the model (You can also copy and paste the JSON Schema from an endpoint into the Raw Schema section of the model)
|
||||
|
||||

|
||||

|
||||
|
||||

|
||||

|
||||
|
||||
9. Click the Save button to save the changes you have made in the editor
|
||||
10. Select the GET /pets {petid} (or any endpoint) and navigate to Responses→ Editor
|
||||
11. To reference the model in your endpoint, click on the object and select $ref as the array item type. Select the model you created from the drop down list
|
||||
|
||||

|
||||

|
||||
|
||||
12. Select the Viewer section to see the changes you have made
|
||||
|
||||

|
||||

|
||||
|
||||
13. All changes made to the properties of the object in the model are now automatically updated in all endpoints that make a reference to the model
|
||||
|
||||
@@ -40,10 +40,10 @@ There are many benefits to using JSON, some of which include:
|
||||
|
||||
* It is a subset of another syntax called
|
||||
[YAML](https://en.wikipedia.org/wiki/YAML). Documents written in JSON can also
|
||||
be written in YAML, so either format can be used to write OpenAPI specifications
|
||||
be written in YAML, so either format can be used to write OpenAPI documents
|
||||
|
||||
* It can be used to link files together through [JSON
|
||||
references](/modeling/modeling-with-openapi/referencing-another-api-spec), making it easy to break up large documents
|
||||
references](/modeling/introduction/modeling-with-openapi/referencing-another-api-spec), making it easy to break up large documents
|
||||
into smaller, more focused documents
|
||||
|
||||
Whether you are modeling an API, creating a Prism Collection, or writing
|
||||
|
||||
@@ -1,14 +1,12 @@
|
||||
# Modeling Introduction
|
||||
|
||||

|
||||
|
||||
## What is API Design?
|
||||
|
||||
Designing (also known as Modeling) your API involves describing all of the inputs and outputs across the footprint of your entire service. Your API design will answer questions like:
|
||||
|
||||
- What are the different resources and operations available in your API?
|
||||
- How does your API authenticate requests?
|
||||
- What are the different data models associated with your service?
|
||||
- What are the different data models assoicated with your service?
|
||||
- How does your API handle errors?
|
||||
|
||||
## How does it fit into Stoplight?
|
||||
@@ -17,17 +15,16 @@ The Stoplight design module is where you and your team will maintain the single
|
||||
|
||||
Once you have your API described in the Stoplight design module, you can:
|
||||
|
||||
- Publish all or part of your API with Hubs
|
||||
- Publish all or part of your API in our Documentation service
|
||||
- Create API tests from your designs
|
||||
- Send requests to your API to debug it
|
||||
- Create a mock API based on your design
|
||||
- ...and much more
|
||||
|
||||
## Getting Started
|
||||
|
||||
There are a few ways to get started designing your API with the Stoplight design module:
|
||||
There are a few ways to get started designing your API with the Stoplight design module, depending on how developed your API is:
|
||||
|
||||
- Create an API from scratch [Using the CRUD Builder](/modeling/modeling-with-openapi/using-the-crud-builder)
|
||||
- [Reference another API Spec](/modeling/modeling-with-openapi/referencing-another-api-spec)
|
||||
- [Send HTTP Requests](/modeling/modeling-with-openapi/sending-http-requests) to an existing API Spec
|
||||
- [Validate your API Spec](/modeling/modeling-with-openapi/validating-your-api-spec)
|
||||
- [Validate your API Spec](/modeling/modeling-with-openapi/validating-your-api-sec)
|
||||
|
||||
@@ -42,10 +42,6 @@ different types of vehicles. To begin working on the API, you will need a base
|
||||
"car" model with a few attributes that are common across all vehicles. This
|
||||
might look similar to:
|
||||
|
||||
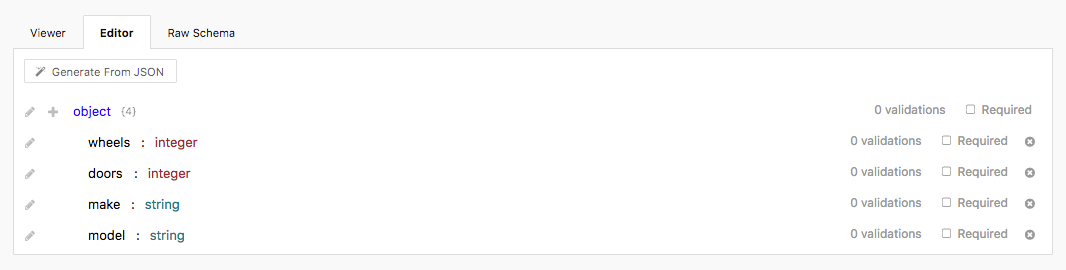
|
||||
|
||||
The JSON schema will be:
|
||||
|
||||
```javascript
|
||||
// the car base type
|
||||
{
|
||||
@@ -71,14 +67,12 @@ The JSON schema will be:
|
||||
}
|
||||
```
|
||||
|
||||
<!--FIXME Insert image of creating model from UI -->
|
||||
|
||||
Now that we have a base type model, we now need a derived type that extends the
|
||||
base type. Since we're dealing with cars, let's create a model that defines a
|
||||
SUV type (or a Sport Utility Vehicle):
|
||||
|
||||
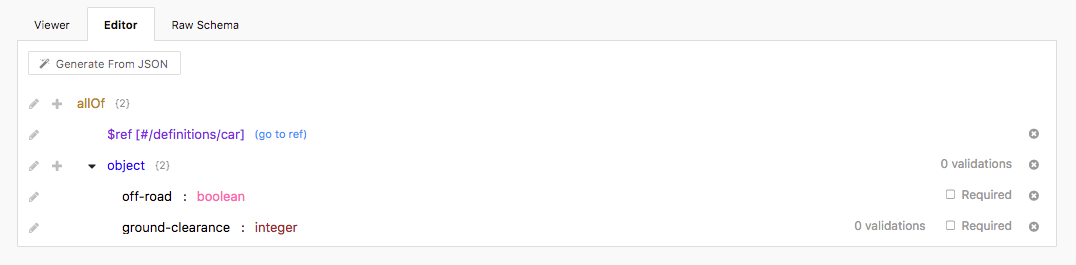
|
||||
|
||||
The JSON schema will be:
|
||||
|
||||
```javascript
|
||||
// the SUV model
|
||||
{
|
||||
@@ -105,6 +99,8 @@ The JSON schema will be:
|
||||
}
|
||||
```
|
||||
|
||||
<!--FIXME Insert image of creating derived model in UI -->
|
||||
|
||||
As shown above, by wrapping our SUV model inside of an `allOf` block, we are
|
||||
able to include all of the properties that are included in the car base model
|
||||
above.
|
||||
@@ -112,10 +108,6 @@ above.
|
||||
When fully de-referenced (the car reference is replaced with the car
|
||||
properties), the derived SUV model will have the following JSON properties:
|
||||
|
||||
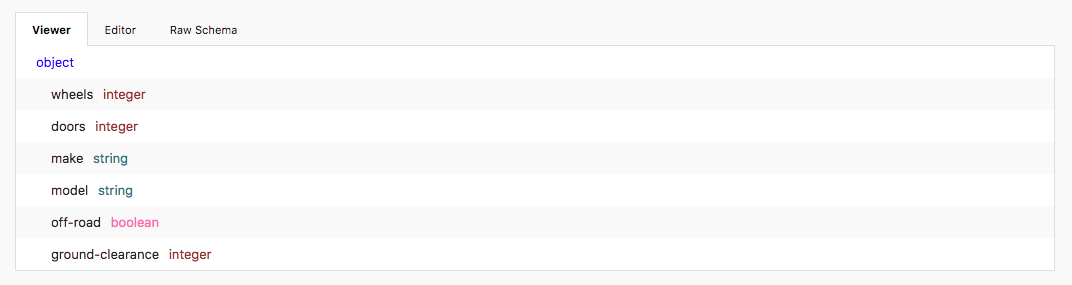
|
||||
|
||||
The JSON schema will be:
|
||||
|
||||
```javascript
|
||||
{
|
||||
"type": "object",
|
||||
@@ -147,12 +139,9 @@ The JSON schema will be:
|
||||
}
|
||||
}
|
||||
```
|
||||
|
||||
---
|
||||
|
||||
**Related Articles**
|
||||
|
||||
* [JSON Introduction](/modeling/json-best-practices/introduction)
|
||||
* [Adding Validations](/modeling/json-best-practices/adding-validations)
|
||||
* [Reducing Duplication with $refs](/modeling/json-best-practices/reducing-duplication-with-refs)
|
||||
* [Generating Schemas](/modeling/json-best-practices/generating-schemas)
|
||||
**Related Articles**
|
||||
- [JSON Introduction](/modeling/json-best-practices/introduction)
|
||||
- [Adding Validations](/modeling/json-best-practices/adding-validations)
|
||||
- [Reducing Duplication with $refs](/modeling/json-best-practices/reducing-duplication-with-refs)
|
||||
- [Generating Schemas](/modeling/json-best-practices/generating-schemas)
|
||||
|
||||
@@ -1,6 +1,6 @@
|
||||
# OpenAPI Validation
|
||||
|
||||

|
||||

|
||||
|
||||
## What
|
||||
OpenAPI validation is the process of verifying the underlying OpenAPI file syntax by making sure it conforms to the [OpenAPI Specification requirements](https://github.com/OAI/OpenAPI-Specification#the-openapi-specification) provided by the [OpenAPI Initiative](https://www.openapis.org/). Stoplight immediately validates any changes done to a spec to ensure they are in the correct format prior to being saved.
|
||||
|
||||
@@ -1,13 +1,13 @@
|
||||
# Referencing Another API Specification
|
||||
|
||||

|
||||
<!-- REFBUILDER GIF/VIDEO-->
|
||||
|
||||
## What
|
||||
|
||||
Referencing another specification allows for cleaner and more organized code. Some use cases are as follows:
|
||||
|
||||
* Generate API documentaion in Hubs
|
||||
* De-duplicate common structures like responses or shared parameters in Modeling
|
||||
* Deduplicate common structures like responses or shared parameters in Modeling
|
||||
* Test a connected API specification in Scenarios
|
||||
* Setup a mock server for an API in Prism
|
||||
|
||||
|
||||
@@ -15,7 +15,7 @@ started, the section below outlines some common schemes in use.
|
||||
* Should not be used without SSL, or some other data-in-transit encryption mechanism
|
||||
* Can easily be combined with other security methods
|
||||
|
||||
> **Note**: basic authentication is susceptible to hijacks and man-in-the-middle
|
||||
> **Note**, basic authentication is susceptible to hijacks and man-in-the-middle
|
||||
> attacks when no encryption is in use. Due to this limitation, this method of
|
||||
> authentication is only recommended when paired with SSL.
|
||||
|
||||
@@ -89,4 +89,4 @@ identify potential security risks.
|
||||
**Related**
|
||||
|
||||
* [Additional Information on HTTP Status and Error Codes](https://en.wikipedia.org/wiki/List_of_HTTP_status_codes)
|
||||
* [API Operations](/modeling/modeling-with-openapi/api-operations)
|
||||
* [API Operations](/modeling/introduction/modeling-with-openapi/api-operations)
|
||||
|
||||
@@ -1,6 +1,6 @@
|
||||
# Sending HTTP Requests
|
||||
|
||||

|
||||
<!---Gif of simple request plus extending spec--->
|
||||
|
||||
## What
|
||||
|
||||
@@ -31,5 +31,4 @@ Use the HTTP Request Maker to send requests to the endpoints defined in your spe
|
||||
|
||||
---
|
||||
**Related Articles**
|
||||
|
||||
- [Using Environment Variables](/testing/using-variables/environment)
|
||||
[Using Environment Variables](./variables-environment.md)
|
||||
|
||||
@@ -21,7 +21,7 @@ Shared components in Stoplight come in two forms:
|
||||
Shared parameters provide a way to use request properties across multiple API
|
||||
endpoints without having to duplicate effort.
|
||||
|
||||

|
||||

|
||||
|
||||
Shared parameters are supported in the following request property locations:
|
||||
|
||||
@@ -31,13 +31,14 @@ Shared parameters are supported in the following request property locations:
|
||||
* __body__ - The request HTTP message body
|
||||
* __form-data__ - The request HTTP message body in the `multipart/form-data` format
|
||||
|
||||
<!-- theme: info -->
|
||||
> For more information the above properties, see the [OpenAPI v2 Specification](https://github.com/OAI/OpenAPI-Specification/blob/master/versions/2.0.md#parameter-object)
|
||||
|
||||
Similar to generic request parameters, restrictions on the parameter values can
|
||||
also be applied based on type, expected default value, minimum/maximum length,
|
||||
and regular expression (regex).
|
||||
|
||||

|
||||

|
||||
|
||||
To use a shared parameter, navigate to an API endpoint's _Request_ section and
|
||||
create a reference to the shared parameter using the "chain" button as shown in
|
||||
@@ -45,7 +46,7 @@ the image above. Once the parameter has been referenced, any updates to the
|
||||
shared parameter will automatically be propagated to every endpoint using that
|
||||
parameter.
|
||||
|
||||

|
||||

|
||||
|
||||
Like other references in Stoplight, shared parameters can also be shared across
|
||||
files, projects, and other external sources.
|
||||
@@ -94,7 +95,7 @@ Now that we know how we want the components to behave, let's create them in
|
||||
Stoplight. To get started, create a new shared parameter for an OpenAPI file
|
||||
under the "Shared" section of the menu.
|
||||
|
||||

|
||||

|
||||
|
||||
As shown in the image above, set the properties for each parameter based on our
|
||||
requirements:
|
||||
@@ -113,7 +114,7 @@ requirements:
|
||||
each parameter for every request. For our example, it makes sense to set
|
||||
defaults that will return the first page (limit of 20, offset of 0).
|
||||
|
||||

|
||||

|
||||
|
||||
Once the shared parameters are created, reference them in any API endpoint under the
|
||||
__Query Parameters__ block of the request section in the editor.
|
||||
@@ -128,7 +129,7 @@ benefit of this approach is that updates to the shared response object are
|
||||
automatically propagated to any endpoint using that object, no extra changes
|
||||
required.
|
||||
|
||||

|
||||

|
||||
|
||||
Shared responses allow you to configure the following properties:
|
||||
|
||||
@@ -136,11 +137,11 @@ Shared responses allow you to configure the following properties:
|
||||
* Response body - Customize the HTTP message body contents using the Stoplight
|
||||
modeling tool (or reference a pre-existing model)
|
||||
|
||||
|
||||
<!-- theme: info -->
|
||||
> For more information on the above properties, see the OpenAPI v2 Specification
|
||||
[here](https://github.com/OAI/OpenAPI-Specification/blob/master/versions/2.0.md#responseObject)
|
||||
|
||||

|
||||

|
||||
|
||||
To use a shared response, navigate to an API endpoint's __Response__ section and
|
||||
create a reference to the shared response by choosing the _Type_ of the response
|
||||
@@ -165,7 +166,7 @@ Now that we know what should be returned, let's create a shared response in
|
||||
Stoplight. To get started, create a new shared response for an OpenAPI file
|
||||
under the "Shared" section of the menu.
|
||||
|
||||

|
||||

|
||||
|
||||
As shown in the image above, set the properties for each portion of the response
|
||||
based on our requirements:
|
||||
@@ -179,7 +180,7 @@ based on our requirements:
|
||||
3. The contents of the shared response object based on the three required
|
||||
properties above.
|
||||
|
||||

|
||||

|
||||
|
||||
Once the shared response is created, it can be referenced in any API endpoint by
|
||||
using a _Reference_ type under a response. A shared response can also be used
|
||||
|
||||
@@ -1,10 +1,13 @@
|
||||
# Create An Organization
|
||||
|
||||

|
||||

|
||||
|
||||
## What
|
||||
Organizations are great for grouping people, data, and billing together in one convenient location.
|
||||
|
||||
## Who
|
||||
* Only the Billing **Owner** or Organization **Administrators** can create Organizations
|
||||
|
||||
## How
|
||||
1. Click on **+ New** to the right of Organizations
|
||||
2. Fill in **Name**
|
||||
|
||||
@@ -1,6 +1,6 @@
|
||||
# Customize Your Organization
|
||||
|
||||

|
||||

|
||||
|
||||
## What
|
||||
|
||||
|
||||
@@ -1,6 +1,6 @@
|
||||
# Delete an Organization
|
||||
|
||||

|
||||

|
||||
|
||||
## What
|
||||
|
||||
|
||||
@@ -1,16 +1,14 @@
|
||||
# Invite People to an Organization
|
||||
|
||||

|
||||

|
||||
|
||||
## What
|
||||
Adding people to your Organization is the first step towards collaboration within Stoplight. There are two methods of inviting people to your Organization: inputting email addresses or by generating Magic Links. Inputting email addresses send invitations directly to that person's email. Magic Links allow you to invite people via a simple link.
|
||||
Adding people to your Organization is the first step towards collaboration within Stoplight.
|
||||
|
||||
## Who
|
||||
* Only an Organization **Owner** or **Administrator** can invite people to an Organization
|
||||
|
||||
## How
|
||||
|
||||
### Inviting via Email Addresses
|
||||
1. From the Stoplight homepage, select the **Organization** you would like to invite people to
|
||||
2. Select the **People** tab from the tabs bar
|
||||
3. Click **Invite Member**
|
||||
@@ -18,24 +16,6 @@ Adding people to your Organization is the first step towards collaboration withi
|
||||
5. Hit **enter** to add them to your list
|
||||
6. Once completed, click the **Invite** button
|
||||
|
||||
### Magic Link
|
||||
|
||||
> Magic Link grants either Creator or Reader Permissions. Set accordingly
|
||||
|
||||
#### Generating and Sending Magic Link
|
||||
1. Select the **Organization** you wish to invite people to
|
||||
2. Select the **People** tab
|
||||
3. Click **Invite Member**
|
||||
4. Select a role, either **Creator** or **Reader**
|
||||
5. Click **Generate Link**
|
||||
6. Send link to invitee
|
||||
|
||||
#### Accepting Magic Link
|
||||
1. Click on the **magic link**
|
||||
2. If new to Stoplight, click **Register**
|
||||
3. If you already have an account, **Login**
|
||||
4. You now have Creator or Reader access to that Organization
|
||||
|
||||
---
|
||||
**Related Articles**
|
||||
- [Invite People & Teams](/platform/projects/invite-people)
|
||||
|
||||
@@ -1,6 +1,6 @@
|
||||
# Remove People from Your Organization
|
||||
|
||||

|
||||

|
||||
|
||||
## What
|
||||
* Removing a person for your organization is as easy as 123...4...5...6
|
||||
|
||||
@@ -1,6 +1,6 @@
|
||||
# Organization Member Roles and Permissions
|
||||
|
||||

|
||||

|
||||
|
||||
## What
|
||||
Roles and Permissions for members of Organizations can be managed and modified within Stoplight to control access to the Organization's functions and features.
|
||||
@@ -10,8 +10,8 @@ Roles and Permissions for members of Organizations can be managed and modified w
|
||||
* Has access to Billing and Organization Settings
|
||||
* **Administrator**
|
||||
* Admins can update the org, its connections, and its members
|
||||
* **Creator**
|
||||
* Creators can update the org and its connections. They can view its members
|
||||
* **Member**
|
||||
* Members can update the org and its connections. They can view its members
|
||||
|
||||
## Who
|
||||
* Only an Organization **Owner** or **Administrator** can modify roles and permissions
|
||||
|
||||
@@ -1,6 +1,6 @@
|
||||
# Transfer Primary Ownership of Your Organization
|
||||
|
||||

|
||||

|
||||
|
||||
## What
|
||||
You can promote another Member of your Organization to the role of Owner
|
||||
|
||||
@@ -1,43 +0,0 @@
|
||||
# Technical Writer Playbook
|
||||
|
||||
Documenting an API is crucial to its success but can be extremely time consuming. Here at Stoplight, we believe documentation should be beautiful, clean, and robust while maintaining a streamlined turnaround time. We’ve created a holistic documentation tool, Hubs, to address some of the problems our users were facing including:
|
||||
|
||||
- Documenting Endpoints
|
||||
- Testing Endpoints
|
||||
- Creating Non-Reference Documentation
|
||||
- Managing Content
|
||||
- External and Internal Referencing
|
||||
- Design and Style
|
||||
|
||||
|
||||
## Documenting Endpoints
|
||||
The most key component to API Documentation are its endpoints. To that end, we created a reference builder that allows you to [“power pages”](/documentation/referencing-other-data-sources) with your specification as you see fit. When you power a page or subpage with your specification, the endpoints are automatically documented and styled for legibility and aesthetic design.
|
||||
|
||||
## Testing Endpoints
|
||||
Testing endpoints is a valuable tool for anyone who wants to consume your API. Users want to know that your API functions properly before they commit to using it. To address this problem, we created [“Try it Out,” an HTTP Request Maker](/modeling/modeling-with-openapi/sending-http-requests). Try it Out allows you to send HTTP Requests to your API to test out its endpoints under any number of different conditions. You can customize Try it Out with security schemes, variables, headers, queries, and it even generates code in various programming languages.
|
||||
|
||||
## Creating Non-Reference Documentation
|
||||
Great documentation is more than just API endpoints. Guides, tutorials, and other supplemental information enhance your users experience by providing them with all the information they need to access your API and your product. We broadened Hubs scope to accomodate all product documentation needs. You can easily build out your content within [Blocks](/documentation/blocks), a number of flexible content structures that can house a number of different forms of content including markdown, images, code snippets, and much more.
|
||||
|
||||
## Managing Content
|
||||
Organizing a complex APIs endpoints and supplemental information can be a challenging task. Some specification can have hundreds of endpoints with supplemental information throughout. To assist with organizing content, we created an overview of all your pages, subpages, and their connections called “Table of Contents”. With a bird’s eye view of your content, you can easily organize and manage your content through drag drop functionality.
|
||||
|
||||
## External and Internal Referencing
|
||||
To accomodate a larger variety of writing workflows, we expanded the capabilities of [Powering a Page](/documentation/referencing-other-data-sources) to allow for more files internally and externally to be referenced. You can now easily reference internal or external specifications, and Markdown, YAML, JSON, and Scenario files.
|
||||
|
||||
## Design and Style
|
||||
We wanted to create a new, beautiful, minimalistic, efficient design for less design-oriented individuals while allowing for customization. Hubs was designed to display your documentation in a neat, efficient structure, designed specifically for displaying the real beauty, your API. On the other hand, we didn’t want to stifle the creativity that goes into documentation design so we added in [theming](/documentation/design/theming) and [custom CSS](/documentation/design/custom-css). We also made it easier to add navigation, different kinds of content, and a more robust search.
|
||||
|
||||
---
|
||||
**Related Links**
|
||||
- [Documentation with Hubs](/documentation/introduction)
|
||||
- [Routing](/documentation/getting-started/routing)
|
||||
- [Headers](/documentation/getting-started/header-footer)
|
||||
- [Pages](/documentation/getting-started/pages)
|
||||
- [Subpages](/documentation/getting-started/subpages)
|
||||
- [Blocks](/documentation/blocks)
|
||||
- [Referencing Other Data Sources](/documentation/referencing-other-data-sources)
|
||||
- [Publishing](/documentation/publishing)
|
||||
- [Theming](/documentation/design/theming)
|
||||
- [Custom CSS](/documentation/design/custom-css)
|
||||
|
||||
0
articles/playbooks/writers.md
Normal file
0
articles/playbooks/writers.md
Normal file
@@ -1,59 +0,0 @@
|
||||
# Introduction
|
||||
|
||||
Prism is a proxy and API server toolkit that helps you test, mock, validate, and orchestrate your online applications. We rebuilt Prism from the ground up to be performant, powerful, and programmable while still being practical. Prism enables teams to work in parallel and iterate faster with less errors. The Stoplight Platform integrates tightly with Prism to generate test coverage of your API automatically, build tests visually, and create mock and contract servers instantly.
|
||||
|
||||
Prism has first class support for the OpenAPI Specification (aka OAS) and Stoplight Scenarios. OAS is machine readable documentation of your API that Prism can read and understand. Scenarios tell Prism how to orchestrate your API. When you use them together you can easily assert, transform, and validate your API against your OAS. Prism also allows your front-end team to work in tandem with your back-end team. While the back-end team implements your API, your front-end teams can implement against a mock server that can return static examples, dynamic data, or replay actual traffic from your API.
|
||||
|
||||

|
||||
|
||||
## Features
|
||||
|
||||
* Act as a mock server, routing incoming requests to example responses, or dynamically generating examples on the fly
|
||||
* Act as a transformation layer, manipulating incoming requests and outgoing responses
|
||||
* Act as a validation layer, validating incoming requests, and outgoing responses
|
||||
* Contract test your APIs
|
||||
* Extend existing APIs with new endpoints or capabilities
|
||||
* Act as a system-wide proxy, blocking traffic to particular websites or endpoints
|
||||
|
||||
## Conduct vs Serve
|
||||
|
||||
Conduct and Serve are important concepts to understand when using Prism.
|
||||
|
||||
* Conduct is an isolated scenario run. You tell Prism what scenarios you want to run, give it an environment to run against, and Prism will generate a report of the run
|
||||
|
||||
* Serving, on the other hand, is a long running instance of Prism that applies scenarios to HTTP traffic
|
||||
|
||||
### Conduct Use Cases
|
||||
|
||||
1. Debugging your API implementation or specification
|
||||
2. Integrating with your CI/CD Environment: Catch bugs before they get to your actual API Consumers
|
||||
3. Webhooks: Generate your OAS from code, automatically upload it to Stoplight
|
||||
|
||||

|
||||
|
||||
### Serve Use Cases
|
||||
|
||||
1. Mocking back one or more specifications: Useful to help teams work in parallel and simplify testing dependencies.
|
||||
2. Validating live traffic between your client/backend.
|
||||
3. Your API, your workflow, your Prism. Prism is very flexible. You can easily create an instance that will record your API traffic, save it to S3, and then create another instance that will replay that API traffic.
|
||||
|
||||

|
||||
|
||||
### Stoplight Prism Helpers
|
||||
|
||||
The [Prism Helpers](https://next.stoplight.io/stoplight/prism) project is a collection of scenarios, specifications, and Prism instances that illustrate how to use Prism effectively. Please go [here](https://community.stoplight.io) and let us know what you would like to see.
|
||||
|
||||
---
|
||||
|
||||
**Related Articles**
|
||||
|
||||
* [Javascript Runtime](/mocking/javascript-runtime)
|
||||
* [Running Tests In Stoplight](/testing/running-tests/in-stoplight)
|
||||
* [Running Tests in the Terminal](/testing/running-tests/in-the-terminal)
|
||||
* [Running Tests Triggered by URL](/testing/running-tests/triggering-by-url)
|
||||
* [Using Variables Overview](/testing/using-variables/overview)
|
||||
* [$$.env (Environment)](/testing/using-variables/environment)
|
||||
* [$.ctx(Context)](/testing/using-variables/context)
|
||||
* [Sending HTTP Requests](/testing/sending-http-requests/overview)
|
||||
* [Contract Testing](/testing/leveraging-openapi/contract-testing)
|
||||
* [Integrating in Continuous Integration](/testing/continuous-integration/overview)
|
||||
62
articles/prism/overview.md
Normal file
62
articles/prism/overview.md
Normal file
@@ -0,0 +1,62 @@
|
||||
# Prism Introduction
|
||||
|
||||
Prism is a performant, dependency free server, built specifically to work with web APIs.
|
||||
|
||||
### Features
|
||||
- Act as a mock server, routing incoming requests to example repsonses, or dynamically generating examples on the fly.
|
||||
- Act as a transformation layer, manipulating incoming requests and outgoing responses.
|
||||
- Act as a validation layer, validating incoming requests and outgoing responses.
|
||||
- Contract test your APIs, given an OAS(Swagger 2) file.
|
||||
- Log all or a subset of traffic to configurable locations.
|
||||
- Extend existing APIs with new endpoints or capabilites.
|
||||
- Act as a system-wide proxy, blocking traffic to particular websites or endpoints.
|
||||
|
||||
### Simplicity Redefined
|
||||
Run it anywhere. It runs on OS X, Windows, and Linux, with no external dependencies. It is a single, self-contained binary file, that you can easily run from your terminal with a single command.
|
||||
|
||||
## Getting Started
|
||||
|
||||
#### macOS and Linux
|
||||
|
||||
```# Install Prism
|
||||
curl https://raw.githubusercontent.com/stoplightio/prism/master.install.sh | sh
|
||||
```
|
||||
|
||||
#### Windows
|
||||
Download the appropriate binary from [here](https://github.com/stoplightio/prism/releases). Unzip the binary file, then navigate in your terminal to the folder where you extracted Prism.
|
||||
|
||||
### Run a Simple Mock Server
|
||||
Prism understands OAS(Swagger 2), so let's get started by spinning up a quick mock server for the popular Petstore API. To do this, run the following command in your terminal:
|
||||
|
||||
```# os x / linux
|
||||
prism run --mock --list --spec http://petstore.swagger.io/v2/swagger.json
|
||||
|
||||
# windows
|
||||
path/to/prism.exe run --mock --list --spec http://petstore.swagger.io/v2/swagger.json
|
||||
```
|
||||
|
||||
Here, you are using the "run" command to run a server based on the spec file passed in via the --spec argument. The spec location can be the filepath to a file on your computer, or the URL to a publicly hosted file. The --mock argument tells Prism to mock all incoming requests, instead of forwarding them to the API host described in the spec file. The --list argument is a convenience, and tells Prism to print out the endpoints in the spec on startup.
|
||||
|
||||
Prism starts on port 4010 by default - try visiting ```http://localhost:4010/v2/pet/findByStatus``` in your browser. This is one of the endpoints described in the petstore spec you passed in. You'll notice that it returns an error about a required query string parameter "status". This is the automatic request validation at work! The swagger spec specifies that a query string parameter names "status" is required for this endpoint so Prism simulates a 400 response for you. Reload the page with a query string parameter, and you will see the dynamically generated mock response ```http://localhost:4010/v2/pet/findByStatus?status=available```.
|
||||
|
||||
Tada! With a single command you have started a validating, dynamically mocking version of the Swagger petstore API.
|
||||
|
||||
### Run some Contract Tests
|
||||
|
||||
Prism consumes OAS(Swagger 2) files. OAS provides the contract for your API. If your OAS file contains the x-tests extension (generated automatically if you use the Stoplight app to manage your OAS and tests) then you can run tests with Prism.
|
||||
|
||||
Check out [this specification](https://goo.gl/jniYmw). If you scroll past all the regular OAS properties, you will notice a ```x-tests``` extension near the bottom of the file. Inside of that property, we have a few test cases defined. This OAS file, along with its tests, is managed in the Stoplight app (we export our API from within the app to produce this file).
|
||||
|
||||
#### To Run the Contract Tests
|
||||
```
|
||||
# os x / linux
|
||||
prism test --spec https://goo.gl/jniYmw
|
||||
|
||||
# windows
|
||||
path/to/prism.exe test --spec https://goo.gl/jniYmw
|
||||
```
|
||||
|
||||
You should see some nice output to your terminal detailing the tests and assertions that are run. These tests take our OAS contract and apply it to your API. They act as a sort of sync manager.
|
||||
|
||||
<!-- theme: info -->
|
||||
> If a test fails, it means one of two things - your API is broken or, our OAS contract is out of date / incorrect
|
||||
File diff suppressed because it is too large
Load Diff
@@ -1,6 +1,6 @@
|
||||
# Change a Project Member's Role
|
||||
|
||||

|
||||

|
||||
|
||||
## What
|
||||
You can invite people to a Project to grant them read or read/write permissions. There are three tiers of read/write permissions:
|
||||
@@ -15,9 +15,10 @@ You can invite people to a Project to grant them read or read/write permissions.
|
||||
* Read
|
||||
|
||||
|
||||
## Who
|
||||
## Who
|
||||
* Only the Organization **Owner** and Organization or Project **Administrators** can modify member roles
|
||||
|
||||
<!-- theme: info -->
|
||||
>By deafult, all members of the Organization and the Project will have Read permission
|
||||
|
||||
## How
|
||||
|
||||
@@ -1,6 +1,6 @@
|
||||
# Creating a Project
|
||||
|
||||

|
||||

|
||||
|
||||
## What
|
||||
Projects are the workspace of the Stoplight Platform. Projects contain:
|
||||
@@ -12,6 +12,7 @@ Projects are the workspace of the Stoplight Platform. Projects contain:
|
||||
* Mocking (Prism)
|
||||
* Markdown Editor
|
||||
|
||||
<!-- theme: info -->
|
||||
>Single Point of Truth: All editors are now contained within a Project
|
||||
|
||||
## Who
|
||||
|
||||
@@ -1,61 +0,0 @@
|
||||
# Git Repositories
|
||||
|
||||
## What
|
||||
The Stoplight Platform is built on top of Git. This means that all your projects are Git repositories and that our platform benefits from all the additonal functionality provided by Git. To access the Git funtionality, you will need to clone your Git repository by generating an Access Token.
|
||||
|
||||
> You can also use Access Tokens to access the Stoplight API, authenticate Prism in a continuous integration enviornment, and access the underlying Git repositories for projects. You can make this part of your Git workflow, add it to scripts, or your CI/CD process
|
||||
|
||||
## Who
|
||||
|
||||
If you have write access to a project, you will be able to:
|
||||
* Pull projects via Git
|
||||
* Commit to projects via Git
|
||||
* Push changes to projects via Git
|
||||
|
||||
If you have read access to a project, you will be able to:
|
||||
* Pull your project via Git
|
||||
|
||||
## How to Clone Your Stoplight Git Repository
|
||||
|
||||
1. Select the **Settings** tab on the platform homepage
|
||||
2. Select **Access Tokens** from the left
|
||||
|
||||

|
||||
|
||||
3. Create a token to access projects that your Stoplight account has proper permissions for (These permissions match the ones in the Stoplight UI)
|
||||
|
||||
> You can name your token whatever you want. Once you have created the token, copy it, and only store it in a safe location. Once you close the window, you will not see it again
|
||||
|
||||
3. On your machine, store your access token as an environmental variable (recommended)
|
||||
|
||||
For example, on Mac/Linux:
|
||||
|
||||
```
|
||||
export STOPLIGHT_TOKEN="1234567890"
|
||||
```
|
||||
|
||||
4. You can then `git clone` the repo, replace `{stoplight-username}`, `{username}`, and `{project-name}` with the appropriate information:
|
||||
|
||||
```
|
||||
git clone https://{stoplight-username}:$STOPLIGHT_TOKEN@git.stoplight.io/{username}/{project-name}.git
|
||||
```
|
||||
|
||||
For example:
|
||||
|
||||
```
|
||||
git clone https://taylor:$STOPLIGHT_TOKEN@git.stoplight.io/taylor/test-new.git
|
||||
```
|
||||
|
||||
> If the project is associated with an organization and not a personal project, replace `username` with `organization-name`
|
||||
|
||||
5. Now you can make changes to your files, commit, and push to your master branch. You can see these changes in the Stoplight UI as well as the "History of Changes"
|
||||
|
||||
> Remember: You will only see changes on the master branch in the UI at this time.
|
||||
|
||||
|
||||
---
|
||||
**Related Articles**
|
||||
- [Change a Project Member's Role](/platform/projects/change-a-members-role)
|
||||
- [Make Your Project Private/Public](/platform/projects/visibility)
|
||||
- [Invite People to Organization](/platform/organizations/invite-people)
|
||||
- [Add People to a Team](/platform/organizations/teams/add-people)
|
||||
@@ -1,6 +1,6 @@
|
||||
# Invite People & Teams to a Project
|
||||
|
||||

|
||||

|
||||
|
||||
## What
|
||||
* You can invite people to a Project to grant them read or read/write permissions
|
||||
|
||||
@@ -1,6 +1,6 @@
|
||||
# Making Your Project Private & Public
|
||||
## Making Your Project Private & Public
|
||||
|
||||

|
||||

|
||||
|
||||
## What
|
||||
|
||||
|
||||
1
articles/robbins.md
Normal file
1
articles/robbins.md
Normal file
@@ -0,0 +1 @@
|
||||
|
||||
@@ -1,6 +1,6 @@
|
||||
# Add People to a Team
|
||||
|
||||

|
||||

|
||||
|
||||
## What
|
||||
|
||||
|
||||
@@ -1,6 +1,6 @@
|
||||
# Create a Team
|
||||
|
||||

|
||||

|
||||
|
||||
## What
|
||||
|
||||
|
||||
@@ -1,6 +1,6 @@
|
||||
# Customize a Team
|
||||
|
||||

|
||||

|
||||
|
||||
## What
|
||||
|
||||
|
||||
@@ -1,6 +1,6 @@
|
||||
# Delete a Team
|
||||
|
||||

|
||||

|
||||
|
||||
## What
|
||||
* Want to disband your team? Here's how:
|
||||
@@ -19,4 +19,4 @@
|
||||
**Related Articles**
|
||||
- [Delete an Organization](/platform/organizations/delete-org)
|
||||
- [Transfer Ownership of a Team](/platform/organizations/teams/transfer-ownership)
|
||||
|
||||
- [Delete a Team](/platform/organizations/teams/delete)
|
||||
|
||||
@@ -1,6 +1,6 @@
|
||||
# Team Member Roles and Permissions
|
||||
|
||||

|
||||

|
||||
|
||||
## What
|
||||
Roles and Permissions for Team members can be managed and modified within Stoplight to control access to the Team’s functions and features.
|
||||
@@ -8,9 +8,9 @@ There are 3 Roles:
|
||||
* **Owner**
|
||||
* Owners can update the Team, its connections, and its collaborators. They can also update the team's settings and delete the team.
|
||||
* **Administrator**
|
||||
* Admins can update the Team, its connections, and its collaborators.
|
||||
* Admins can update the Team, its connections, and its collaborators.
|
||||
* **Member**
|
||||
* Members can view and create projects. They can view the Team's members.
|
||||
* Members can view and create projects. They can view the Team's members.
|
||||
|
||||
## Who
|
||||
* Only the Team **Owner** or **Administrator** can modify Roles and Permissions
|
||||
|
||||
@@ -1,6 +1,6 @@
|
||||
# Remove People from a Team
|
||||
|
||||

|
||||

|
||||
|
||||
## What
|
||||
|
||||
|
||||
@@ -1,6 +1,6 @@
|
||||
# Transfer Primary Ownership of a Team
|
||||
|
||||

|
||||

|
||||
|
||||
## What
|
||||
You can transfer Ownership of a Team to another member of the Team.
|
||||
|
||||
@@ -72,18 +72,23 @@ When running `prism conduct` you can:
|
||||
* Include the Scenario JSON on your CI server, and pass in its absolute file path
|
||||
* Pass in the absolute URL to the scenario JSON served up via HTTP
|
||||
|
||||
<!-- theme: warning -->
|
||||
|
||||
> Don't forget to pass in any required environment values with the --env command
|
||||
> line flag (or you can provide the filepath to a json file with your environment
|
||||
> variables)!
|
||||
|
||||
<!-- theme: info -->
|
||||
|
||||
> Did you know? You can find the full command to run your scenario collection
|
||||
> or individual scenarios in the Stoplight application. Click on the "Home"
|
||||
> button of a scenario under "Trigger This Collection".
|
||||
|
||||
---
|
||||
|
||||
**Related Articles**
|
||||
- [Integrating in Continuous Integration](/testing/continuous-integration/overview)
|
||||
- [Integrating with Jenkins](/testing/continuous-integration/jenkins)
|
||||
- [Integrating with Travis](/testing/continuous-integration/travis)
|
||||
- [Prism Docker Image](https://hub.docker.com/r/stoplight/prism/)
|
||||
**Related**
|
||||
|
||||
* [Continuous Integration Overview](./continuous-integration.md)
|
||||
* [Continuous Integration with Travis CI](./continous-integration-travis)
|
||||
* [Continuous Integration with Jenkins](./continous-integration-jenkins)
|
||||
* [Prism Docker Image](https://hub.docker.com/r/stoplight/prism/)
|
||||
|
||||
@@ -28,6 +28,7 @@ off your tests. If running natively, use the command format:
|
||||
BUILD_ID=dontKillMe nohup prism mock --spec ... &
|
||||
```
|
||||
|
||||
<!-- theme: warning -->
|
||||
|
||||
> Please note that the trailing ampersand (`&`) is required
|
||||
|
||||
@@ -37,7 +38,7 @@ If running in Docker, use the format:
|
||||
docker run -d --rm -p 4010:4010 stoplight/prism:latest mock --spec ...
|
||||
```
|
||||
|
||||
For more information on using Prism as a test server, see [here](/mocking/introduction).
|
||||
For more information on using Prism as a test server, see [here](./overview.md).
|
||||
|
||||
### Running Prism in the Foreground
|
||||
|
||||
@@ -59,11 +60,13 @@ When running `prism conduct`, you can:
|
||||
* Include the Scenario JSON on your CI server, and pass in its absolute file path
|
||||
* Pass in the absolute URL to the scenario JSON served up via HTTP
|
||||
|
||||
<!-- theme: warning -->
|
||||
|
||||
> Don't forget to pass in any required environment values with the --env command
|
||||
> line flag (or you can provide the filepath to a json file with your environment
|
||||
> variables)!
|
||||
|
||||
<!-- theme: info -->
|
||||
|
||||
> Did you know? You can find the full command to run your scenario collection
|
||||
> or individual scenarios in the Stoplight application. Click on the "Home"
|
||||
@@ -80,10 +83,10 @@ on the plugin, see [here](https://plugins.jenkins.io/stoplightio-report).
|
||||
|
||||
**Related**
|
||||
|
||||
- [Jenkins Website](https://jenkins.io/)
|
||||
- [Integrating in Continuous Integration](/testing/continuous-integration/overview)
|
||||
- [Integrating with Travis](/testing/continuous-integration/travis)
|
||||
- [Integrating with CircleCI](/testing/continuous-integration/circle-ci)
|
||||
- [Prism Docker Image](https://hub.docker.com/r/stoplight/prism/)
|
||||
- [Stoplight Report Plugin Homepage](https://plugins.jenkins.io/stoplightio-report)
|
||||
- [Stoplight Report Plugin Github](https://github.com/jenkinsci/stoplightio-report-plugin)
|
||||
* [Jenkins Website](https://jenkins.io/)
|
||||
* [Continuous Integration Overview](./continuous-integration.md)
|
||||
* [Continuous Integration with Circle CI](./continous-integration-circle)
|
||||
* [Continuous Integration with Travis CI](./continous-integration-travis)
|
||||
* [Prism Docker Image](https://hub.docker.com/r/stoplight/prism/)
|
||||
* [Stoplight Report Plugin Homepage](https://plugins.jenkins.io/stoplightio-report)
|
||||
* [Stoplight Report Plugin Github](https://github.com/jenkinsci/stoplightio-report-plugin)
|
||||
|
||||
@@ -49,11 +49,13 @@ When running `prism conduct` you can:
|
||||
* Include the Scenario JSON on your CI server, and pass in its absolute file path
|
||||
* Pass in the absolute URL to the scenario JSON served up via HTTP
|
||||
|
||||
<!-- theme: warning -->
|
||||
|
||||
> Don't forget to pass in any required environment values with the --env command
|
||||
> line flag (or you can provide the filepath to a json file with your environment
|
||||
> variables)!
|
||||
|
||||
<!-- theme: info -->
|
||||
|
||||
> Did you know? You can find the full command to run your scenario collection
|
||||
> or individual scenarios in the Stoplight application. Click on the "Home"
|
||||
@@ -61,9 +63,9 @@ When running `prism conduct` you can:
|
||||
|
||||
---
|
||||
|
||||
**Related Articles**
|
||||
**Related**
|
||||
|
||||
- [Integrating in Continuous Integration](/testing/continuous-integration/overview)
|
||||
- [Integrating with Jenkins](/testing/continuous-integration/jenkins)
|
||||
- [Integrating with CircleCI](/testing/continuous-integration/circle-ci)
|
||||
- [Prism Docker Image](https://hub.docker.com/r/stoplight/prism/)
|
||||
* [Continuous Integration Overview](./continuous-integration.md)
|
||||
* [Continuous Integration with Circle CI](./continous-integration-circle)
|
||||
* [Continuous Integration with Jenkins](./continous-integration-jenkins)
|
||||
* [Prism Docker Image](https://hub.docker.com/r/stoplight/prism/)
|
||||
|
||||
@@ -16,13 +16,13 @@ the lifetime of the project.
|
||||
|
||||
There are a few different approaches available when integrating Prism into a CI
|
||||
testing pipeline:
|
||||
testing with Stoplight [Scenarios](/testing/introduction),
|
||||
testing with Stoplight [Scenarios](./scenarios-introduction.md),
|
||||
testing with a mock server, and
|
||||
contract testing.
|
||||
|
||||
## Testing with Scenarios
|
||||
|
||||
Stoplight [Scenarios](/testing/introduction) allows users to define
|
||||
Stoplight [Scenarios](./scenarios-introduction.md) allows users to define
|
||||
multiple steps for testing an OpenAPI specification. Scenarios provide a similar
|
||||
function to API's as [functional test
|
||||
cases](https://en.wikipedia.org/wiki/Functional_testing) do in software
|
||||
@@ -35,7 +35,7 @@ To run a scenario with Prism, use the `conduct` command:
|
||||
prism conduct my-scenario.json --spec open-api-spec.json -e "myapikey=abc123"
|
||||
```
|
||||
|
||||
For more information on Scenarios, please see [here](/testing/introduction).
|
||||
For more information on Scenarios, please see [here](./scenarios-introduction.md).
|
||||
|
||||
## Testing with a Mock Server
|
||||
|
||||
@@ -57,7 +57,7 @@ To start a mock server with Prism, use the `mock` command:
|
||||
prism mock --spec open-api-spec.json
|
||||
```
|
||||
|
||||
For more information on mock testing with Prism, see [Mocking Introduction](/mocking/introduction).
|
||||
For more information on mock testing with Prism, see [Mocking Introduction](FIXME).
|
||||
|
||||
## Contract Testing
|
||||
|
||||
@@ -79,14 +79,14 @@ To start a contract/validation server with Prism, use the `validate` command:
|
||||
prism validate --spec open-api-spec.json --upstream http://localhost:8080
|
||||
```
|
||||
|
||||
>For more information on contract testing with Prism, see [Mocking Introduction](/mocking/introduction).
|
||||
For more information on contract testing with Prism, see [Mocking Introduction](FIXME).
|
||||
|
||||
---
|
||||
|
||||
**Related**
|
||||
- [Mocking Introduction](/mocking/introduction)
|
||||
- [Testing Introduction](/testing/introduction)
|
||||
- [Integrating with Jenkins](/testing/continuous-integration/jenkins)
|
||||
- [Integrating with Travis](/testing/continuous-integration/travis)
|
||||
- [Integrating with CircleCI](/testing/continuous-integration/circle-ci)
|
||||
|
||||
* [Testing Overview](./overview.md)
|
||||
* [Scenarios Introduction](./scenarios-introduction.md)
|
||||
* [Continuous Integration with Circle CI](./continous-integration-circle.md)
|
||||
* [Continuous Integration with Travis CI](./continous-integration-travis.md)
|
||||
* [Continuous Integration with Jenkins](./continous-integration-jenkins.md)
|
||||
|
||||
@@ -23,12 +23,14 @@ Benefits of contract testing include:
|
||||
pipeline ensures that the spec accurately represents your API implementation
|
||||
over time.
|
||||
|
||||
<!-- theme: info -->
|
||||
|
||||
> If you don't have an API specification yet, you can create one using the
|
||||
> [Stoplight modeling tool](/modeling/introduction)!
|
||||
> [Stoplight modeling tool](../modeling/modeling-introduction.md)!
|
||||
|
||||
## Connecting a Spec
|
||||
|
||||

|
||||
<!-- FIXME - Show a gif of selecting spec in coverage screen, and clicking on different endpoints -->
|
||||
|
||||
To get started with contract testing, the first thing you will need to do is
|
||||
generate a scenario from an OpenAPI specification. To get started:
|
||||
@@ -69,7 +71,7 @@ You can use the coverage report to quickly stub out a new scenario. To start:
|
||||
|
||||
## Automatic Contract Test Assertion
|
||||
|
||||

|
||||
<!-- FIXME - Show a gif of running a scenario -->
|
||||
|
||||
After linking your spec to the Scenario Collection, contract test assertions
|
||||
will be automatically added as steps within your scenario.
|
||||
@@ -82,15 +84,3 @@ JSON schema.
|
||||
When a contract assertion step is run, the HTTP response structure will be
|
||||
validated against the matched JSON schema from the connected API specification.
|
||||
Any validation errors will automatically be added to the test results.
|
||||
|
||||
---
|
||||
**Related Articles**
|
||||
- [Testing Introduction](/testing/introduction)
|
||||
- [Running Tests In Stoplight](/testing/running-tests/in-stoplight)
|
||||
- [Running Tests in the Terminal](/testing/running-tests/in-the-terminal)
|
||||
- [Running Tests Triggered by URL](/testing/running-tests/triggering-by-url)
|
||||
- [Using Variables Overview](/testing/using-variables/overview)
|
||||
- [$$.env (Environment)](/testing/using-variables/environment)
|
||||
- [$.ctx(Context)](/testing/using-variables/context)
|
||||
- [Sending HTTP Requests](/testing/sending-http-requests/overview)
|
||||
|
||||
|
||||
@@ -1,42 +1 @@
|
||||
# Testing with Scenarios
|
||||
|
||||

|
||||
|
||||
It has become increasingly important to develop highly flexible, performant, and powerful testing roadmaps to catch bugs faster and rapidly iterate. A thorough test suite is essential for:
|
||||
- Assessing the health of an API
|
||||
- Providing valuable documentation
|
||||
- Driving design and implementation
|
||||
- Managing technical debt
|
||||
|
||||
## Assessing the Health of an API
|
||||
|
||||
APIs require maintenance like any other software. To ensure that your API is functioning properly, a suite of tests should be run periodically to check for weaknesses and errors.
|
||||
|
||||
>Create and [run tests within Stoplight](/testing/running-tests/in-stoplight), [the terminal](/testing/running-tests/in-the-terminal), or [trigger it by URL](/testing/running-tests/triggering-by-url). If you prefer to [use CI](/testing/continuous-integration/overview), Stoplight also provides integrations to [Jenkins](/testing/continuous-integration/jenkins), [CircleCI](/testing/continuous-integration/circle-ci), and [Travis](/testing/continuous-integration/travis).
|
||||
|
||||
## Providing Valuable Documentation & Driving Design
|
||||
|
||||
API tests provide insight into how your API behaves under certain scenarios and can drive design if created early enough in the design process. Test/Behavior-driven development (TDD/BDD) encourages you to think about design requirements before writing any code.
|
||||
|
||||
>Stoplight further promotes this design-first principle by providing [Contract Testing](/testing/leveraging-openapi/contract-testing); an integration between your tests and your OpenAPI Specification. This allows for immediate validation and verification that your API responses match the “Contract” specified in your OpenAPI spec.
|
||||
|
||||
## Managing Technical Debt
|
||||
|
||||
Microservices and serverless architecture have made it easier than ever to iterate quickly. The downside of rapid development is an increase in bugs and technical debt, making projects harder to manage without a proper testing solution. It is critical to have a comprehensive test suite to allow teams to test the API during development.
|
||||
|
||||
>Stoplight makes it easy to create a full suite of tests by providing [Environment](/testing/using-variables/environment) and [Context variables](/testing/using-variables/context), and the ability to reference other scenarios to accelerate test generation and reduce duplication.
|
||||
|
||||
---
|
||||
**Related Articles**
|
||||
- [Running Tests In Stoplight](/testing/running-tests/in-stoplight)
|
||||
- [Running Tests in the Terminal](/testing/running-tests/in-the-terminal)
|
||||
- [Running Tests Triggered by URL](/testing/running-tests/triggering-by-url)
|
||||
- [Using Variables Overview](/testing/using-variables/overview)
|
||||
- [$$.env (Environment)](/testing/using-variables/environment)
|
||||
- [$.ctx(Context)](/testing/using-variables/context)
|
||||
- [Sending HTTP Requests](/testing/sending-http-requests/overview)
|
||||
- [Contract Testing](/testing/leveraging-openapi/contract-testing)
|
||||
- [Integrating in Continuous Integration](/testing/continuous-integration/overview)
|
||||
- [Integrating with Jenkins](/testing/continuous-integration/jenkins)
|
||||
- [Integrating with Travis](/testing/continuous-integration/travis)
|
||||
- [Integrating with CircleCI](/testing/continuous-integration/circle-ci)
|
||||
|
||||
@@ -2,12 +2,13 @@
|
||||
|
||||
Scenarios allow you to quickly and efficiently test APIs. Scenarios can be
|
||||
run in a variety of different ways, including from the [command-line with
|
||||
Prism](/testing/running-tests/in-the-terminal) or by [URL](/testing/running-tests/triggering-by-url). However, the easiest
|
||||
Prism](./run-test-terminal.md) or by [URL](./run-test-url). However, the easiest
|
||||
way is through the Stoplight editor.
|
||||
|
||||
<!-- theme: info -->
|
||||
|
||||
> If you haven't created your first scenario yet, please [do so before
|
||||
> continuing](/testing/introduction)
|
||||
> continuing](./scenarios-introduction.md)
|
||||
|
||||
Scenarios in Stoplight are composed of three different levels:
|
||||
|
||||
@@ -30,7 +31,7 @@ Once you have created a scenario **step**, use the **Run Step** button to
|
||||
execute that step. The **Run Step** button is available towards the top of the
|
||||
editor, as shown below.
|
||||
|
||||

|
||||

|
||||
|
||||
## Running a Scenario
|
||||
|
||||
@@ -39,8 +40,9 @@ button to execute that scenario. The **Run Scenario** button is available
|
||||
towards the top of the editor while viewing the scenario configuration/overview,
|
||||
as show below.
|
||||
|
||||

|
||||

|
||||
|
||||
<!-- theme: info -->
|
||||
|
||||
> Scenarios can also be run directly from every step using the **Run Scenario**
|
||||
> button
|
||||
@@ -52,16 +54,17 @@ the **Run Collection** button to run the entire collection (including all
|
||||
scenarios and steps). The **Run Collection** button is available towards the top
|
||||
of the editor while viewing the collection home screen, as shown below.
|
||||
|
||||

|
||||

|
||||
|
||||
<!-- theme: info -->
|
||||
|
||||
> Collections can also be run from the scenario and step screens using the **Run
|
||||
> Collection** button
|
||||
|
||||
---
|
||||
|
||||
**Related Articles**
|
||||
- [Testing Introduction](/testing/introduction)
|
||||
- [Running Tests in the Terminal](/testing/running-tests/in-the-terminal)
|
||||
- [Running Tests Triggered by URL](/testing/running-tests/triggering-by-url)
|
||||
**Related**
|
||||
|
||||
* [Scenarios Overview](./scenarios-introduction.md)
|
||||
* [Running Scenarios from the Command-Line](./run-test-terminal.md)
|
||||
* [Running Scenarios by URL](./run-test-url.md)
|
||||
|
||||
@@ -10,6 +10,8 @@ _On macOS or Linux:_
|
||||
curl https://raw.githubusercontent.com/stoplightio/prism/2.x/install.sh | sh
|
||||
```
|
||||
|
||||
<!-- theme: info -->
|
||||
|
||||
> When installed through the installation script, Prism will be installed to `/usr/local/bin/prism`
|
||||
|
||||
_On Windows:_
|
||||
@@ -22,12 +24,13 @@ After installing, you should be able to run `prism -h` (or `prism.exe -h` in Win
|
||||
|
||||
The Scenario app has a convenient display that gives you the exact command required to run the collection or scenario that you are viewing (taking into account your current environment variables). If you have the Scenario editor connected to a local file on your computer, it will use the path to that file, otherwise it will use the Scenario SRN (unique identifier).
|
||||
|
||||
<!-- theme: warning -->
|
||||
|
||||
> Keep in mind that if you are storing your Scenarios on Stoplight's servers, and running them from the command line, you must save them in the Stoplight app before running! This is because Prism will make a call to the Stoplight API to fetch your Scenario JSON, which it will then run from your computer.
|
||||
|
||||
See below for a screenshot of the "Run From Terminal" command generator. The command in this box will update live in response to environment, user, and scenario changes.
|
||||
|
||||

|
||||
<!-- FIXME: image showing "Run from Terminal" option under a scenario -->
|
||||
|
||||
## Running Scenarios
|
||||
|
||||
@@ -44,7 +47,7 @@ prism conduct /path/to/collection.json
|
||||
prism conduct "https://export.stoplight.io/1234/master/main.scenarios.yml"
|
||||
```
|
||||
|
||||
For more information on Scenarios and how they can be used, see [here](/testing/introduction).
|
||||
For more information on Scenarios and how they can be used, see [here](./scenarios-introduction.md).
|
||||
|
||||
## Contract Testing
|
||||
|
||||
@@ -63,11 +66,10 @@ You can also run a contract test against a specific upstream URL with the
|
||||
prism validate --spec /path/to/my/spec.json --upstream http://localhost:8080
|
||||
```
|
||||
|
||||
For more information on contract testing and how it can be used, see [here](/testing/leveraging-openapi/contract-testing).
|
||||
For more information on contract testing and how it can be used, see [here](./contract-testing.md).
|
||||
|
||||
---
|
||||
**Related Articles**
|
||||
## Related
|
||||
|
||||
- [Testing Introduction](/testing/introduction)
|
||||
- [Contract Testing](/testing/leveraging-openapi/contract-testing)
|
||||
- [Integrating in Continuous Integration](/testing/continuous-integration/overview)
|
||||
* [Scenarios Overview](./scenarios-introduction.md)
|
||||
* [Contract Testing Overview](./contract-testing.md)
|
||||
* [Integrating Prism into a CI Pipeline](./continuous-integration.md)
|
||||
|
||||
@@ -1,6 +1,6 @@
|
||||
# Triggering Scenarios by URL
|
||||
|
||||
In addition to being able to run tests [through Stoplight](/testing/running-tests/in-stoplight) and [the terminal](/testing/running-tests/in-the-terminal),
|
||||
In addition to being able to run tests [through Stoplight](./run-test-stoplight.md) and [the terminal](./run-test-terminal.md),
|
||||
scenarios can also be run by issuing a HTTP request.
|
||||
|
||||
To trigger a scenario by URL, there are two methods:
|
||||
@@ -25,7 +25,7 @@ scenario. To find this URL:
|
||||
* Within this section is a "Trigger by URL" containing the URL unique to this
|
||||
scenario
|
||||
|
||||

|
||||

|
||||
|
||||
## Triggering Scenarios
|
||||
|
||||
@@ -107,12 +107,14 @@ it to be used to authenticate with the Stoplight API. For example:
|
||||
$ curl -H 'Private-Token: H4BTDASDf5sGHMWJSfE32' ...
|
||||
```
|
||||
|
||||
<!-- theme: warning -->
|
||||
|
||||
> Be sure to keep all private tokens safe! They can be used to authenticate
|
||||
> requests with any project that your account has access to.
|
||||
|
||||
---
|
||||
|
||||
**Related Articles**
|
||||
- [Running Tests In Stoplight](/testing/running-tests/in-stoplight)
|
||||
- [Running Tests in the Terminal](/testing/running-tests/in-the-terminal)
|
||||
**Related**
|
||||
|
||||
* [Running Scenarios through Stoplight](./run-test-stoplight.md)
|
||||
* [Running Scenarios from the Terminal](./run-test-terminal.md)
|
||||
|
||||
@@ -1,116 +1,50 @@
|
||||
# Overview of Testing with HTTP Requests
|
||||
# Overview of Testing with HTTP Requests
|
||||
|
||||
## What are HTTP methods?
|
||||
## What are HTTP methods?
|
||||
|
||||
Hypertext Transfer Protocol (HTTP) is a set of rules that define how information
|
||||
is requested, transmitted, and formatted between a client and a server. HTTP
|
||||
methods (verbs) are used to implement create, read, update, and delete
|
||||
operations on identified resources.
|
||||
- Hypertext Transfer Protocol (HTTP) is a set of rules that define how information is requested, transmitted, and formatted between a client and a server. HTTP methods (verbs) are used to implement create, read, update, and delete operations on identified resources.
|
||||
- HTTP methods are classified as safe, non-safe methods, idempotent or non-idempotent methods. Safe methods do not change the state of a resource. Idempotent methods, if executed severally, deliver consistent outcomes. An example of idempotency is outlined below:
|
||||
|
||||
Each HTTP method can be classified as safe, idempotent, or both.
|
||||
|
||||
### Safe Methods
|
||||
|
||||
Safe methods do not change the state of a resource. Safe methods include:
|
||||
|
||||
* **OPTIONS**
|
||||
* **GET**
|
||||
* **HEAD**
|
||||
|
||||
### Idempotent Methods
|
||||
|
||||
Idempotent methods can be called several times and should expect the same
|
||||
results. Idempotent methods include:
|
||||
|
||||
* **OPTIONS**
|
||||
* **GET**
|
||||
* **HEAD**
|
||||
* **PUT**
|
||||
* **DELETE**
|
||||
|
||||
To demonstrate an idempotent HTTP request:
|
||||
|
||||
* `GET petAge`, where the returned age is 2. Since the result will always return
|
||||
2 when the statement is issued over and over again, this request is
|
||||
idempotent
|
||||
* `POST petAge`, where you are incrementing the age of a pet. Since we are
|
||||
actively incrementing the age, each successive execution will give the pet a
|
||||
different age each time, making this request non-idempotent
|
||||
### Example
|
||||
- petAge = 2 # will always return 2 even when the statement is executed over and over again. This statement is idempotent.
|
||||
- petAge++ # will return different results based on the number of executions. This statement is non-idempotent.
|
||||
|
||||
## Methods
|
||||
- The **GET** method retrieves data and resource representation. It does not change the state of a resource and several executions produce the same results. Thus, it is a safe and idempotent method. When a GET method is successful, it should return a 200 (OK) HTTP status code with the content in the response body and a 404 (NOT FOUND) code if the resource is not available.
|
||||
- The **POST** method creates new resources. The POST method is not safe and is non-idempotent as the execution of similar POST requests will create two different resources with similar details. It is suggested for non-idempotent resource requests.
|
||||
- The **PATCH** method makes partial updates to a resource and it is non-idempotent.
|
||||
- The **PUT** method updates a resource or creates a new resource if it does not exist. It is ideal for the complete update of a resource. The PUT method is idempotent but not safe.
|
||||
- The **DELETE** method deletes a resource. It is idempotent but not safe.
|
||||
|
||||
* The **GET** method retrieves data and resource representation. It does not
|
||||
change the state of a resource and several executions produce the same
|
||||
results. Thus, it is a safe and idempotent method. When a GET method is
|
||||
successful, it should return a 200 (OK) HTTP status code with the content in
|
||||
the response body and a 404 (NOT FOUND) code if the resource is not available
|
||||
### Summary
|
||||
The GET method is the only safe method, as it does not change the state of a resource. GET, PUT, and DELETE methods are idempotent while the POST and PATCH methods are non-idempotent.
|
||||
|
||||
* The **POST** method creates new resources. The POST method is not safe and is
|
||||
non-idempotent as the execution of similar POST requests will create two
|
||||
different resources with similar details. It is suggested for non-idempotent
|
||||
resource requests
|
||||
|
||||
* The **PATCH** method makes partial updates to a resource and it is
|
||||
non-idempotent
|
||||
|
||||
* The **PUT** method updates a resource or creates a new resource if it does not
|
||||
exist. It is ideal for the complete update of a resource. The PUT method is
|
||||
idempotent but not safe
|
||||
|
||||
* The **DELETE** method deletes a resource. It is idempotent, but not safe
|
||||
|
||||
## Testing with HTTP Requests
|
||||
|
||||
Testing using HTTP Requests demonstrates whether or not an API will perform as
|
||||
expected when it is deployed to a production server and integrated with existing
|
||||
platforms.
|
||||
## Testing with HTTP Requests
|
||||
- Testing using HTTP Requests demonstrates whether or not an API will perform as expected when it is deployed to a production server and integrated with existing platforms.
|
||||
|
||||
<!-- theme: info -->
|
||||
> HTTP Request Tests should include checks to the response code, message, and body.
|
||||
|
||||
Apart from verifying the functionality of essential features, HTTP Request Tests
|
||||
**save time and cost**.
|
||||
- Apart from verifying the functionality of essential features, HTTP Request Tests **save time and cost**.
|
||||
|
||||
## Testing with HTTP Requests: Best Practices
|
||||
## Testing with HTTP Requests: Best Practices
|
||||
|
||||
Testing is a critical stage of the API development life cycle and the type of
|
||||
tests executed will depend on the complexity of the API, time, budget, etc. It
|
||||
is vital to conduct robust tests to reveal any inconsistencies or defects in
|
||||
the API before it is shipped to a production server or interfaced with other
|
||||
platforms.
|
||||
|
||||

|
||||
### GET
|
||||
|
||||
* Test the GET method to confirm it returns the correct data
|
||||
* Test a valid GET request to ensure it returns a 200 (OK) status code or 404 (NOT FOUND) if invalid
|
||||
* Ensure you test every endpoint fetching data within your API before deployment to a production server
|
||||
- Test the GET method to confirm it returns the correct data.
|
||||
- Test a valid GET request to ensure it returns a 200 (OK) status code or 404 (NOT FOUND) if invalid
|
||||
- Ensure you test every endpoint fetching data within your API before deployment to a production server.
|
||||
|
||||
### POST
|
||||
|
||||
* Test the POST method to confirm it creates a resource and returns a 200(OK)
|
||||
code and/or 201(CREATED) code if valid. If invalid, look for a 4xx error
|
||||
status code
|
||||
* You can use the GET method to see the outcome of the POST operation
|
||||
- Test the POST method to confirm it creates a resource and returns a 200(OK) code and/or 201(CREATED) code if valid. If invalid, look for a 4xx error status code.
|
||||
- You can use the GET method to see the outcome of the POST operation.
|
||||
|
||||
### PUT & PATCH
|
||||
|
||||
* The PUT and PATCH update methods should be tested to ensure that a 200(OK)
|
||||
status code or 204(NO CONTENT) is returned for a successful transaction. If
|
||||
unsuccessful, look for a 4xx error status code
|
||||
- The PUT and PATCH update methods should be tested to ensure that a 200(OK) status code or 204(NO CONTENT) is returned for a successful transaction. If unsuccessful, look for a 4xx error status code.
|
||||
|
||||
### DELETE
|
||||
- Test the DELETE request to certify it returns a 4xx error code if a DELETE operation is executed against an invalid or non-existent resource.
|
||||
- Test the DELETE request to confirm it returns a 200(OK) for a successful operation.
|
||||
- Tests for the DELETE method **must not** be done with data residing on a production or live data store.
|
||||
|
||||
* Test the DELETE request to certify it returns a 4xx error code if a DELETE
|
||||
operation is executed against an invalid or non-existent resource
|
||||
* Test the DELETE request to confirm it returns a 200(OK) for a successful
|
||||
operation
|
||||
* Tests for the DELETE method **must not** be done with data residing on a
|
||||
production or live data store
|
||||
|
||||
---
|
||||
**Related Articles**
|
||||
- [Testing Introduction](/testing/introduction)
|
||||
- [Running Tests In Stoplight](/testing/running-tests/in-stoplight)
|
||||
- [Running Tests in the Terminal](/testing/running-tests/in-the-terminal)
|
||||
- [Running Tests Triggered by URL](/testing/running-tests/triggering-by-url)
|
||||
|
||||
<!-- theme: info -->
|
||||
> Testing is a critical stage of the API development life cycle and the type of tests executed will depend on the complexity of the API, time, budget, etc. It is vital to conduct robust tests to reveal any inconsistencies or defects in the API before it is shipped to a production server or interfaced with other platforms.
|
||||
|
||||
@@ -1,6 +1,8 @@
|
||||
# Using Context Variables
|
||||
|
||||
Context variables allow you to dynamically store and share data between steps in a scenario. Contrary to environment variables, context variables are _not_ saved once a test has completed. Therefore, context variables are only suitable for temporary data.
|
||||
<!--(FIXME - SHOW WRITING VARIABLE TO CONTEXT IN STEP)-->
|
||||
|
||||
Context variables allow you to dynamically store and share data between steps in a scenario. Contrary to environment variables, context variables are _not_ saved once a test has completed. Therefore, context variables are only suitable for temporary data.
|
||||
|
||||
Context variables are scoped to the scenario, _not_ the collection. This means that two scenarios can both read/write the same context variable `myVar`, and not conflict with each other. Environment variables, on the other hand, are shared amongst all scenarios, and are scoped to the collection.
|
||||
|
||||
@@ -10,9 +12,9 @@ At the start of a test run, the context object is empty. Good examples of data t
|
||||
|
||||
Context variables make it possible to chain related steps together. For example, say we have the following set of actions to perform:
|
||||
|
||||
1. Create User, `POST /users`. Returns a new user object, with an `id` property.
|
||||
2. Get User, `GET /users/{$.ctx.userId}`.
|
||||
3. Delete User, `DELETE /users/{$.ctx.userId}`.
|
||||
1. Create User, `POST /users`. Returns a new user object, with an `id` property.
|
||||
2. Get User, `GET /users/{$.ctx.userId}`.
|
||||
3. Delete User, `DELETE /users/{$.ctx.userId}`.
|
||||
|
||||
Somehow we need to use the `id` property for the user created in step #1 to build the request in steps #2 and #3. This is a great case for context variables, since the data is temporary (the new user's id changes every test run, and is only needed in this single scenario).
|
||||
|
||||
@@ -22,14 +24,17 @@ To accomplish this, we would capture/set the `$.ctx.userId` property to `output.
|
||||
|
||||
### With Captures
|
||||
|
||||
<!--(FIXME - SHOW USING THE CAPTURE MENU IN A SCENARIO STEP)-->
|
||||
|
||||
The capture UI in the step editor makes it easy to set `$.ctx` values. You can use values from the step output or input, including headers, response bodies, etc.
|
||||
|
||||

|
||||
|
||||
<!-- theme: info -->
|
||||
> Multiple captures can be applied to the same step, to set multiple `$.ctx` values.
|
||||
|
||||
### With Scripting
|
||||
|
||||
<!--(FIXME - SHOW SCREENSHOT OF SCRIPT IN STEP)-->
|
||||
|
||||
Scripting allows you to use more complicated logic in a scenario step. Scripts
|
||||
are executed either before or after a step request finishes. Scripts are plain
|
||||
Javascript and give you direct access to the scenario context through the global
|
||||
@@ -44,7 +49,7 @@ $.ctx.set('userId', output.body.get('id'));
|
||||
|
||||
Where the `$.ctx.set(x, y)` function adds the data referenced in the second
|
||||
argument (`y`) to the context under the string value of the first argument
|
||||
(`x`).
|
||||
(`x`).
|
||||
|
||||
Here is another example that just sets `myVariable` to the hardcoded value `123`:
|
||||
|
||||
@@ -54,6 +59,8 @@ $.ctx.set('myVariable', 123);
|
||||
|
||||
## Using Context Variables
|
||||
|
||||
<!--(FIXME - SHOW USING A CONTEXT VARIABLE IN A SCENARIO STEP)-->
|
||||
|
||||
To use a context variable in a scenario, use the following syntax:
|
||||
|
||||
```
|
||||
@@ -84,9 +91,11 @@ $.ctx.get('myVariable');
|
||||
Where the braces (`{}`) are absent, and we are using the `get()` method for
|
||||
retrieving the context variable under the `myVariable` key.
|
||||
|
||||
---
|
||||
***
|
||||
|
||||
**Related Articles**
|
||||
**Related**
|
||||
|
||||
* [Using Variables Overview](/testing/using-variables/overview)
|
||||
* [$$.env (Environment)](/testing/using-variables/environment)
|
||||
* [Environment Overview](../editor/environments.md)
|
||||
* [Environment Configuration](../editor/editor-configuration.md)
|
||||
* [Variables Overview](./variables-overview.md)
|
||||
* [Context Variables](./variables-context.md)
|
||||
|
||||
@@ -1,20 +1,20 @@
|
||||
# Using Environment Variables
|
||||
|
||||
<!--(FIXME - SHOW CLICKING THROUGH ENVIRONMENTS IN UI)-->
|
||||
|
||||
> If you have not already done so, we recommend reviewing the
|
||||
> [Environments](/platform/editor-basics/environments) article before continuing.
|
||||
[Environments](../editor/environments.md) article before continuing.
|
||||
|
||||
Environment variables in Stoplight allow you to dynamically retrieve information
|
||||
in a scenario from the active environment. This makes it possible to
|
||||
switch between different environments with ease, having variables automatically
|
||||
populate based on the current environment.
|
||||
|
||||

|
||||
|
||||
## Setting Environment Variables
|
||||
|
||||
### With the Editor Configuration
|
||||
|
||||
For information on managing project environments, please review the [environment](/platform/editor-basics/editor-configuration) article.
|
||||
For information on managing project environments, please review the [environment](../editor/environments.md) article.
|
||||
|
||||
### With Captures
|
||||
|
||||
@@ -23,8 +23,8 @@ Captures make it easy to "capture" values from your step request or result, and
|
||||
Say you have a scenario step that sends an HTTP request to authenticate a new user. The response from that request includes an apiKey that you want to use for other requests. You can easily save that apiKey to an environment variable, for later re-use, by adding a capture in the form `$$.env.apiKey = output.body.apiKey`. After running the step, check your current environment variables and note the newly added apiKey!
|
||||
|
||||
> Environment variables set via captures are only added to the user's private
|
||||
> variables, and are not sent to Stoplight. See the [Environment
|
||||
> section](/platform/editor-basics/environments) for more information.
|
||||
variables, and are not sent to Stoplight. See the [Environment
|
||||
section](../editor/environments.md) for more information.
|
||||
|
||||
### With Scripting
|
||||
|
||||
@@ -45,11 +45,13 @@ argument (`y`) to the environment under the string value of the first argument
|
||||
(`x`).
|
||||
|
||||
> Environment variables set via script are only added to the user's private
|
||||
> variables, and are not sent to Stoplight. See the [Environment
|
||||
> section](/platform/editor-basics/environments) for more information.
|
||||
variables, and are not sent to Stoplight. See the [Environment
|
||||
section](../editor/environments.md) for more information.
|
||||
|
||||
## Using Environment Variables
|
||||
|
||||
<!--(FIXME - SHOW USING A VARIABLE IN A SCENARIO STEP)-->
|
||||
|
||||
Use an environment variable in a scenario with the following syntax:
|
||||
|
||||
```
|
||||
@@ -81,11 +83,11 @@ $$.env.get('myVariable');
|
||||
Where the braces (`{}`) are absent, and we are using the `get()` method for
|
||||
retrieving the environment variable under the `myVariable` key.
|
||||
|
||||
---
|
||||
***
|
||||
|
||||
**Related Articles**
|
||||
**Related**
|
||||
|
||||
* [Editor Configuration](/platform/editor-basics/editor-configuration)
|
||||
* [Environments](/platform/editor-basics/environments)
|
||||
* [Using Variables Overview](/testing/using-variables/overview)
|
||||
* [$.ctx(Context)](/testing/using-variables/context)
|
||||
* [Environment Overview](../editor/environments.md)
|
||||
* [Environment Configuration](../editor/editor-configuration.md)
|
||||
* [Variables Overview](./variables-overview.md)
|
||||
* [Context Variables](./variables-context.md)
|
||||
|
||||
@@ -3,7 +3,7 @@
|
||||
Variables in Stoplight provide a powerful and intuitive way to dynamically set,
|
||||
update, and retrieve information at any step in a Scenario.
|
||||
|
||||
Variables are stored in an [environment](/platform/editor-basics/environments). You can define one or more environments,
|
||||
Variables are stored in an [environment](../editor/environments.md). You can define one or more environments,
|
||||
each with their own variables. This makes it easy to quickly swap out sets of
|
||||
variables during testing.
|
||||
|
||||
@@ -18,12 +18,13 @@ so that the host can quickly be changed to test multiple server locations (devel
|
||||
|
||||
There are two scopes for variables, which affect how and when they can be used.
|
||||
|
||||
* __Environment Variables__ - Environment variables are scoped to the project, and are shared amongst all steps in your test run. They are persisted between test runs, and are great for data that does not change often (hostnames, ports, etc). See [here](/testing/using-variables/environment) for more information on how to use environment variables.
|
||||
* __Environment Variables__ - Environment variables are scoped to the project, and are shared amongst all steps in your test run. They are persisted between test runs, and are great for data that does not change often (hostnames, ports, etc). See [here](./variables-environment.md) for more information on how to use environment variables.
|
||||
|
||||
* __Context Variables__ - Context variables are scoped to the scenario, and are reset on every test run. They are useful to persist test and application state between scenario steps. Context variables are great for temporary information that is only relevant to the current test run. For example, you might store a newly created `userId` returned in your first step, to be used in the second step. This `userId` changes on every test run, which makes it a good context variable candidate. See [here](/testing/using-variables/context) for more information on how to use context variables.
|
||||
* __Context Variables__ - Context variables are scoped to the scenario, and are reset on every test run. They are useful to persist test and application state between scenario steps. Context variables are great for temporary information that is only relevant to the current test run. For example, you might store a newly created `userId` returned in your first step, to be used in the second step. This `userId` changes on every test run, which makes it a good context variable candidate. See [here](./variables-context.md) for more information on how to use context variables.
|
||||
|
||||
***
|
||||
|
||||
**Related Articles**
|
||||
- [$$.env (Environment)](/testing/using-variables/environment)
|
||||
- [$.ctx(Context)](/testing/using-variables/context)
|
||||
**Related**
|
||||
|
||||
* [Environment Variables](./variables-environment.md)
|
||||
* [Context Variables](./variables-context.md)
|
||||
|
||||
Binary file not shown.
|
Before Width: | Height: | Size: 871 KiB After Width: | Height: | Size: 22 MiB |
Binary file not shown.
|
Before Width: | Height: | Size: 1.1 MiB After Width: | Height: | Size: 2.8 MiB |
Binary file not shown.
|
Before Width: | Height: | Size: 337 KiB |
Binary file not shown.
|
Before Width: | Height: | Size: 847 KiB |
Some files were not shown because too many files have changed in this diff Show More
Reference in New Issue
Block a user